

 |
| Junction boxes house any and all wire splices. Any splices need to be capped. |
Since there is no ceiling, it was easy to trace the wires back to where they entered the garage.
I figured out which breaker controlled the lights after flipping through all the breakers. If the previous owners didn't label the box well, think about relabeling. It saves you a lot of headache with work like this. NEVER do electrical work without checking and then double checking that the wires are NOT live.
To get enough length of wire for the junction box, I ran a new wire from the junction box to the first light. I cut the existing wire at the junction box with enough length to splice.
I bought cheap light fixtures and boxes. The plastic boxes nail to the joists and the fixtures are a single bulb base with dual connections that allow daisy chaining of multiple lights. The second light then connections to the bathroom light. I stapled the wiring to the ceiling joists every so often to secure it. Do not staple through the wire.
 |
| Light base and box. |
 |
| The light base allows a chain of lights to be connected. |
The light switch splices into the power wire before the first light, interrupting the circuit. The box for the switch is nailed to a stud and the paneling cut out for the box. I ran wiring from my junction box along the bottom of the joists and down the wall that would house the switch. The switch is spliced into the black (power) wire. The switch box is nailed to an adjacent stud.
 |
| Light switch box. |
I also ran a wire to the bathroom area that terminates in a junction box. The bathroom is unfinished, but if I ever finish it, I now have power run so I can put the fixture on a separate switch wired from this junction box. This power is spliced in before the switch. If I were to splice it in after the switch, that switch would turn power to the bathroom on and off, which isn't optimal.
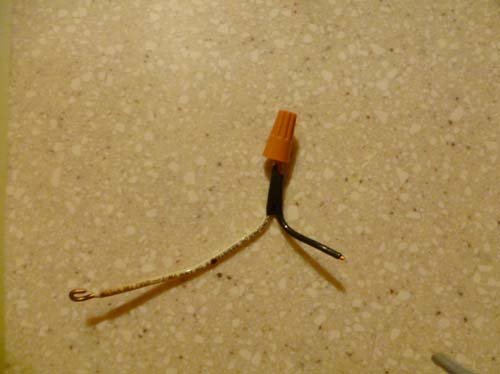
I added wire caps to all wire connections and the loose wires at the bathroom junction box. All wire caps were then taped to ensure they stay in place.
 |
| Tape the wires together to prevent them from pulling apart. |
 |
| Add a wire cap to the wires. Make sure it's the right size. If it's too small it will not stay on or connect the wires properly. |
 |
| Tape the wire nut to the wires. It's easy insurance. |
Once the work was done I flipped the breaker back on and the lights and switch work. Now I don't have to wander into a dark garage.
I'm not an electrician. Any action you take based on my instruction you do so at your own peril. I claim no responsibility.
I really enjoyed reading through this post—there’s something so satisfying about seeing lighting and electrical updates come together so cleanly. Good lighting truly changes how a space feels and functions. I’ve been exploring similar improvements in workspace and garage environments, and it reminded me of how crucial proper illumination is for detailing setups too. In India, Manmachine Automotive is a professional detailing lights provider, and posts like yours highlight just how impactful the right lighting choices can be. Great work and very inspiring!
ReplyDeleteBhargavaindustry has emerged as a trusted name in the electrical manufacturing sector, especially as a reliable MCB Box Manufacturer. In today’s market, where electrical safety and durability are non-negotiable, Bhargavaindustry stands out for its consistent quality and attention to detail. Their MCB boxes are designed to meet modern electrical safety standards, making them suitable for residential, commercial, and industrial applications.
ReplyDeleteOne of the most impressive aspects of Bhargavaindustry is the strength and finish of their MCB boxes. The materials used are robust, heat-resistant, and capable of withstanding long-term usage without warping or damage. This ensures that the internal components remain protected, reducing the risk of electrical faults. Their designs are also practical, allowing easy installation and maintenance, which is a big advantage for electricians and contractors.
Bhargavaindustry clearly understands the importance of safety in electrical distribution. Their MCB boxes are engineered to provide proper insulation and secure housing for circuit breakers, helping prevent short circuits and accidental contact. This commitment to safety reflects the company’s strong manufacturing standards and industry expertise.
In addition to product quality, Bhargavaindustry is known for its professional approach to business. Timely delivery, consistent product specifications, and customer-focused service make them a dependable partner for bulk buyers and distributors. Whether for small projects or large-scale installations, their MCB boxes deliver both performance and reliability.
Overall, Bhargavaindustry proves that quality manufacturing and safety-driven design can go hand in hand. For anyone looking for a dependable MCB Box Manufacturer in India, Bhargavaindustry is certainly a brand worth considering.
I connect San Jose businesses with top buyers for used electrical equipment. From transformers to circuit breakers, I help you get cash for your surplus fast. Serving local contractors and electricians with free quotes and hassle-free removal in the Bay Area.
ReplyDeleteSell Used Electrical Equipment Buyers in San Jose CA