With the
batting cage in place, it was time to tackle the numerous holes in the net.
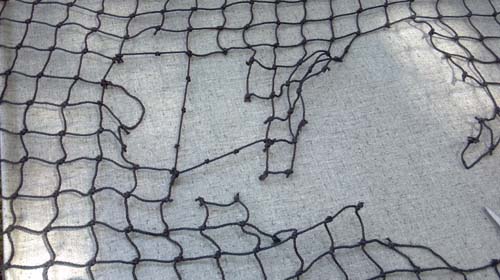
The cage net is at least a decade old. It doesn't appear to have ever been patched. The holes were left untended, with the most grievous holes tied together with shoe string.
Patching all holes at the outset, and then repairing them as they appear will keep the net in the best condition. Once a hole gets started, it just gets larger. A knot with four anchor points is stronger than a knot with only three or even two anchor points.
I found tarred twine that matched the net. It's #36 line 100% nylon.
#36 Tarred Twine
The weight rating is equivalent to 340 pounds. I started with 486 feet and ended up having to get a second spool. At least I'll have plenty for the future.
I scoured the internet, but found very little information
on how best to repair the net. I found illustrated instructions that I
couldn't follow and found a vague reference to a hitch knot being the
best knot for repair.
I used a double hitch knot when patching. Illustrations are included below.
I would start my first hitch knot very loosely, and then tighten it so that the end of the line was as short as possible.
You want to run continuous lines during repair. For really big holes, cut plenty of line much longer than you need.
Don't be afraid to cut the existing net to make a repair easier.
For the hitch knot, run the twine up and over the line. The end of the twine is towards the back. Bring the end towards the front, and then across the twine and run the end through the loop. This is a hitch knot. Run the next hitch knot on the other side of the existing knot.
The double hitch knot straddles the existing knot and ensures the line doesn't slide.
 |
| Step 1 - Start the knot with the line in front of the existing net. |
 |
| Step 2 - Loop the line behind the net. |
|
 |
| Step 3 - Run the line in front. |
 |
| Step 5 - Loop the line back and complete the first knot. |
 |
| Step 6 - The next knot will straddle the existing knot. |
 |
| Step 7 - Run the line in front. |
 |
| Step 8 - Run the line through the loop and complete the knot. |
When repairing a hole that needed the criss-cross
recreated, I would do a single hitch knot and then when I came back
across with another line would do a double hitch knot straddling the
single knot.
This ensures the pattern/lines don't shift.
 |
| Step 1 |
 |
| Step 2 |
 |
| Step 3 |
You
get a feel for it as you do it. Numerous times I would cut a line too
short and would have to un-knot it, back it up, and start over with a
longer piece of twine. I prefer a clean look with as few knots as
possible.
If you check your batting cage each time you
put it up, you can keep the holes in check. This net had never been
repaired, just stop gaps here and there.
Armed with little information I embarked on task that took much longer than anticipated.
You need scissors and the twine. I also had a container to collect the frayed and tattered ends I cut off.
 |
| A single hitch knot. When I cross the line I will do a double hitch. |
When starting a new line.
 |
| Loop the line |
 |
| Make the knot |
 |
| Tighten the knot |
 |
| Start another knot on the other side of the existing knot |
 |
| Pull the knight tight. |
A few progress shots of the net repair in process.
A simple hole.
 |
| If any part of the existing line is frayed, cut it out. |
A larger hole and repair. I string the repairs in L shapes as I try to figure out how to line the net back up. The knotted up portion, most of that was cut out.
 |
| The initial hole. |
 |
| Cutting out the fray and running the first line. |
 |
| The new line runs in an 'L" shape. |
 |
| Another line is run with single knots evenly spaced for the future vertical line. |
 |
| The hole slowly closes up. |
This project took a ton of time because there were so many holes. Repairing any holes as they appear will prevent a massive time sink. A small hole doesn't take long to repair; a larger hole like above takes a couple of hours.


No comments:
Post a Comment