In this
series, we are going to draw a barn. I will cover how to use many of the common tools, illustrate the benefits of components & layers, and provide a real-world application.
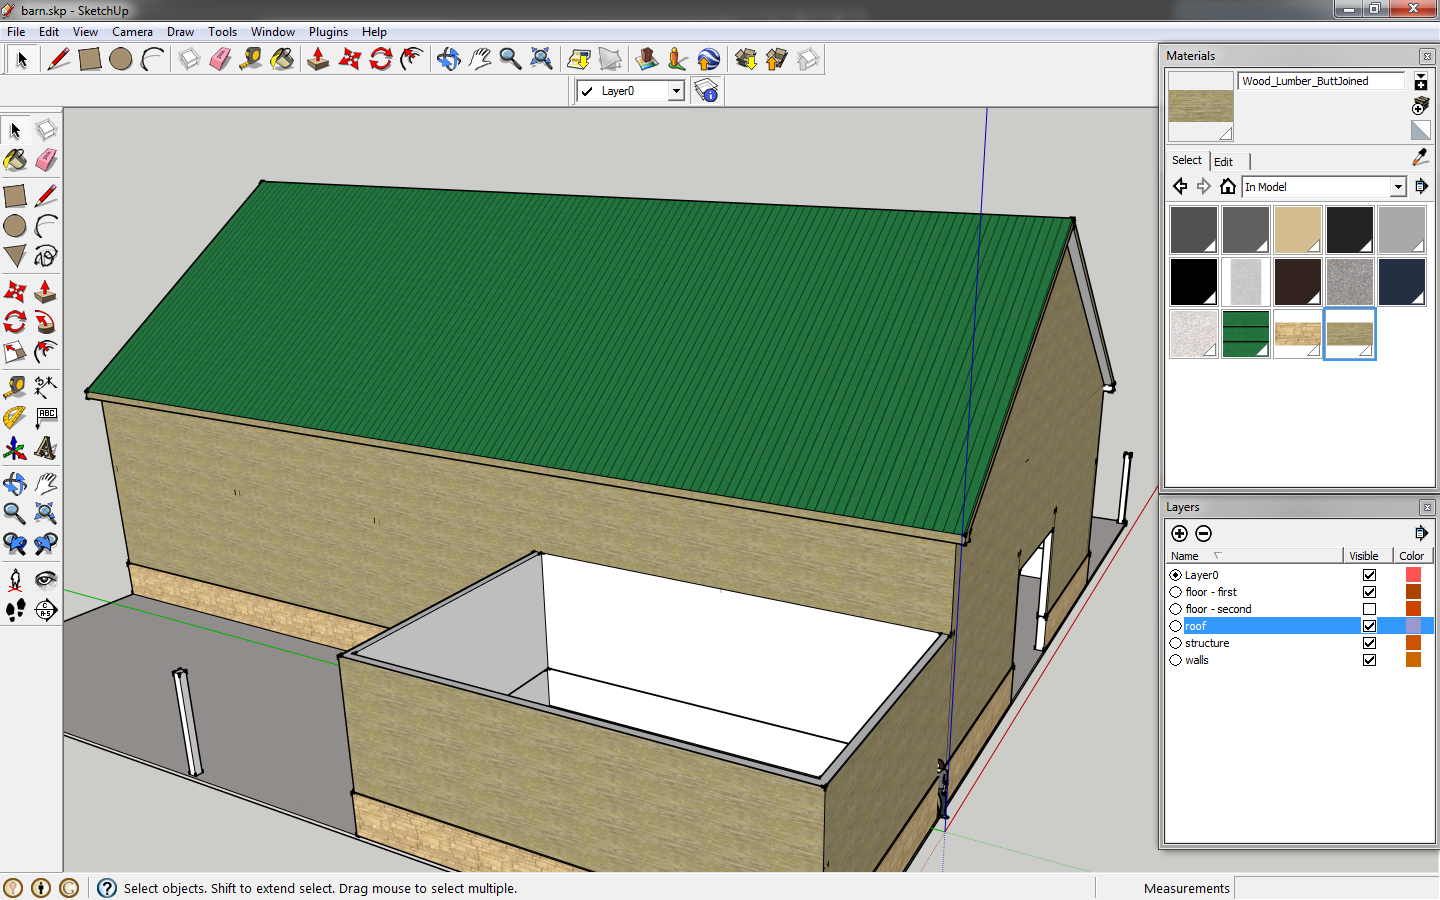
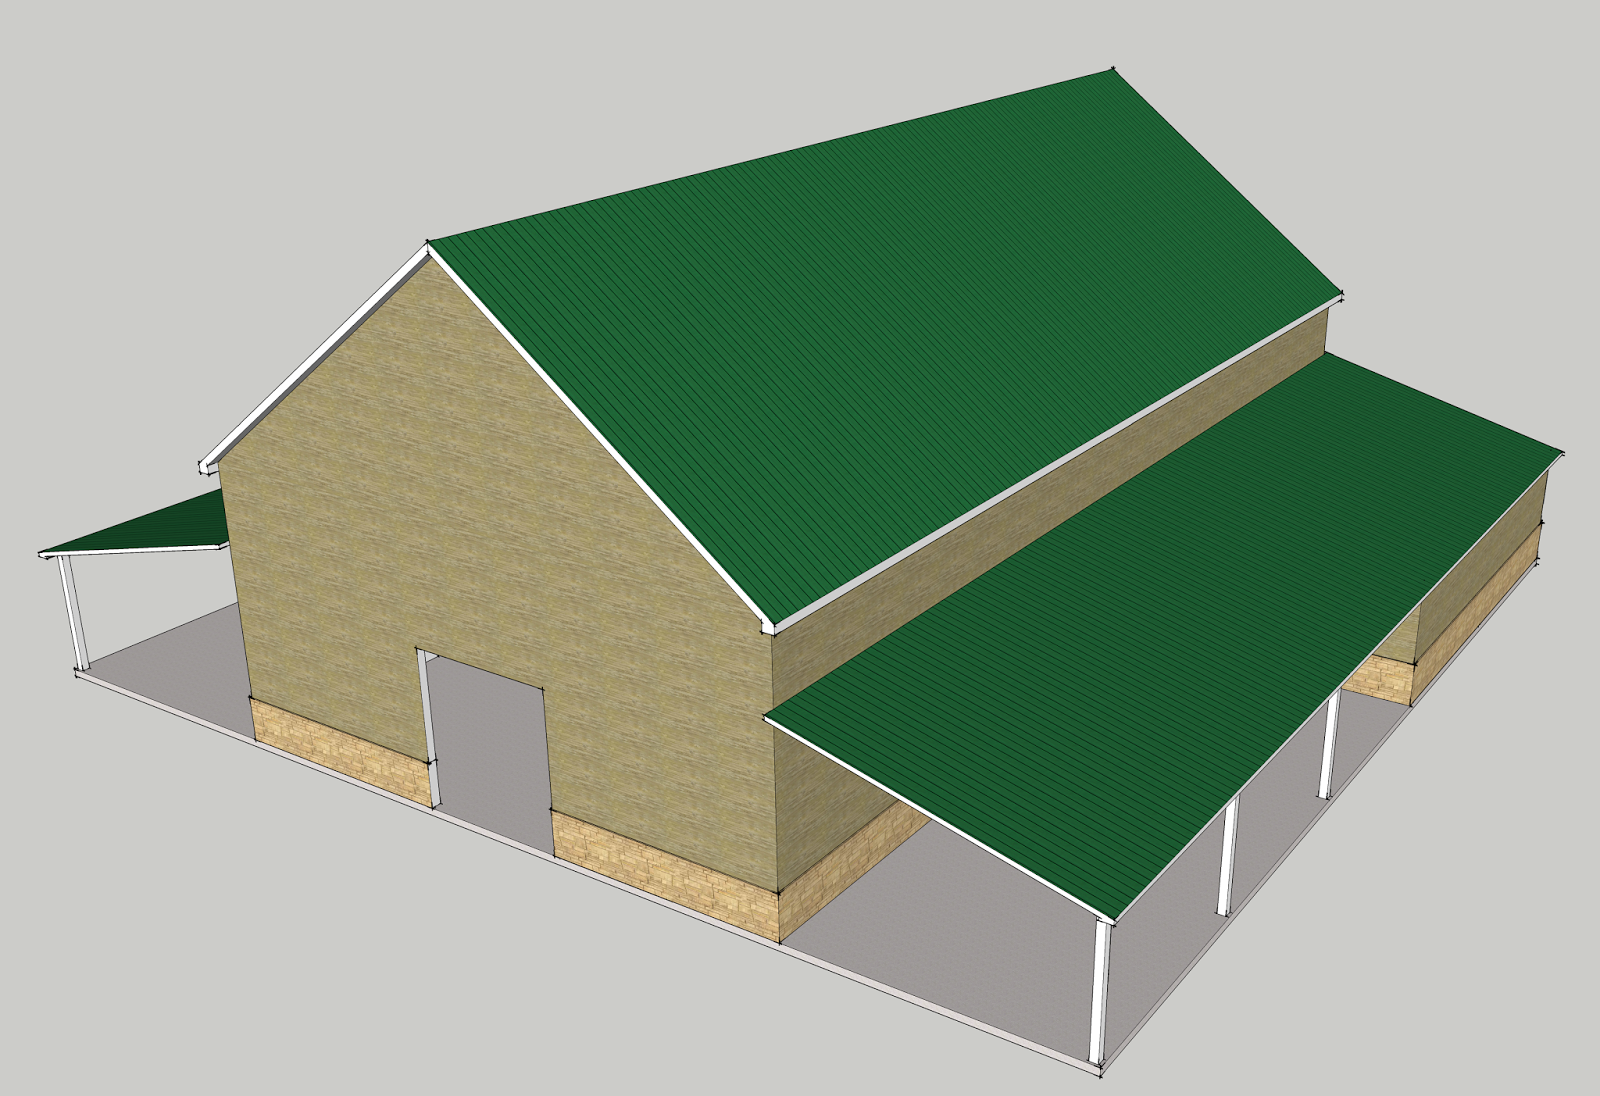 |
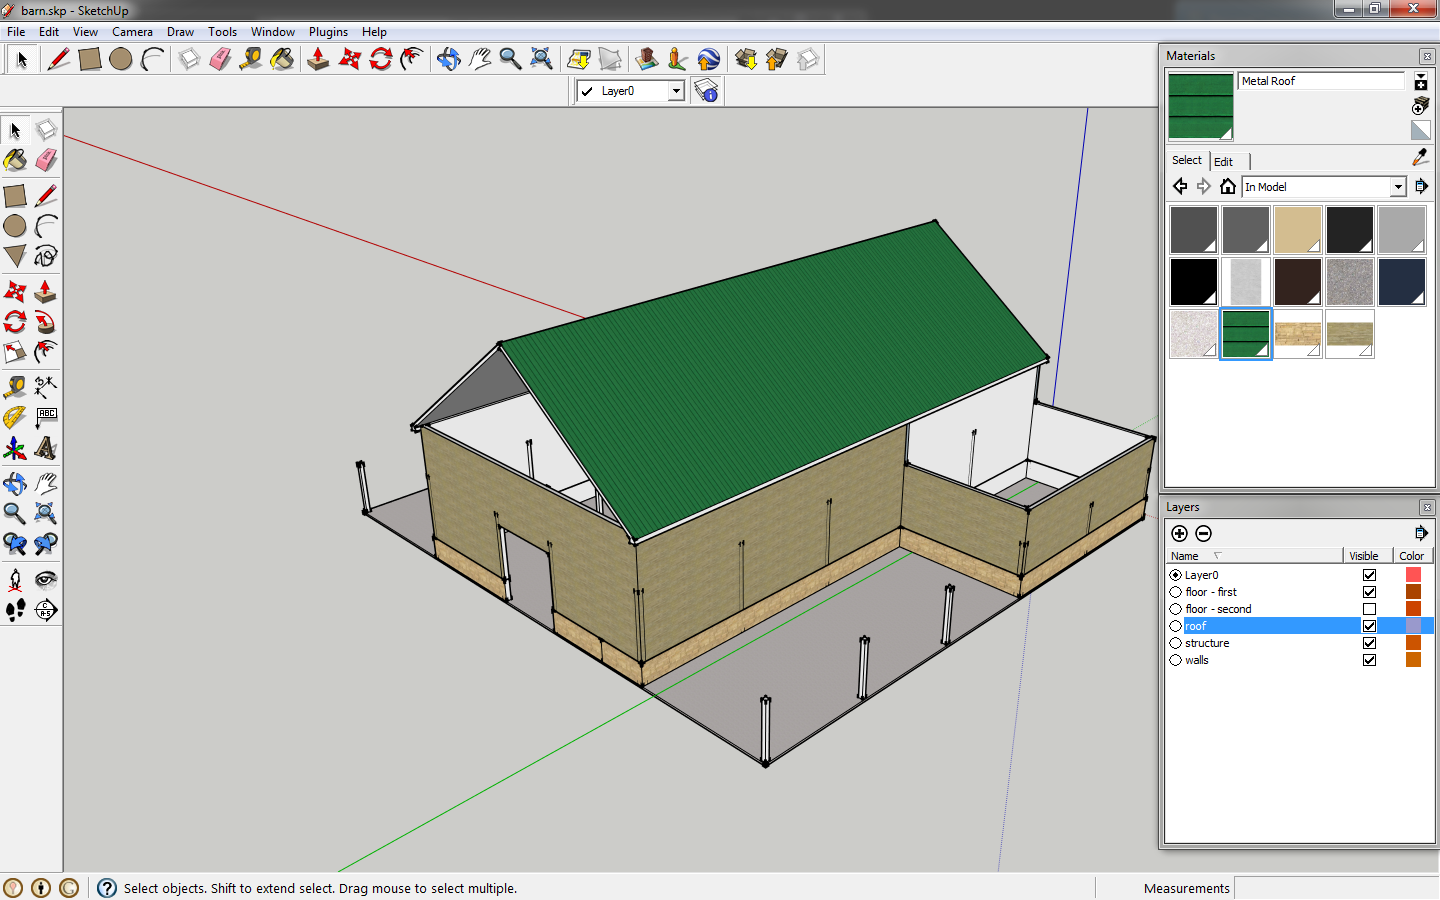
| The finished product at the end of this tutorial. |
To navigate in your drawing, you may need to
orbit, do this by holding the middle mouse button or key in
o and hold the left mouse button. You can pan by keying in
h and holding the left mouse button. You can zoom by scrolling the middle mouse button or keying in
z and holding the left mouse button.
Open Sketchup. If the
Materials and
Layers windows aren't open, click
Window on the menu bar at the top and click to open them.
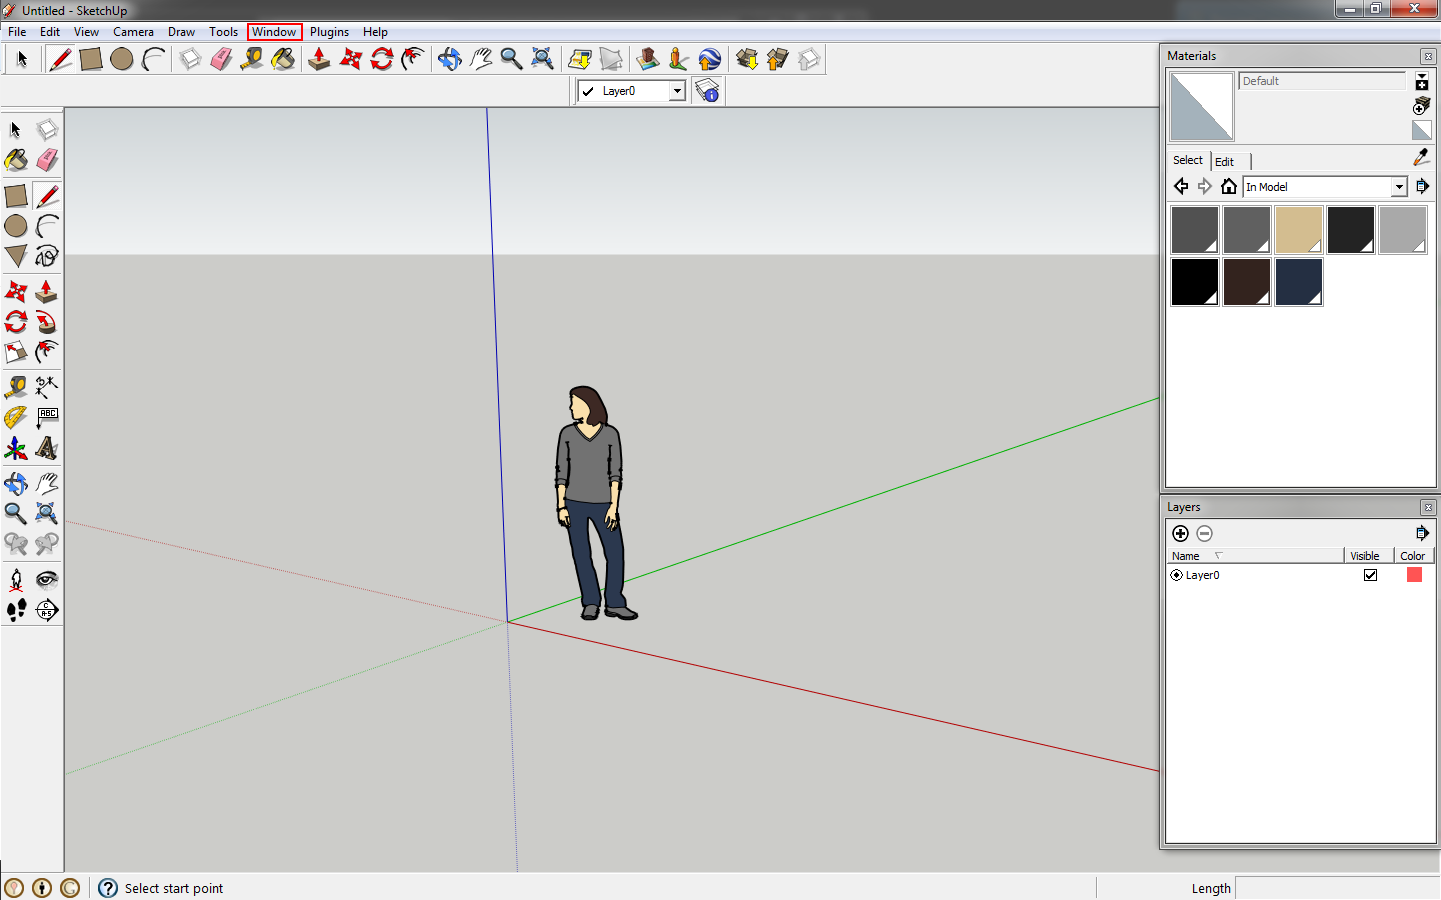 |
| The initial Sketchup screen. |
Key in
r or click the
rectangle tool. Left mouse button click (lmb) an then move the mouse to the right to draw the outline of a rectangle. Key in
54',100' and hit
enter to draw the rectangle.
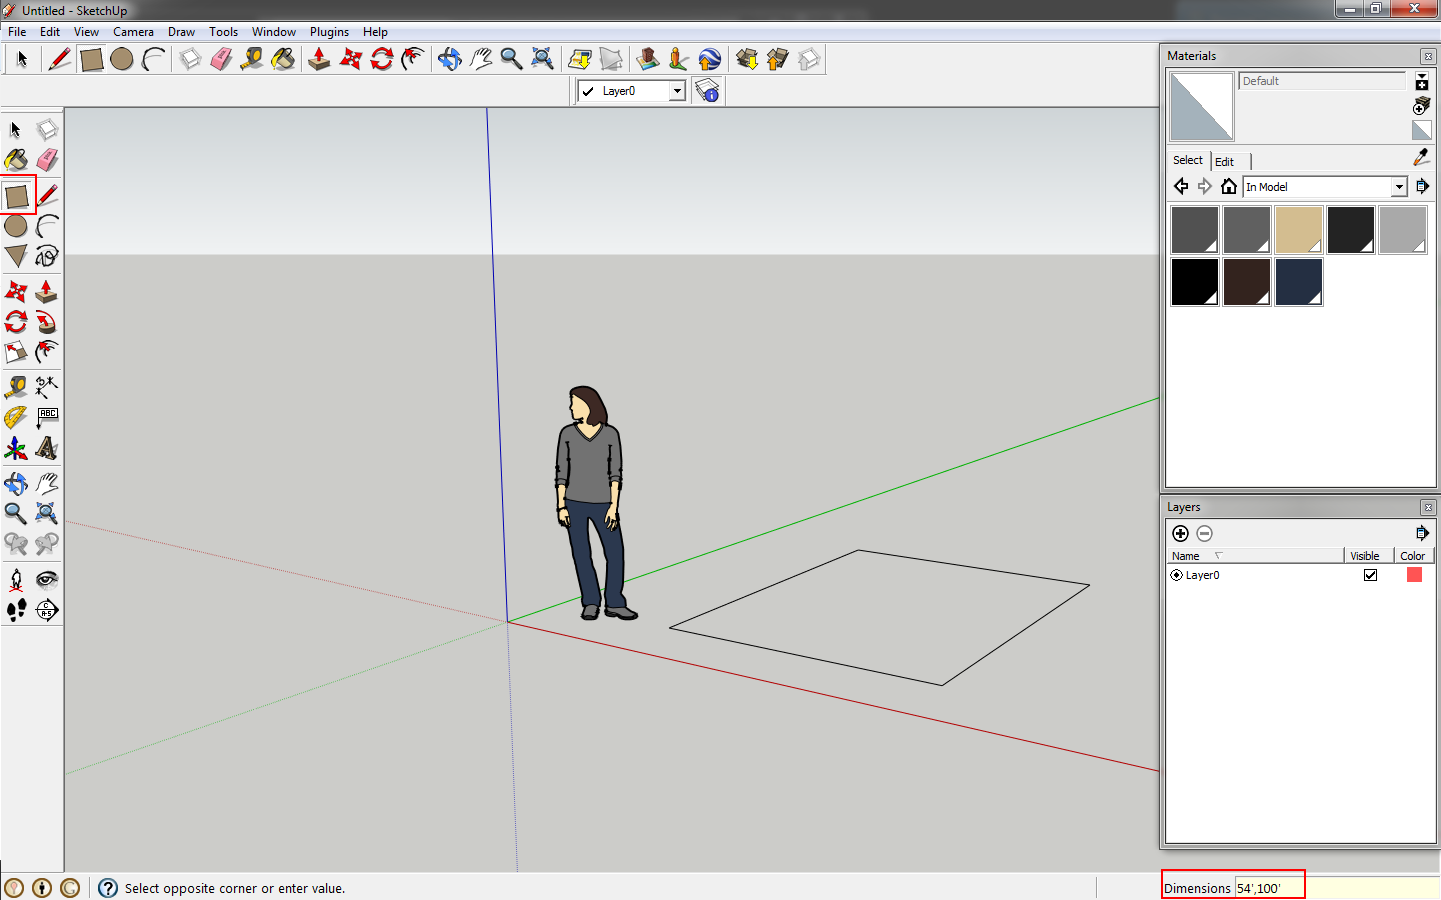 |
| Draw a rectangle to represent the footprint of the barn. |
We are going to draw the columns next, just as if we were actually building it. The barn is timber frame, so the columns will be 8" square. Draw a
rectangle, type in
8,8. Select that rectangle and key in
ctrl+c to make a component. That is a custom shortcut, you can also right click on the selection and select
make component. (You can click
window on the menu bar,
preferences, then click
shortcuts to modify shortcut keys. Modifying shortcuts increases efficiency.)
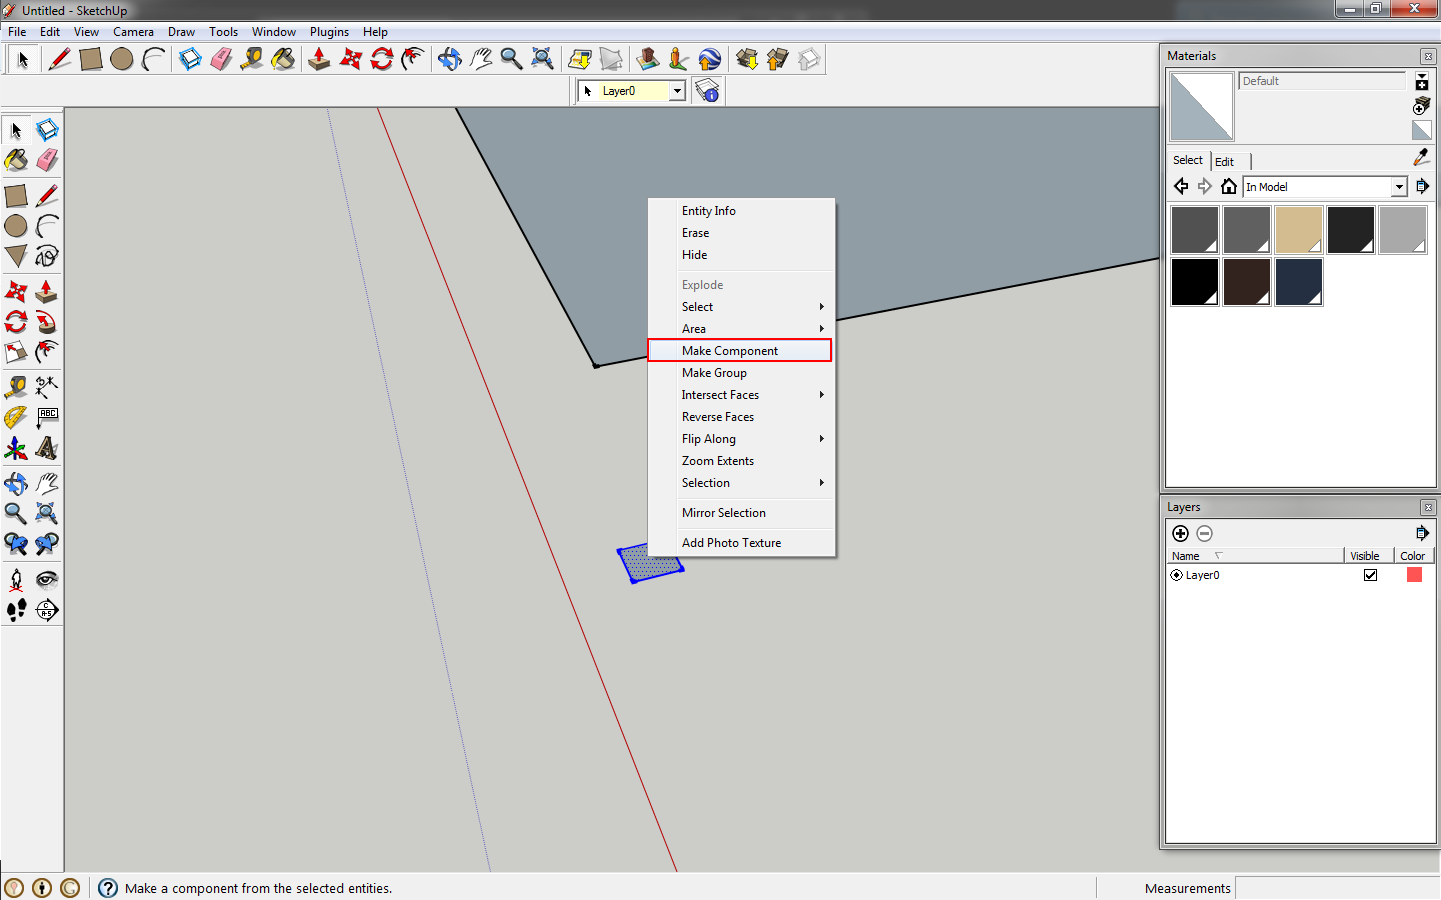 |
| Draw a rectangle for the column. |
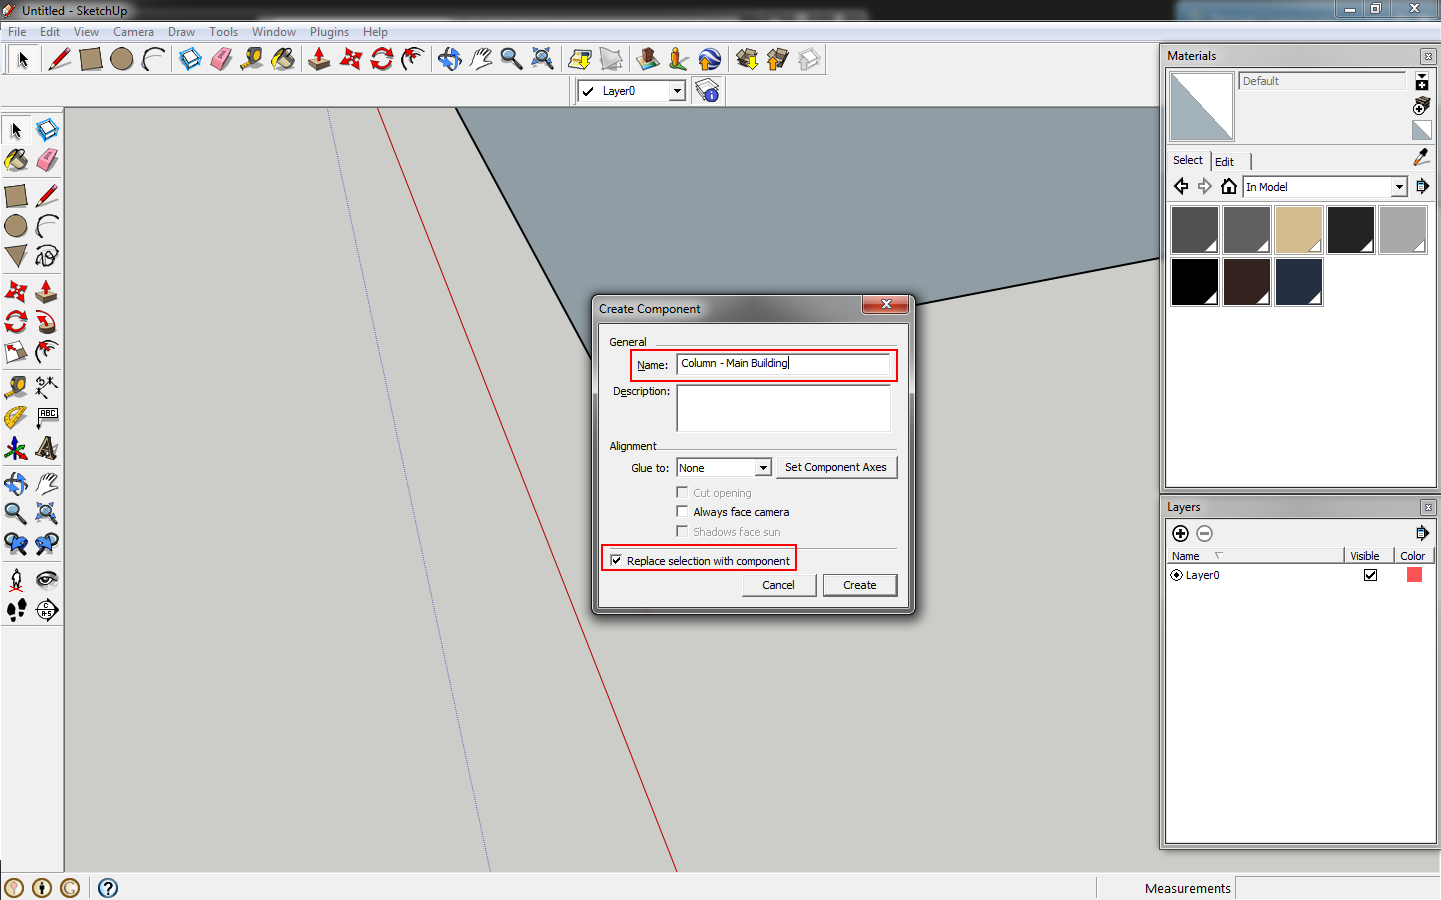
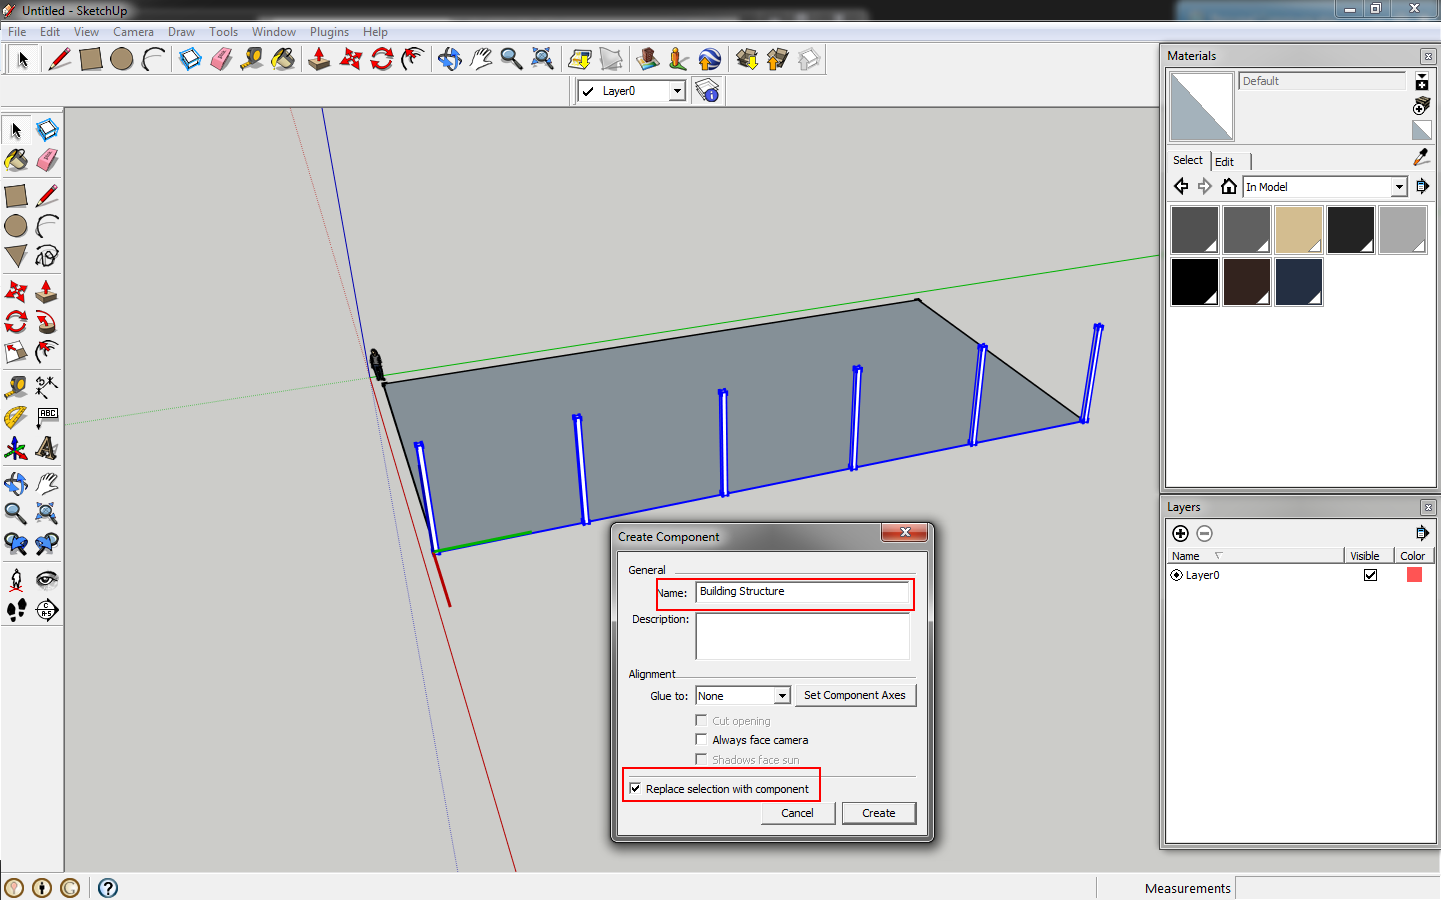
Name it something unique,
Column - Main Building. Confirm that
Replace selection with component is checked and click
Create.
 |
| Create a component. |
Double click your component, key in
p for push pull or hit the
push/pull tool. Click the face of the column, move your mouse up and key in
16' and hit
enter. Click outside of your component to exit component editing. (This is standard for components. Double click them to edit and click anywhere outside of the bounding box to finish the edit.)
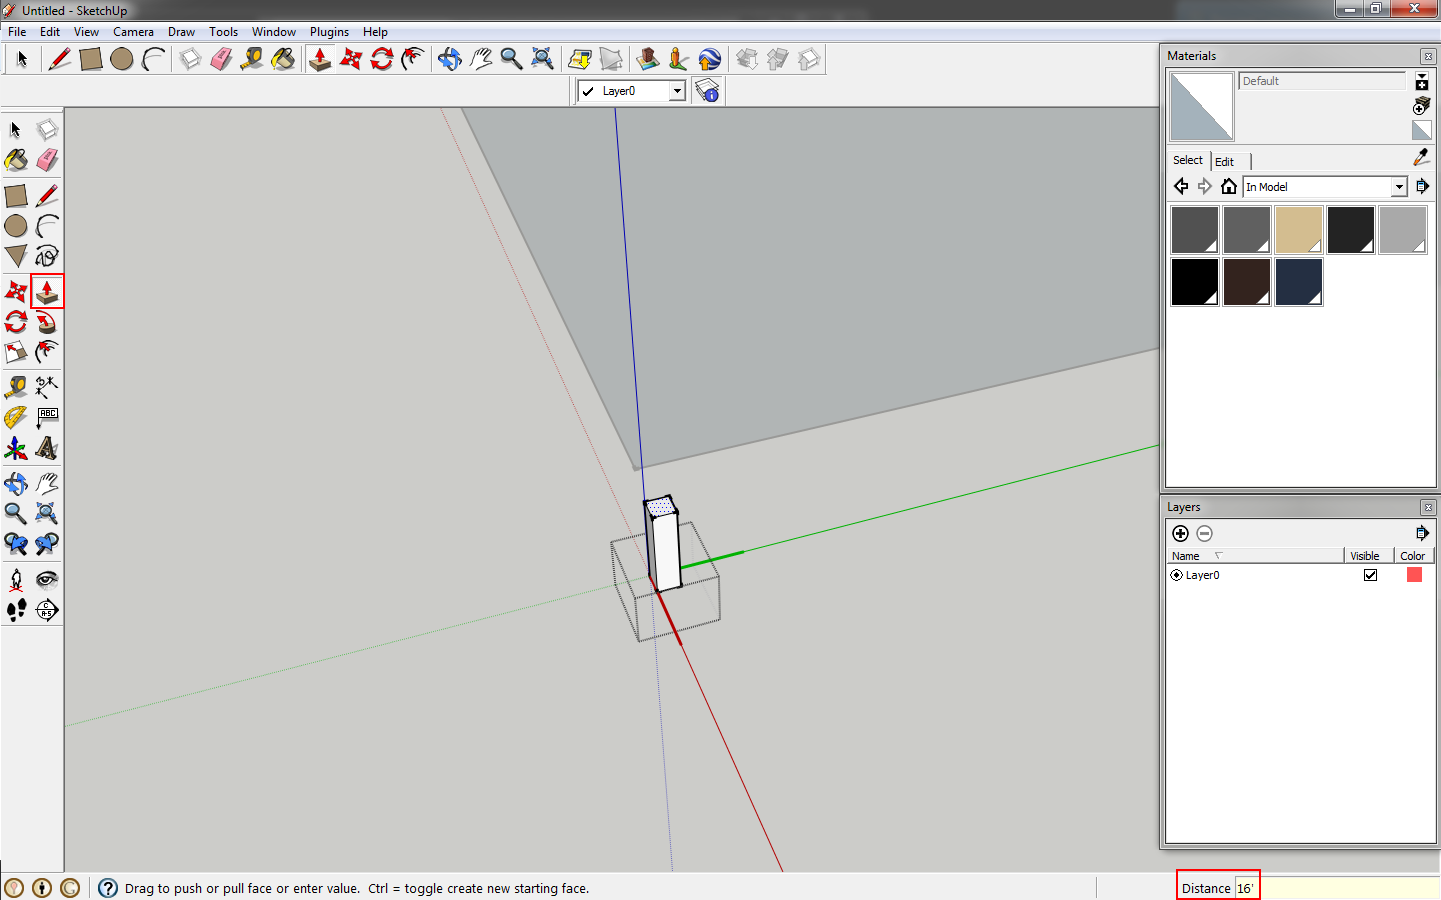 |
| Edit the component and pull the height to 16'. |
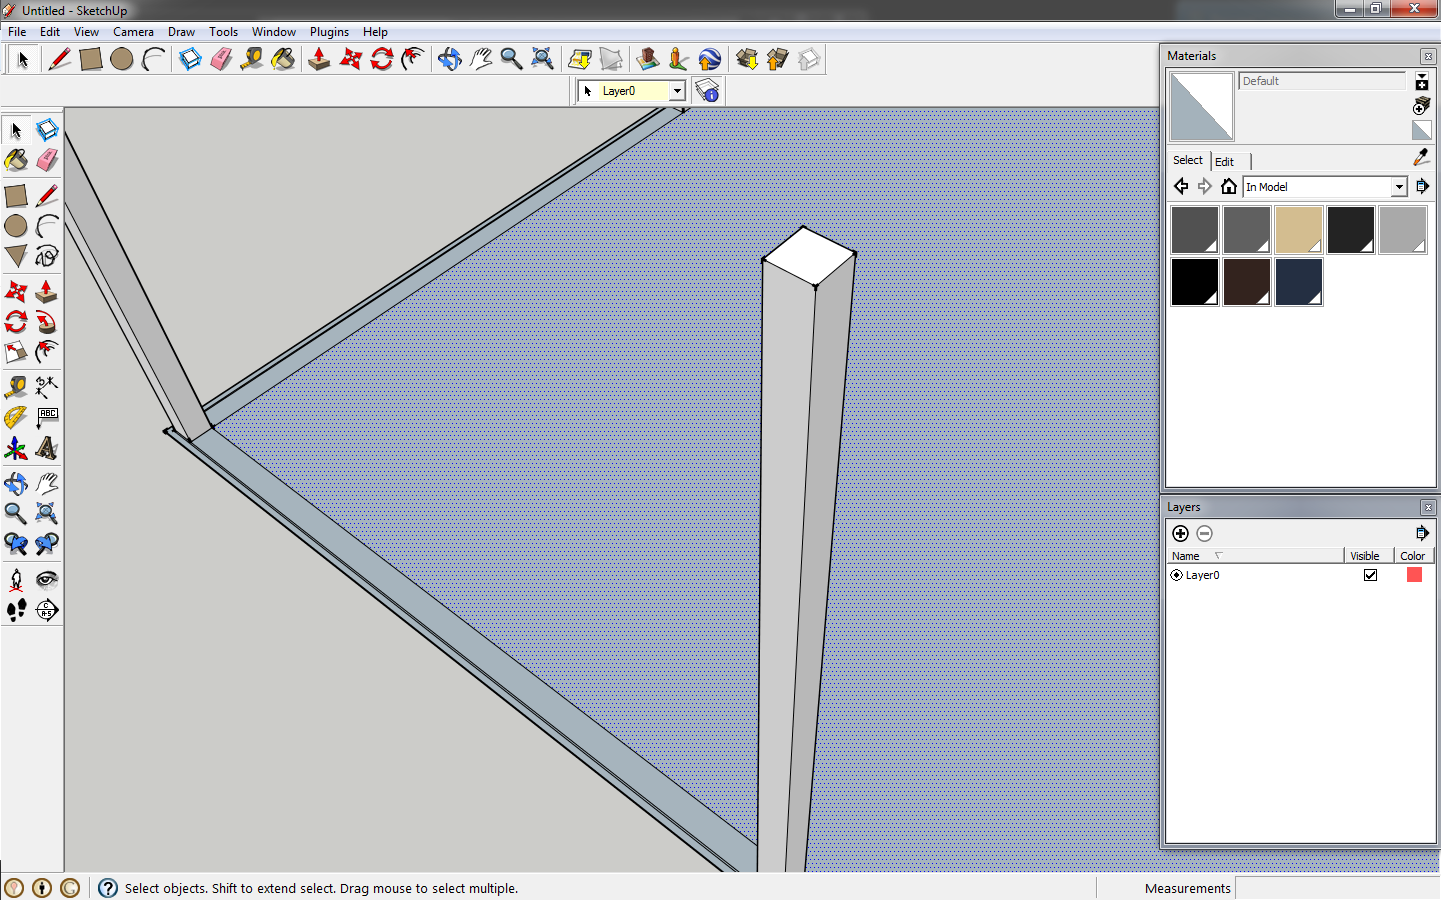
Click the column component, then click
move tool or key in
m. Move your column so that it is centered on the corner of your original rectangle. You can click a corner, move it to the corner of your large rectangle and then move the column again 4" left and 4" down to center it on the corner.
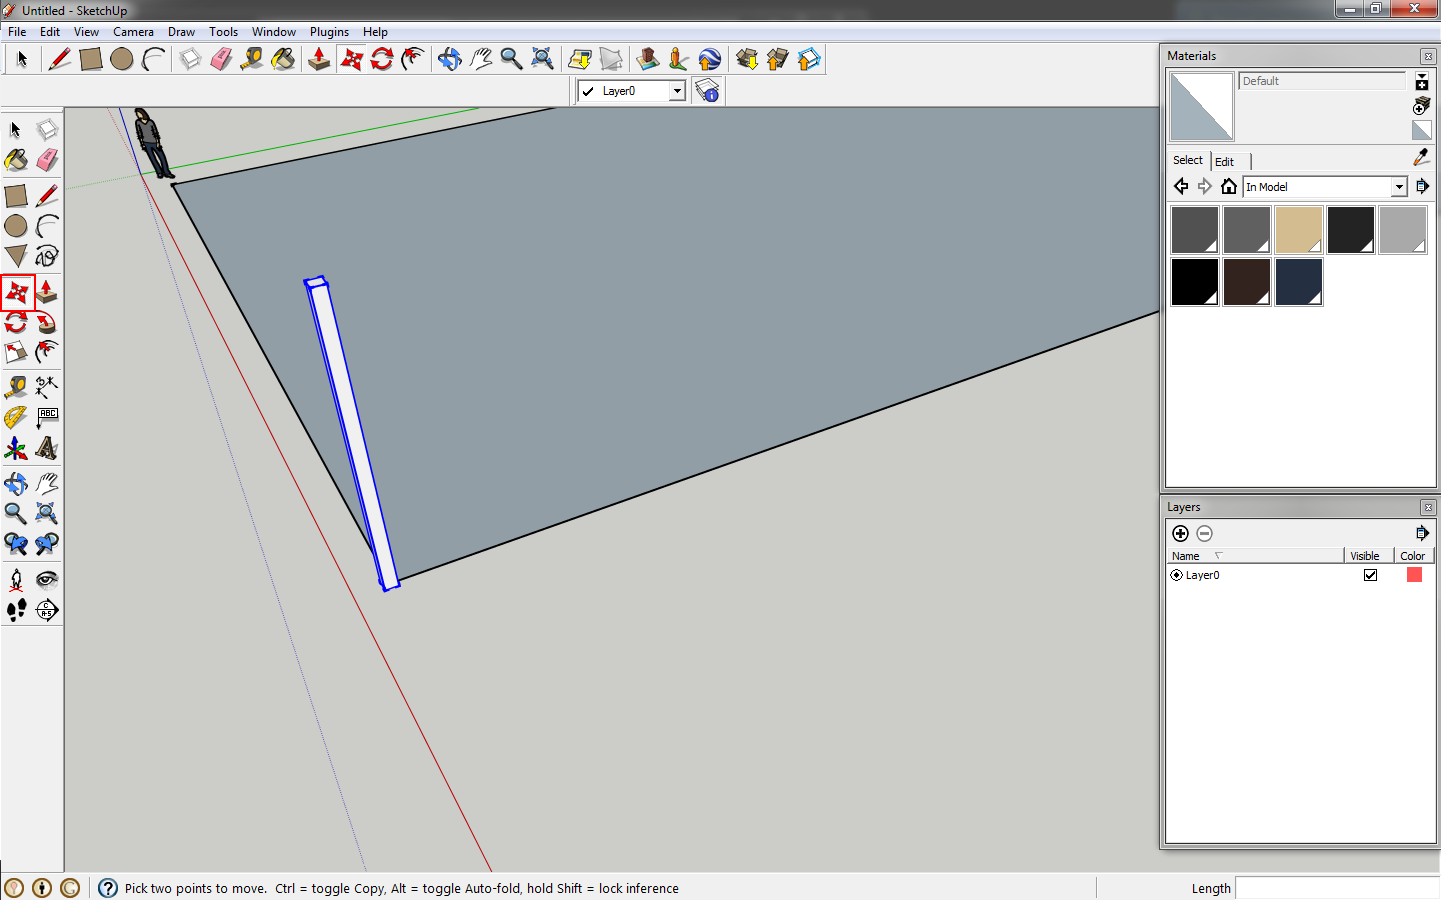 |
| Move the column. |
Click the column again, click
move, then click
ctrl on your keyboard to copy the column. Key in
100', before clicking anything else, key in
/ and
5 then
enter. This will divide the space between the copy and the original into five equal spaces. You can key in
/4 then
enter, /3 then
enter, etc to view different divisions before you hit the
space bar to confirm. We will stick to five bays at 20'-0" on center.
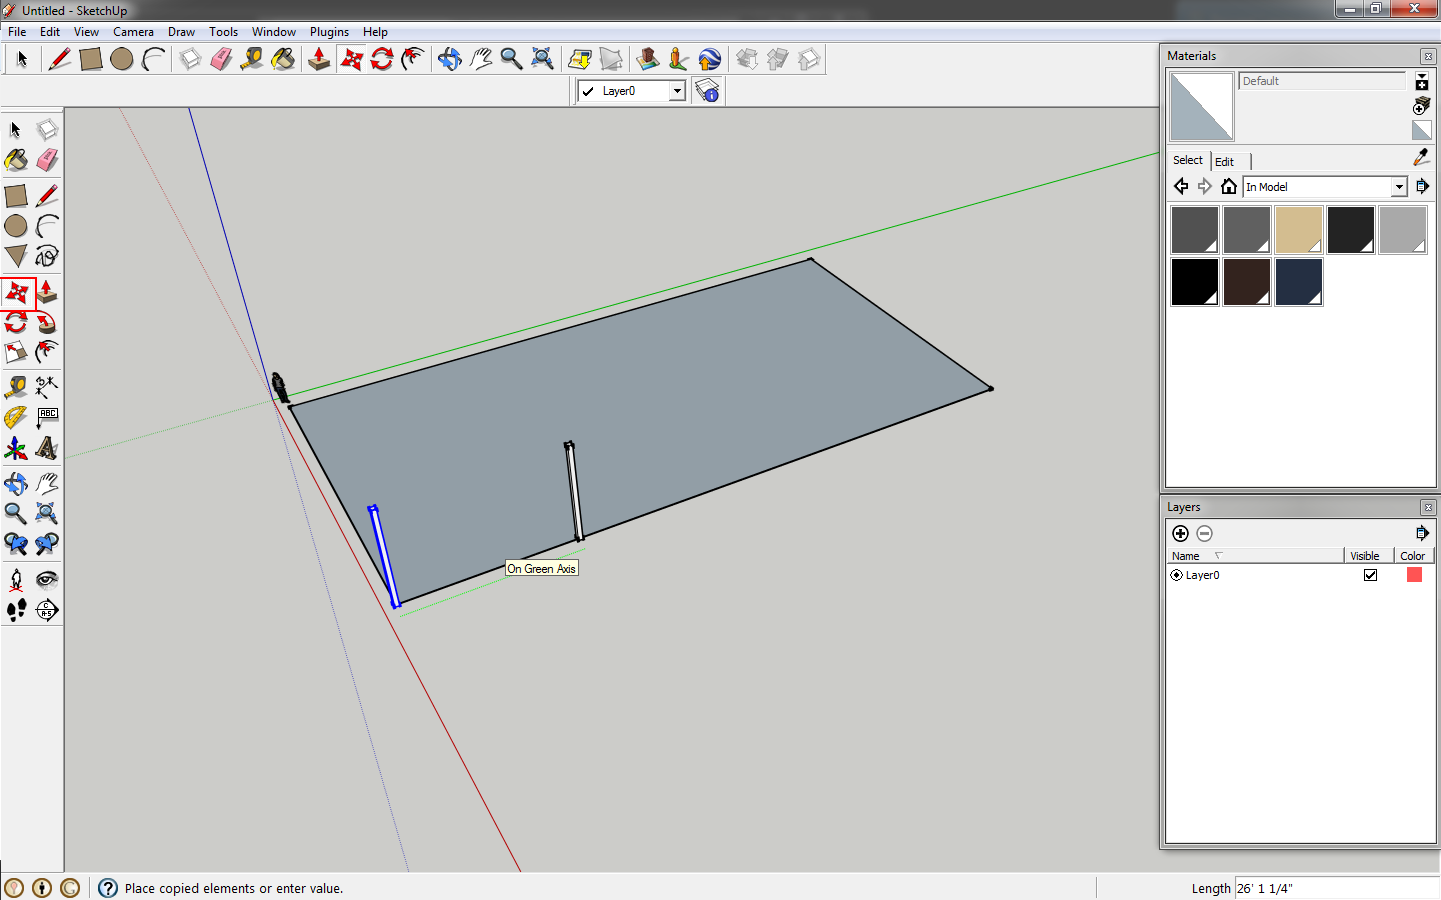 |
| Copy the column 20' over. |
 |
| Key in x5 to repeat the copy five times. |
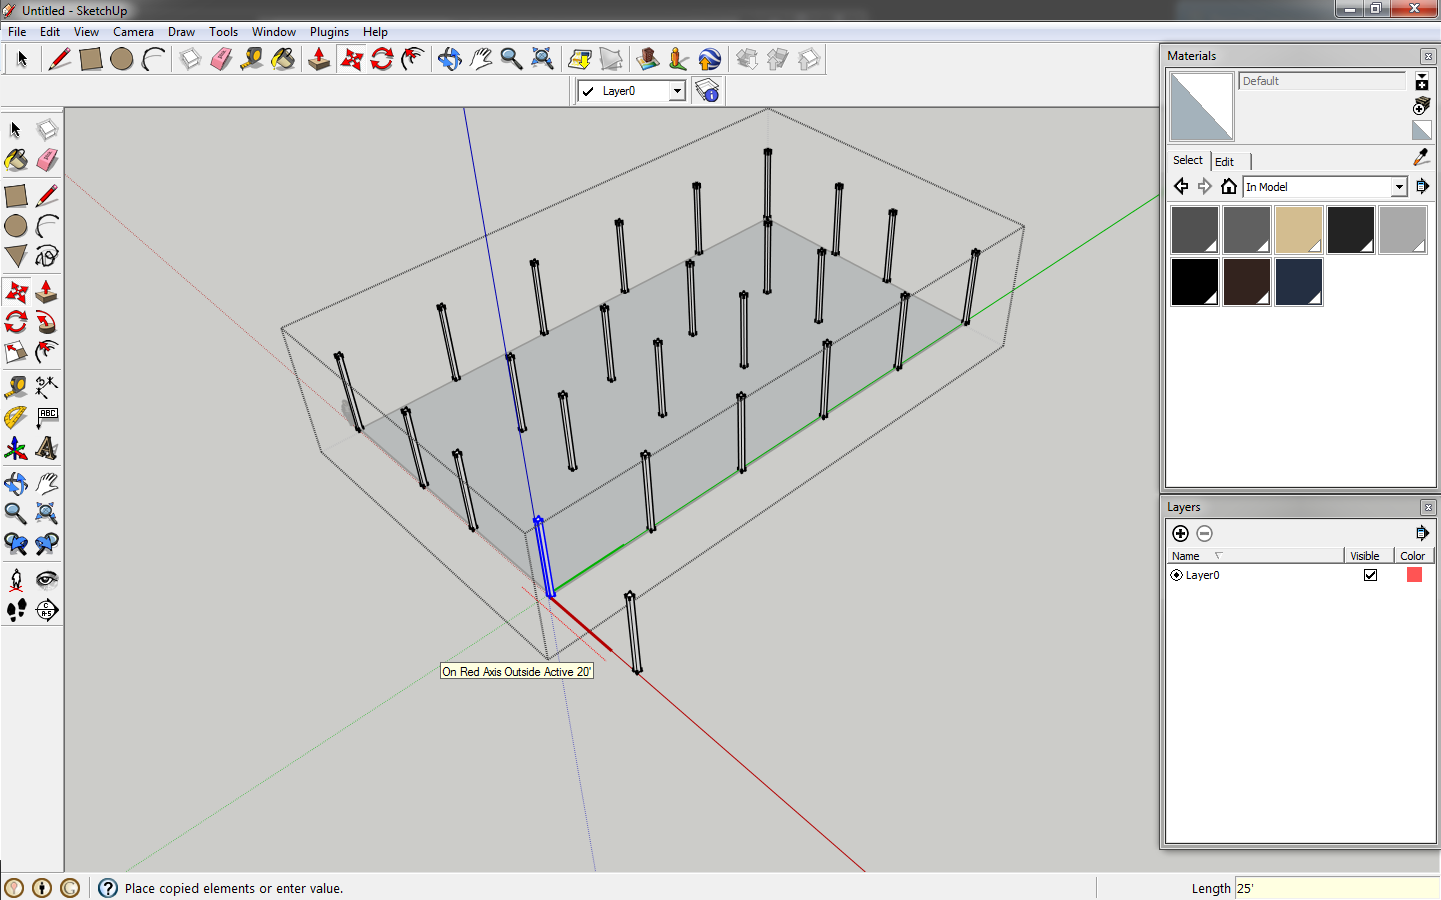
Select the six columns and create a component. You could create a group. A group is a single instance and subsequent copies are unique. In a component, if you edit one you edit all of them. This is useful for columns that will all be the same height or for the structure that can be obstructed by walls. You can copy the structure and move it outside of the model to edit it. So create a component of the six columns, double click one of them to edit the component and copy the two corner columns
20', copy those columns
14'. Select the six columns in the row and copy them
54'.
 |
| Select the columns and create a component. |
While still editing the component, copy one column
25' out from the building. Our barn is going to have a shed roof on each side.
 |
| Copy a column to serve as the shed roof column. |
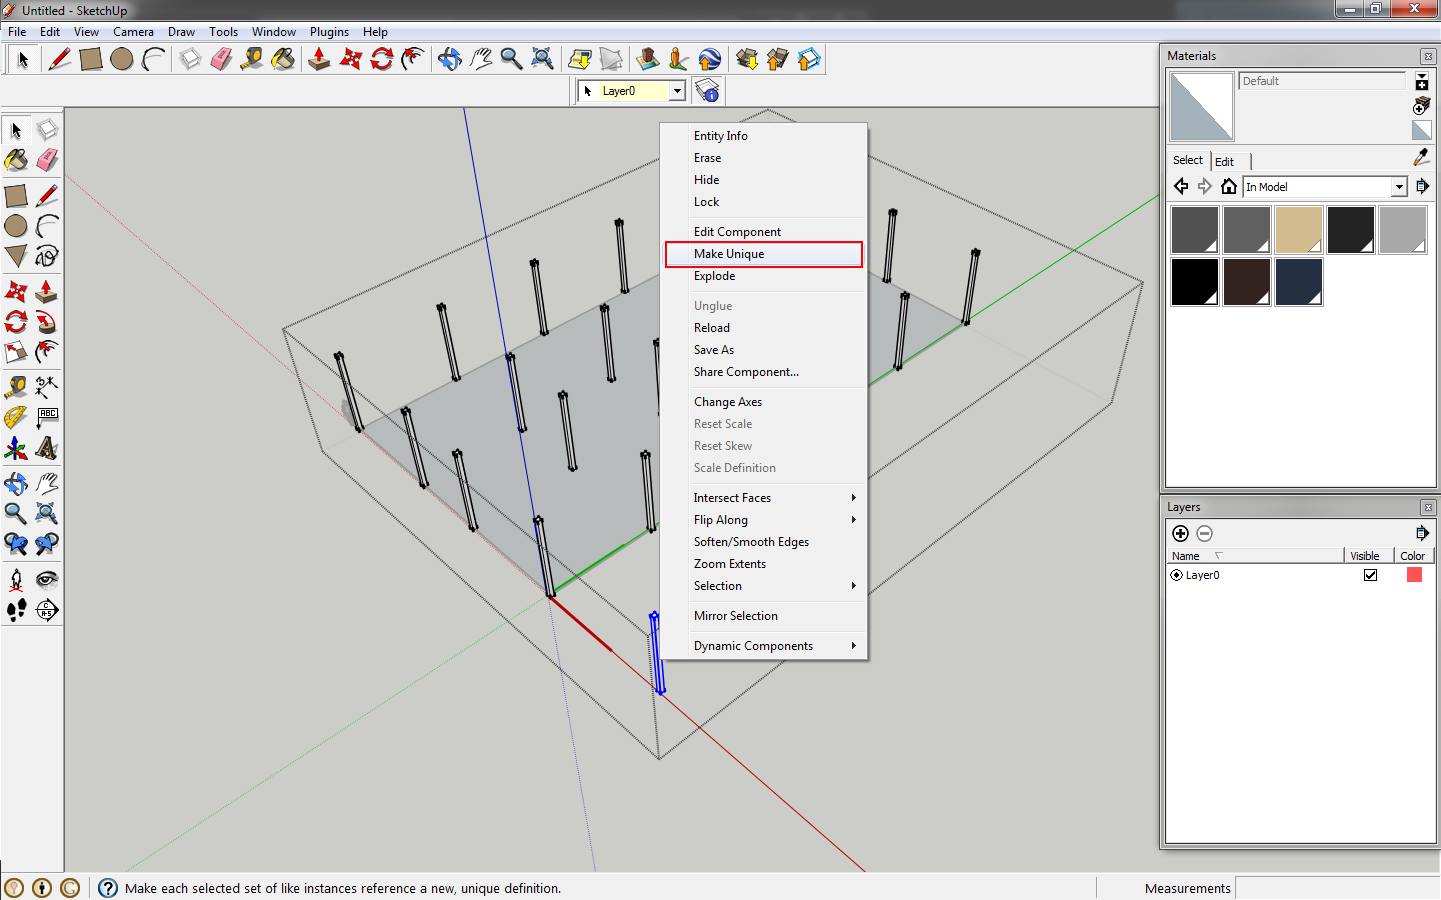
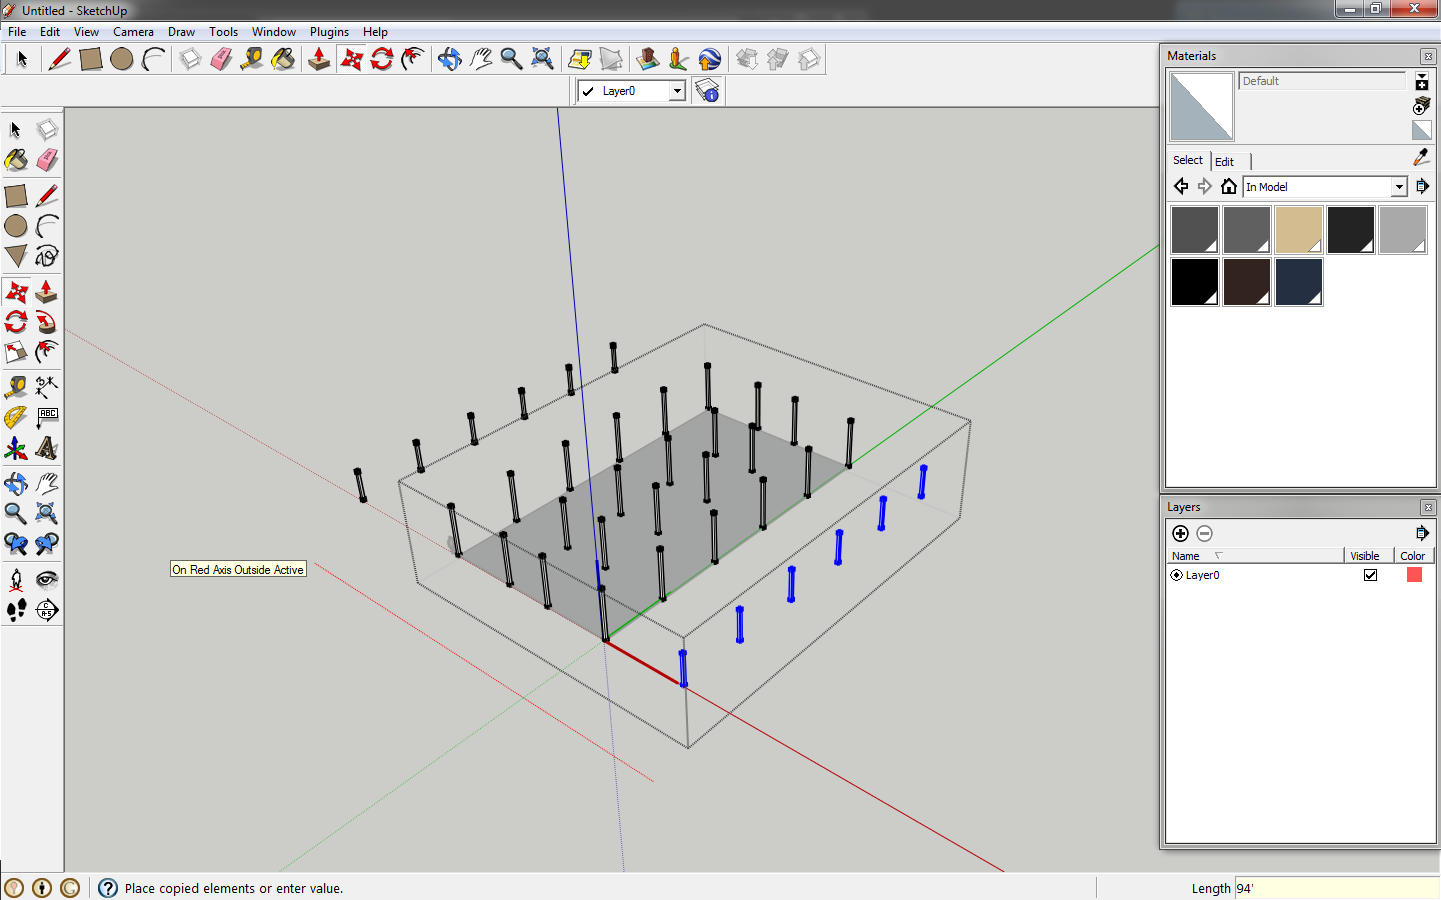
Right click on the column and select
make unique. Shorten it by 6' with push/pull, then copy it, key in
20', then
5x. This will copy it five times. Select these six shorter columns and make a component. Take this component and copy it to the other side by 94' to create the columns for the shed on the other side.
 |
| Make the column unique. |
 |
| Select and copy the column. |
Delete the original rectangle, ensuring you erase all 4 sides, and draw a new one from outside corner to outside corner of the main building columns.
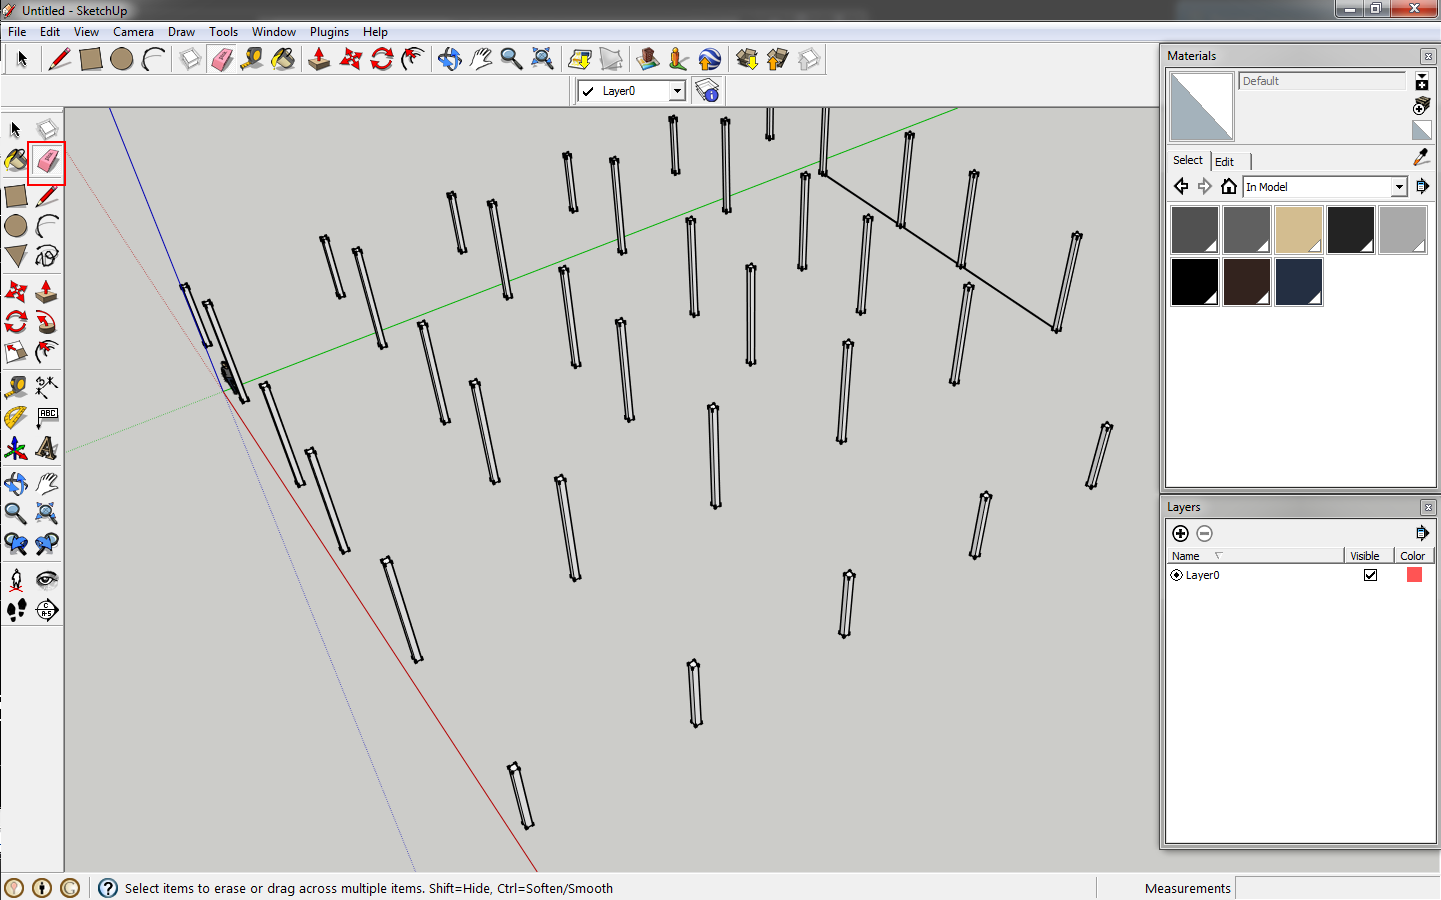 |
| Erase the original rectangle |
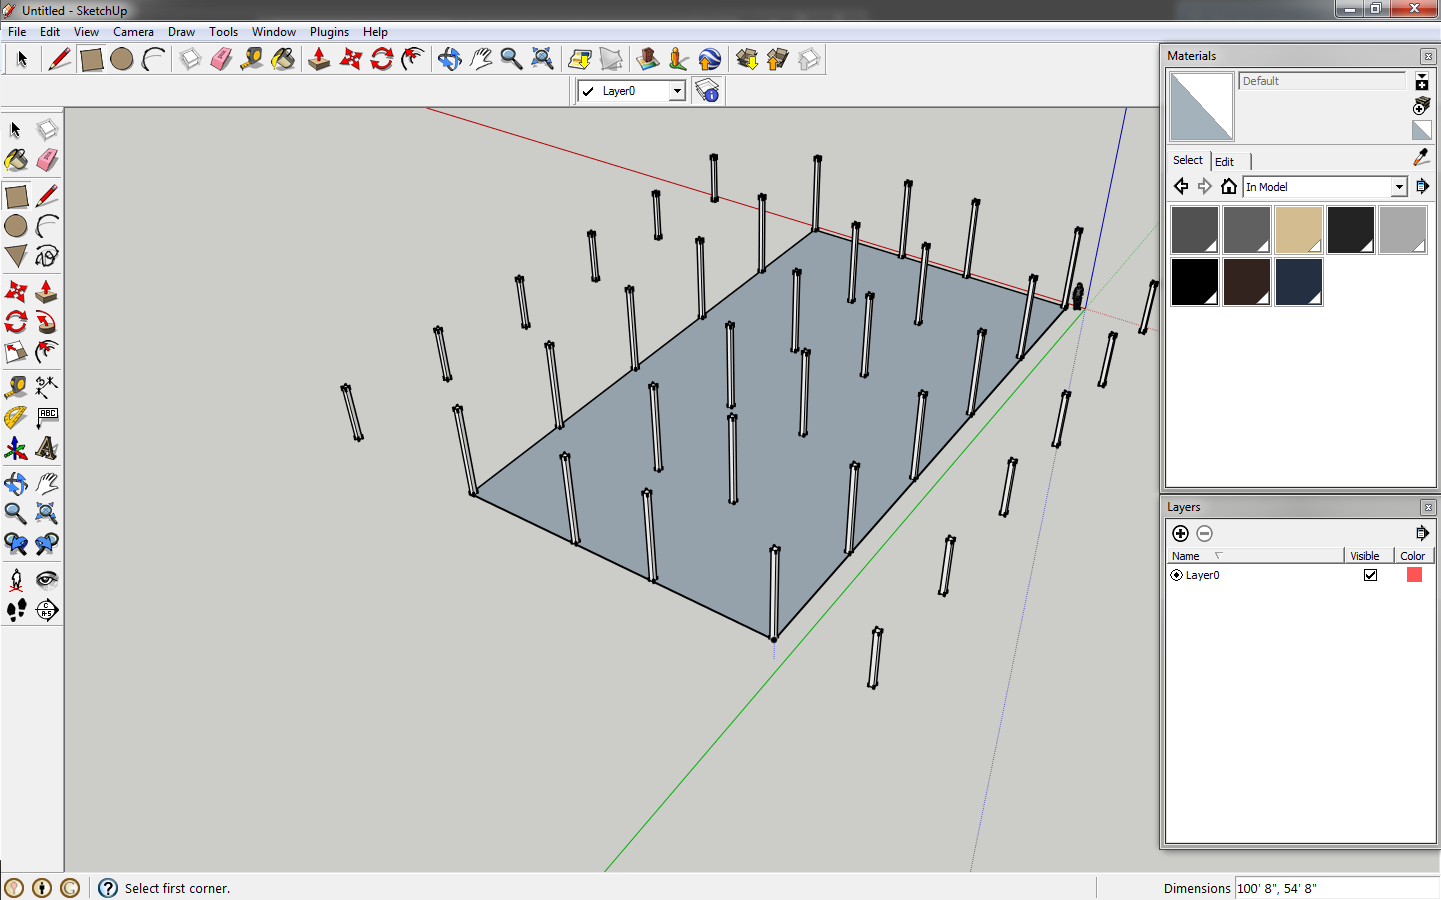 |
| Draw a new rectangle. |
It's time to draw walls. The barn will have a 4'-0" stone base with wood siding above.
Click the face of this rectangle, key in
f or click the
offset tool. Drag the mouse towards the center of the rectangle, key in
8 and hit enter. This is our structure. Click inside the 8" border to select the face, click
offset or
f then click the outside edge of the rectangle and offset by 1/2" by dragging outside of the rectangle and keying in
.5 and
enter. Click inside the .5" border, click
offset, click an edge, drag outside of the rectangle, key in
2 and hit enter. We have drawn 8" of structure, 1/2" backer board, and 2" of stone for our wall.
 |
| Offset the rectangle twice. |
 |
| The lines represent the wall material thickness. |
Select and delete the inner face.
 |
| Select the face. |
Select the entire perimeter of the wall by left clicking, holding, and dragging.. Since the columns are components we won't accidentally select one of them. Make the wall selection a component.
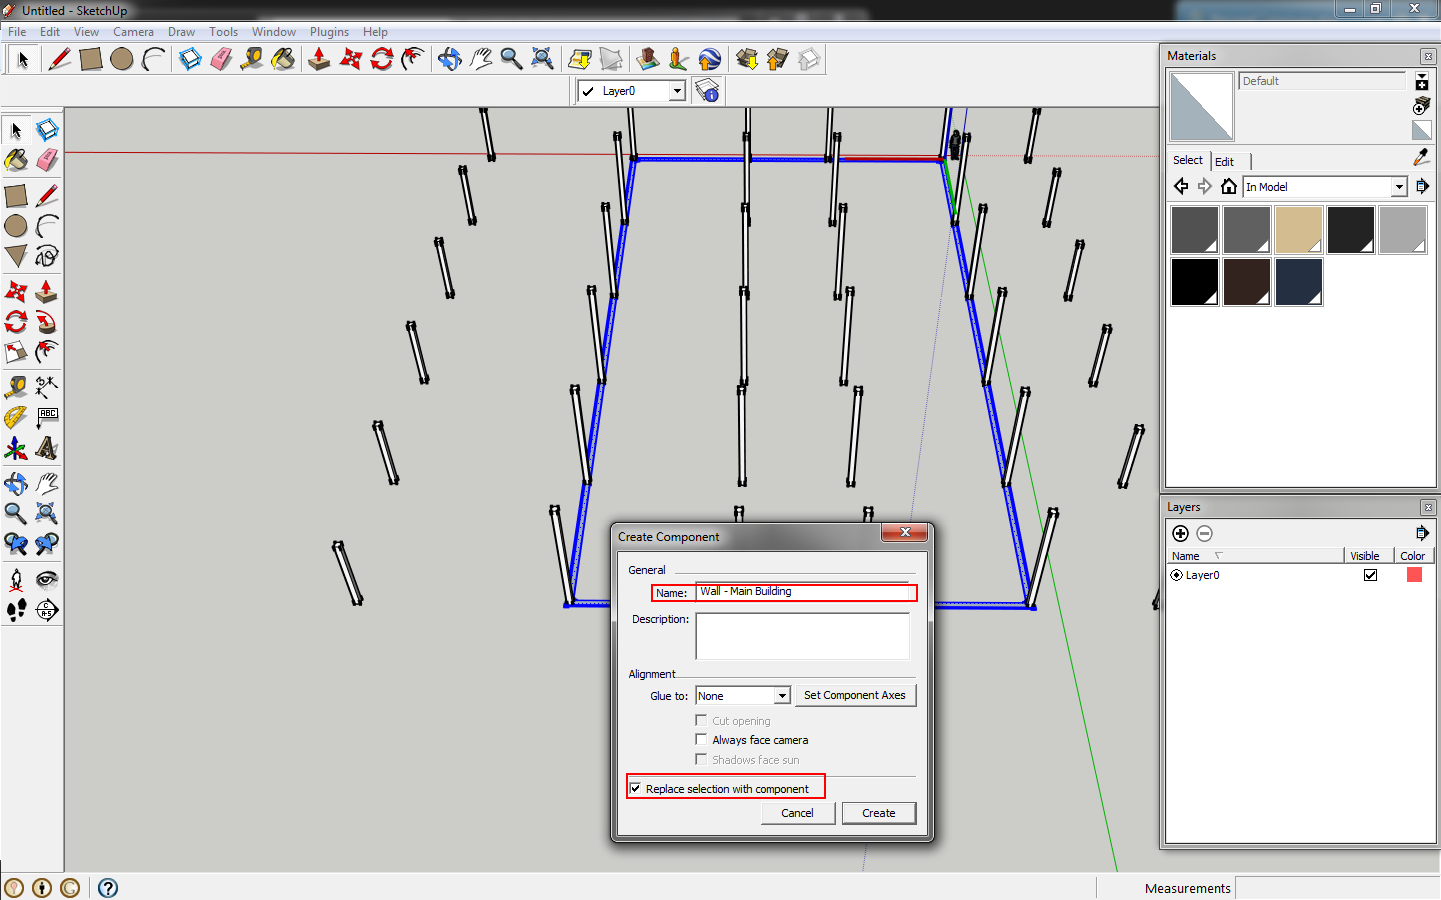 |
| Make your wall a component. |
Double click the wall component. And use
push/pull to set the height of the wall to 4'. Do this for each wall part- structure, backer board, and stone.
 |
| Pull the wall height to 4'. |
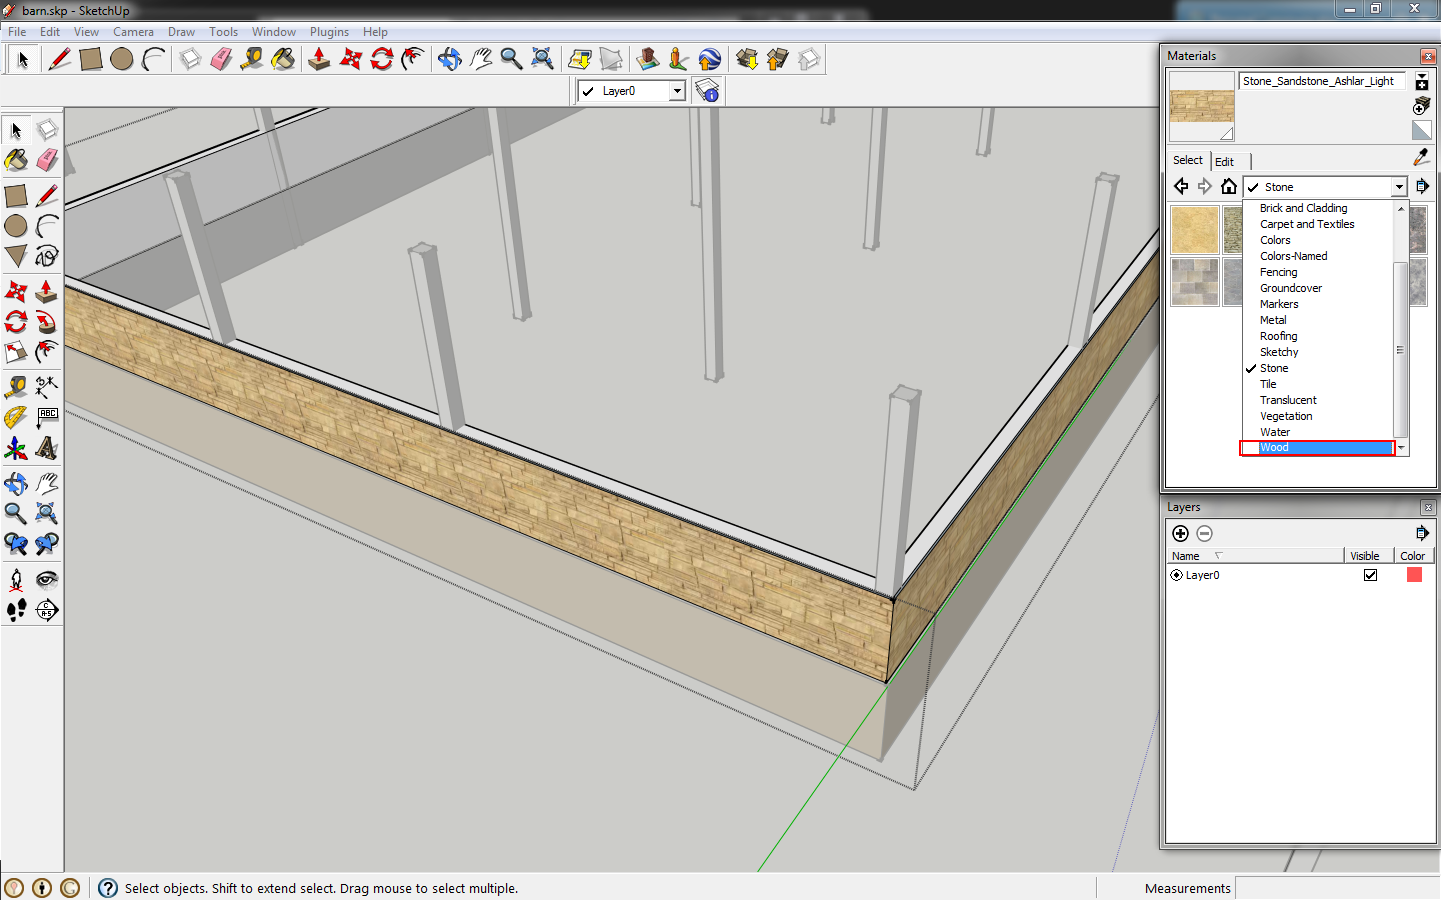
While still editing the wall component, click the drop down box in the
materials window and find
stone. Click a stone pattern you like, this will change the cursor to a paint bucket. Click on the face of the wall to apply the material.
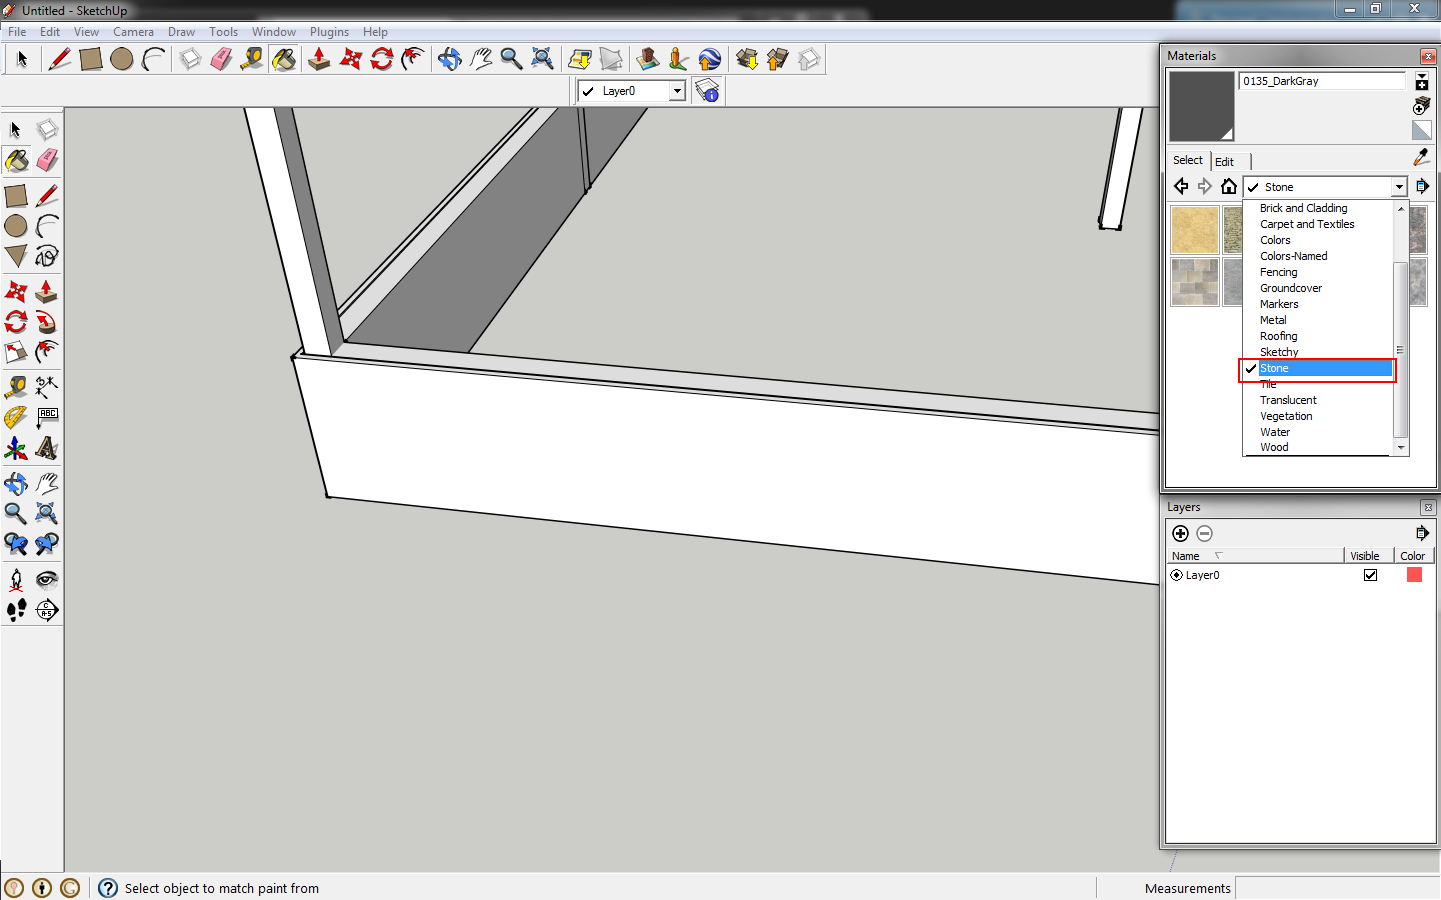 |
| Go to the materials window. |
 |
| Apply the material to your wall. |
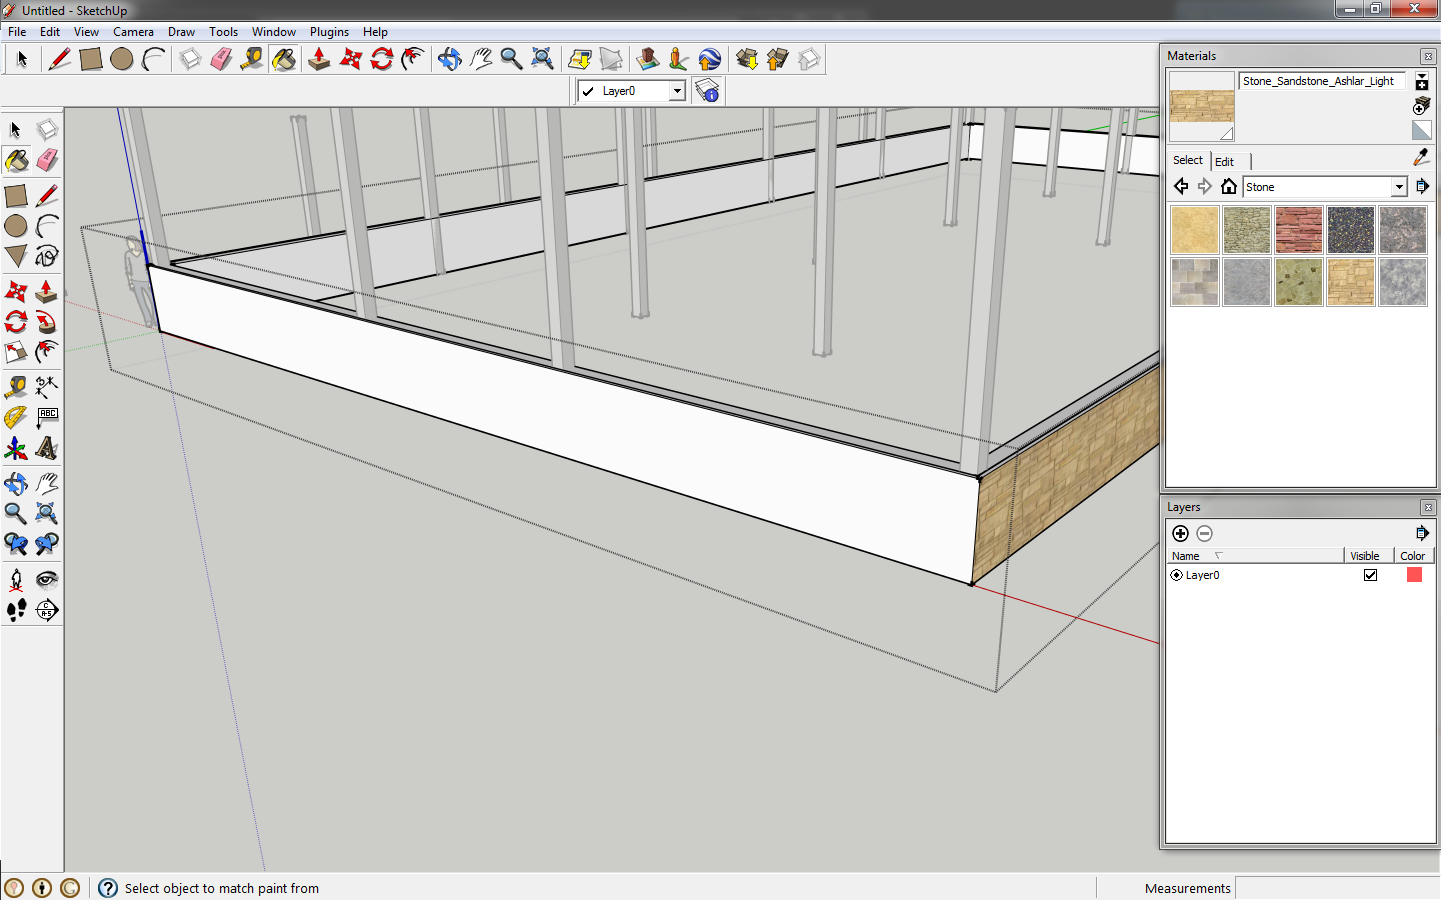
Click outside of the component to finish editing. Click the stone base, click
move and copy it 4' up. Then right click it and select
make unique. We are going to turn this into the wood siding. By copying the component, we ensure the structure layers will be aligned as they would be continuous.
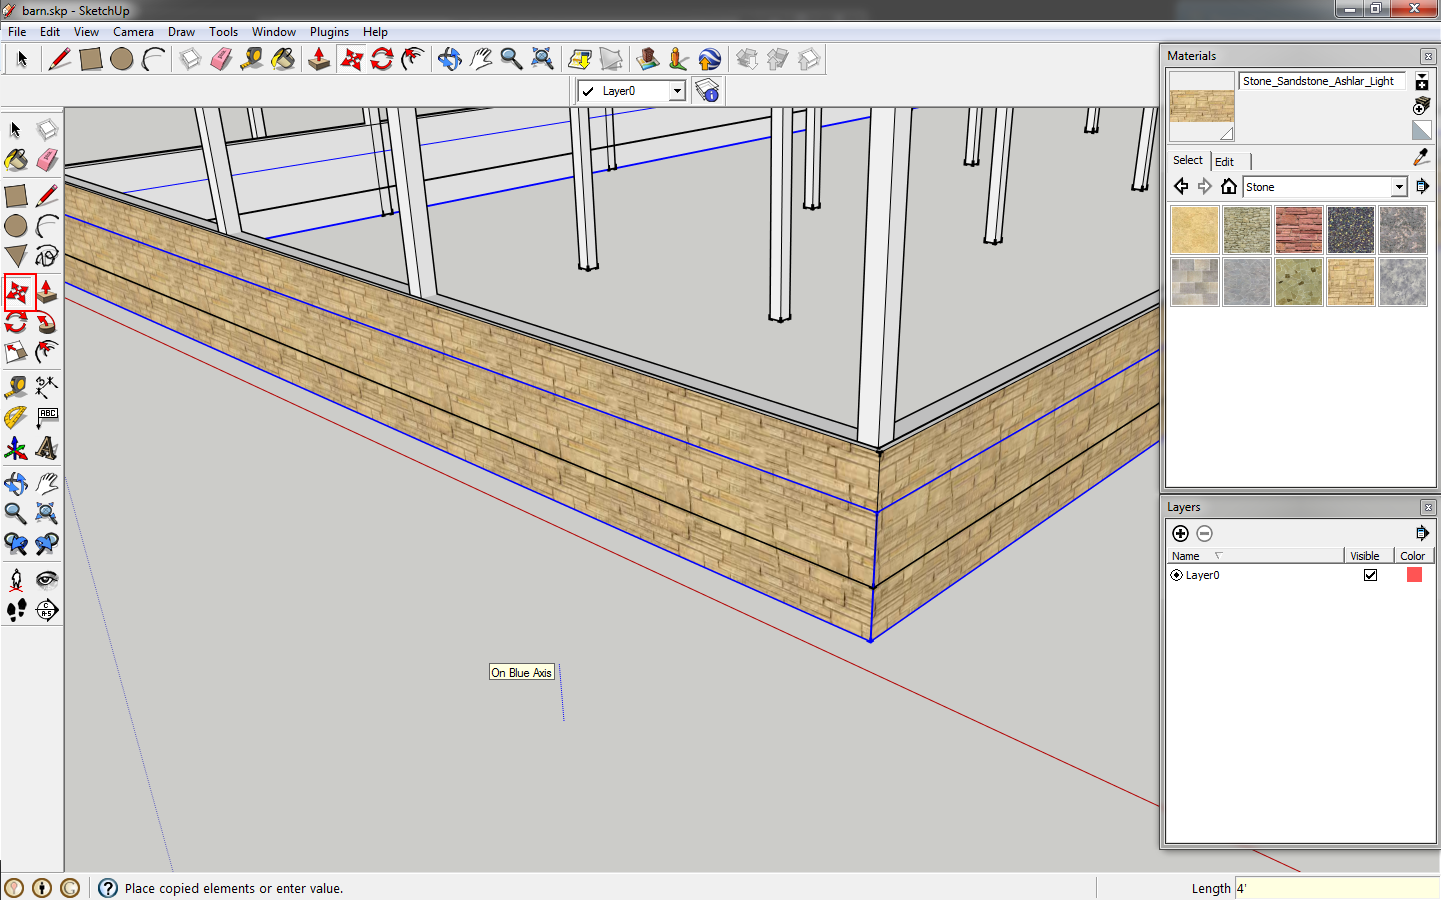 |
| Copy the component. |
Double click the component to edit it. Use
push/pull to remove the stone layer by pushing it in 2". Do this to all sides, then
pull the backer board layer out by .5" on all sides. This leaves us with 8" structure and 1" of wood siding.
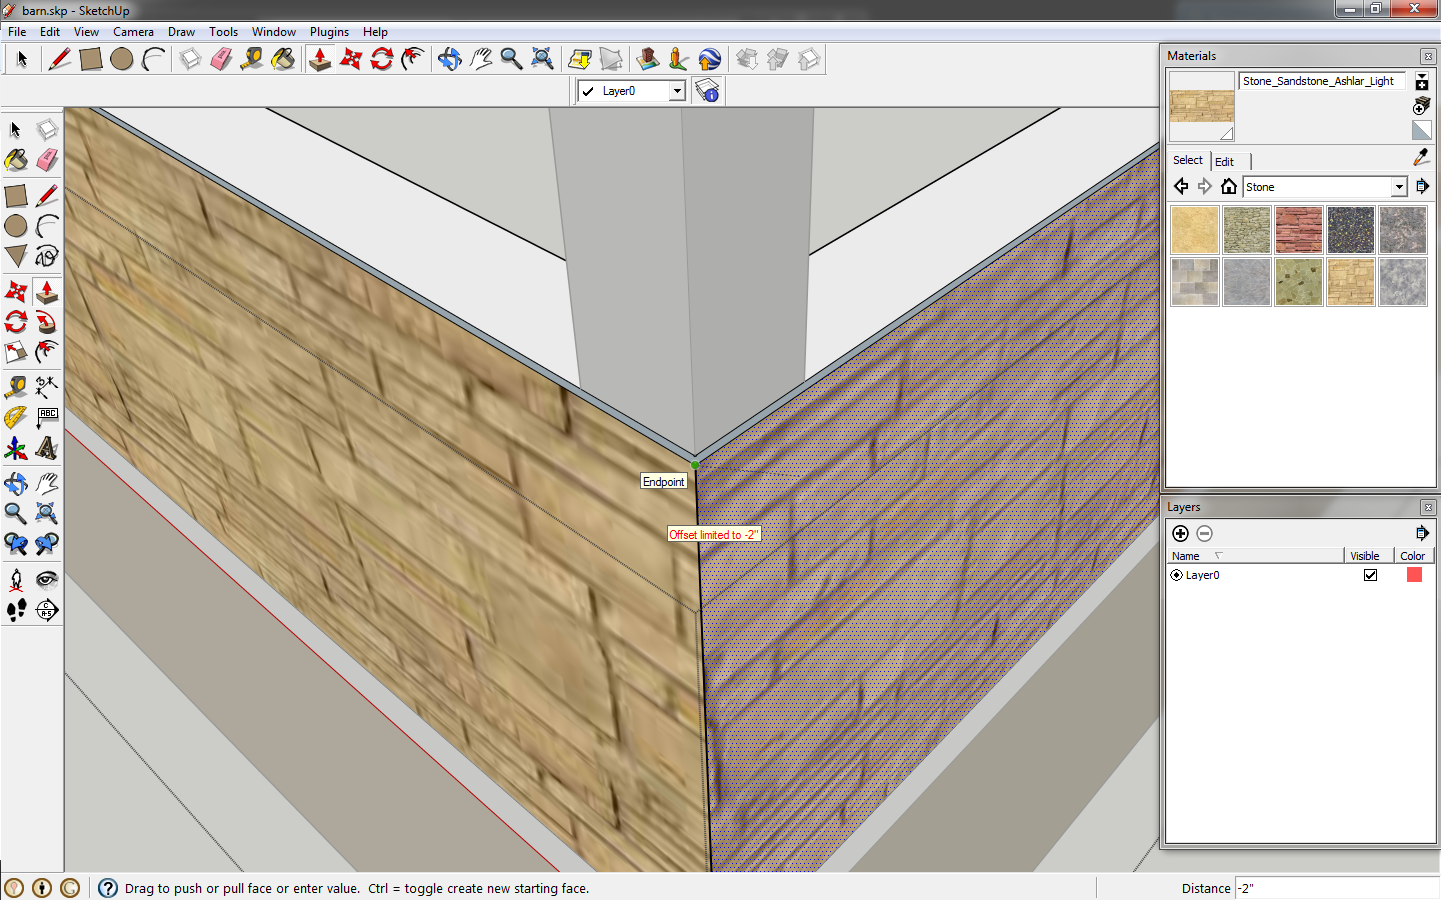 |
| Push the faces to remove the stone thickness. |
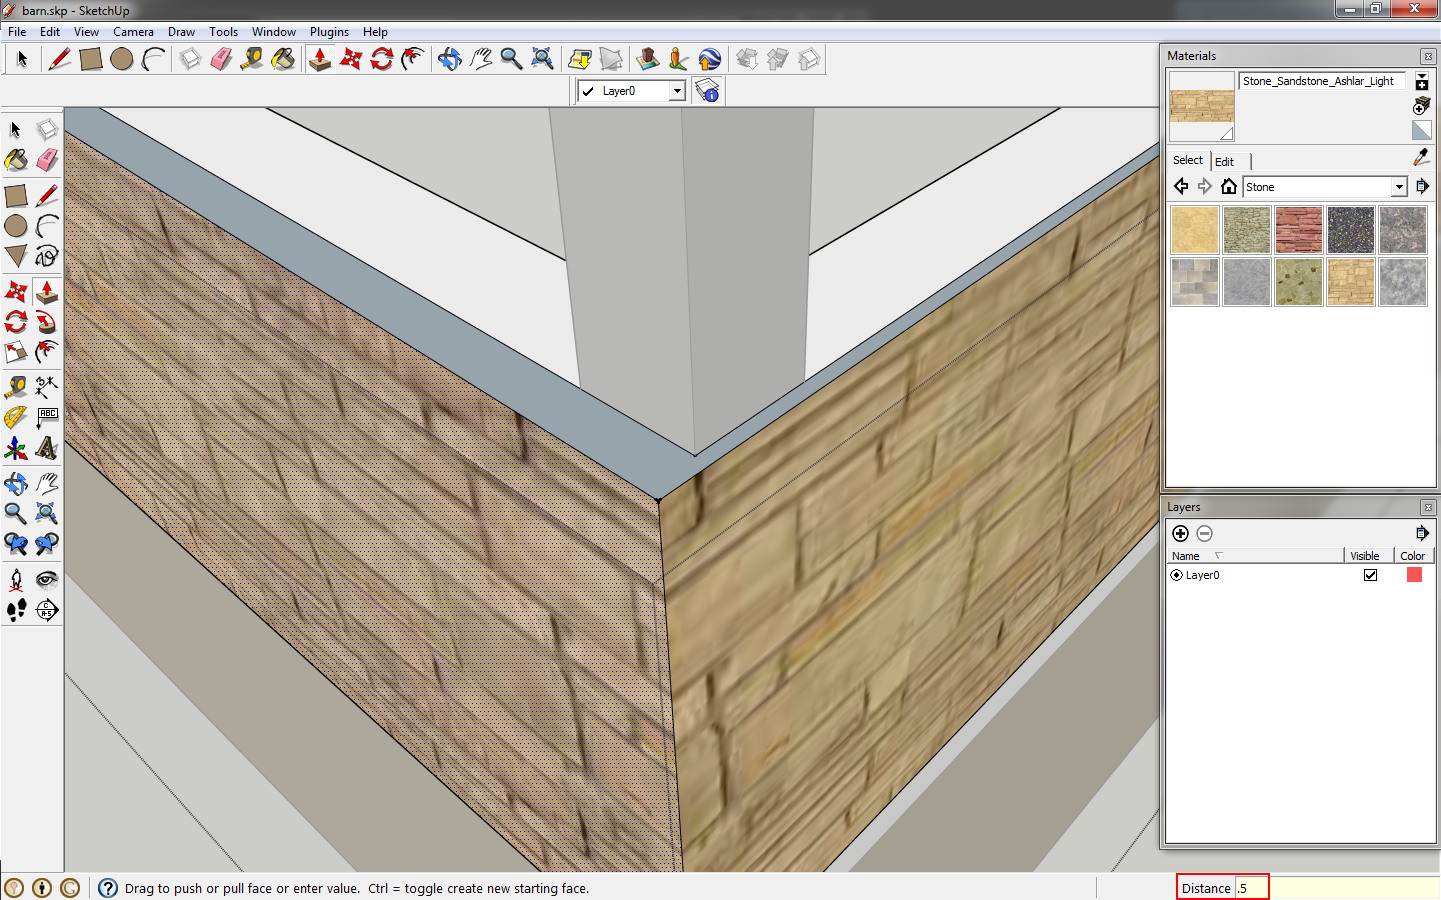 |
| Pull the faces to correct the width. |
Select the
wood drop down in the materials window and apply the material to the wall portion we are editing.
 |
| Select a material in the material window. |
Push/pull this wall up an additional 8', both faces.
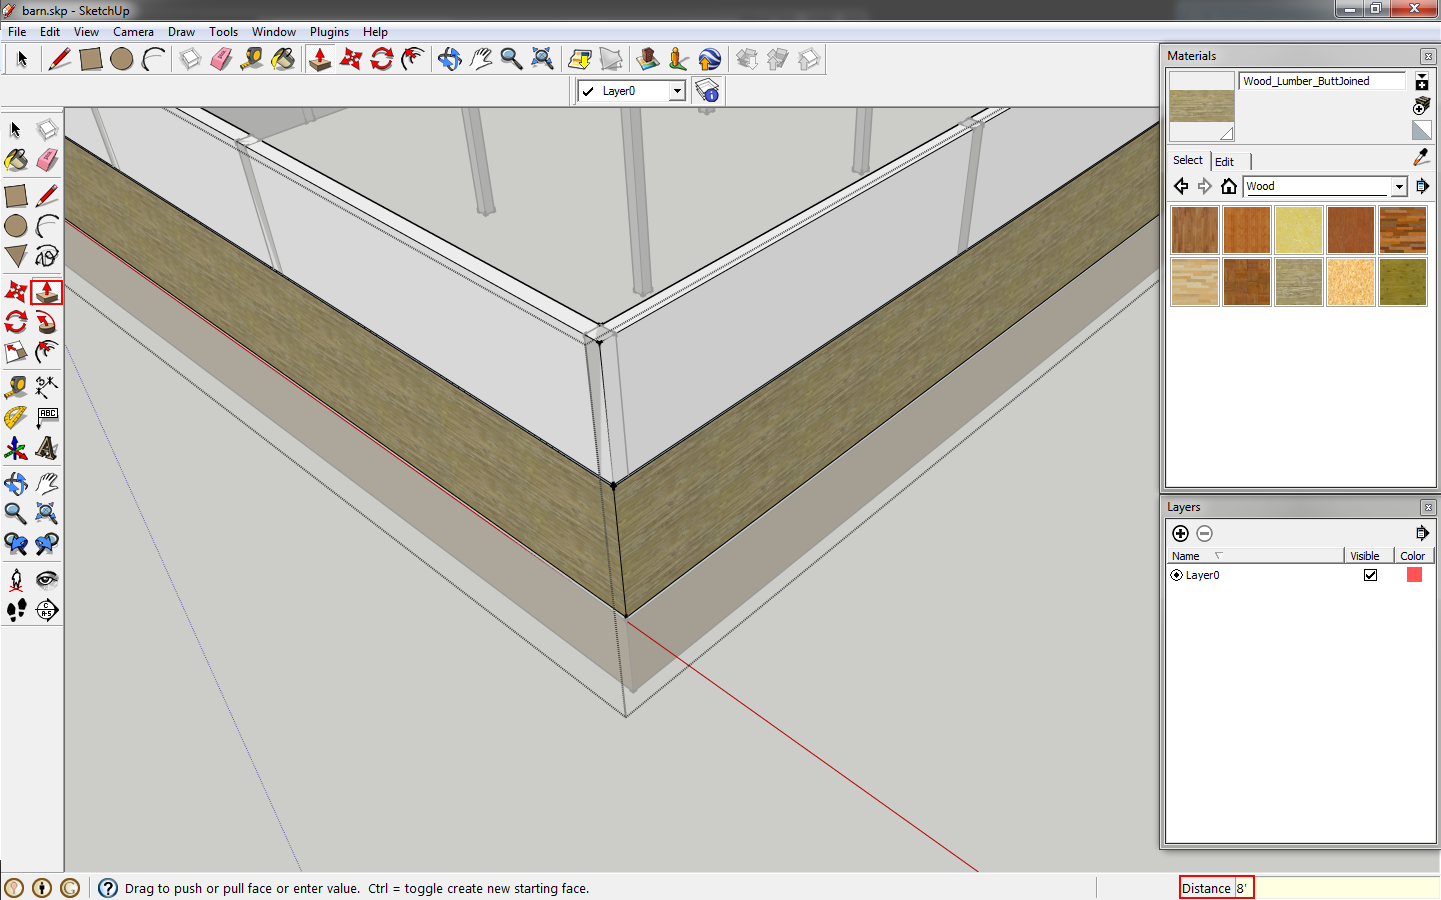 |
| Pull the wall vertically so that the height is 16'. |
Create a floor by using the
rectangle tool dragging from outside corner to outside corner of the shed roof columns.
This is our concrete floor slab.
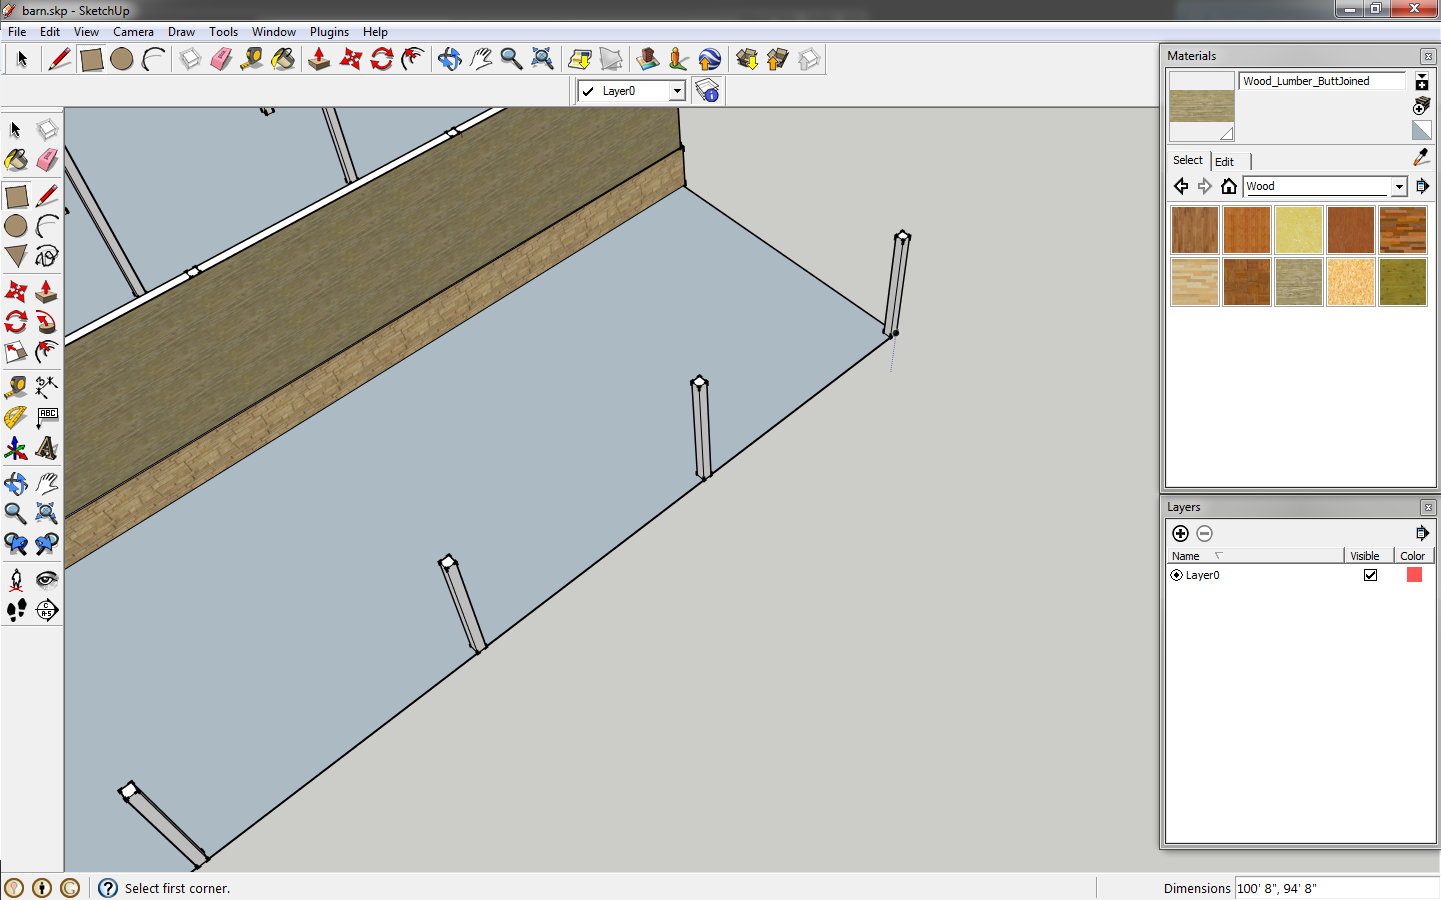 |
| Create a floor. |
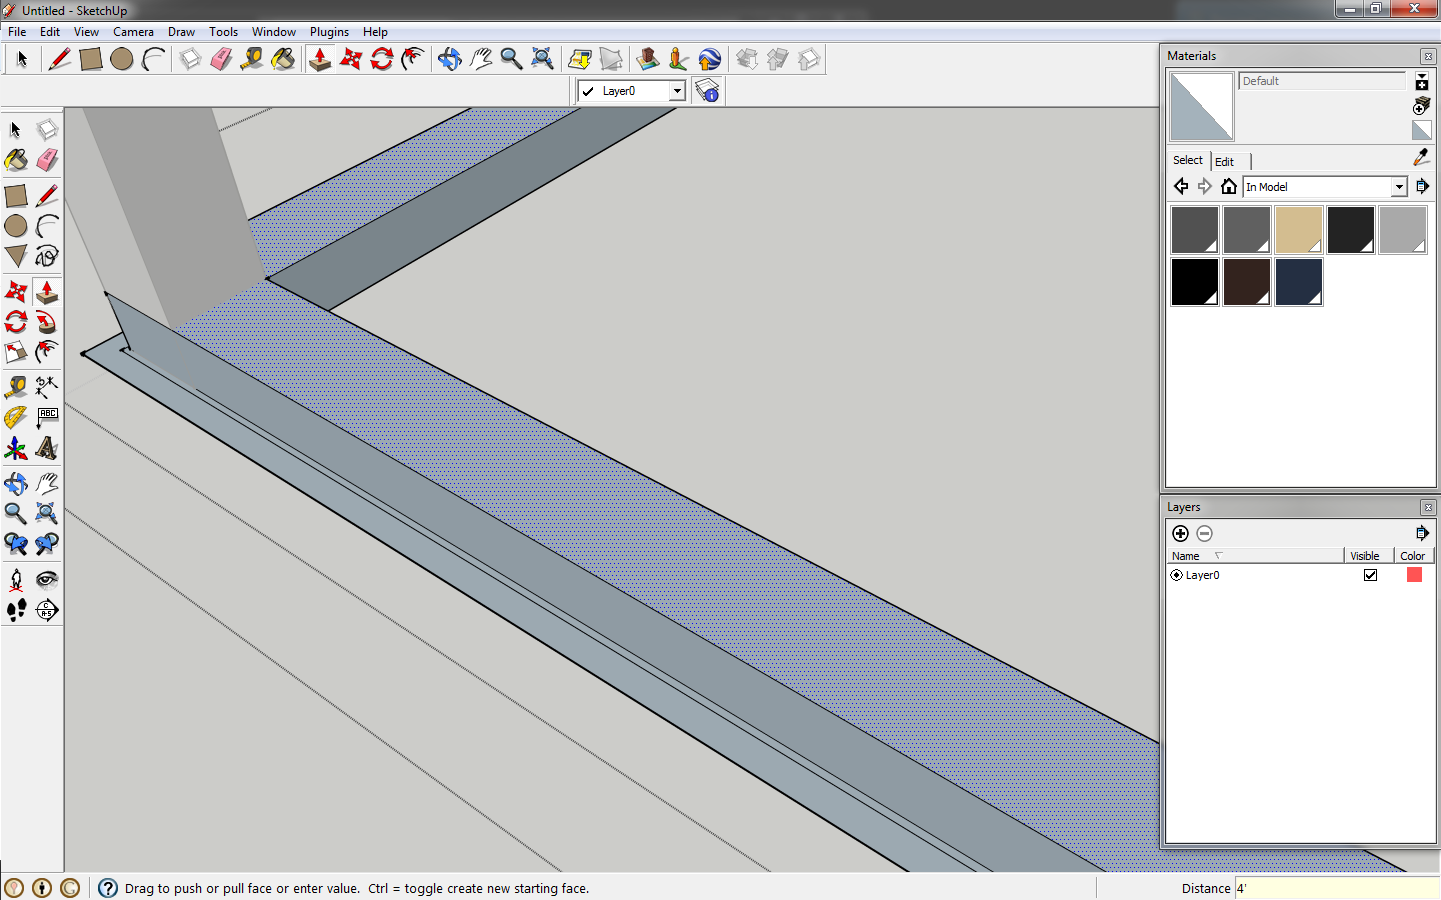
Push the rectangle down 4", a typical thickness for a concrete slab.
Push/pull the vertical faces to be even with the short ends of
the building. This puts the edges 3" past the column, so do that on the
long side as well. Make the floor a component.
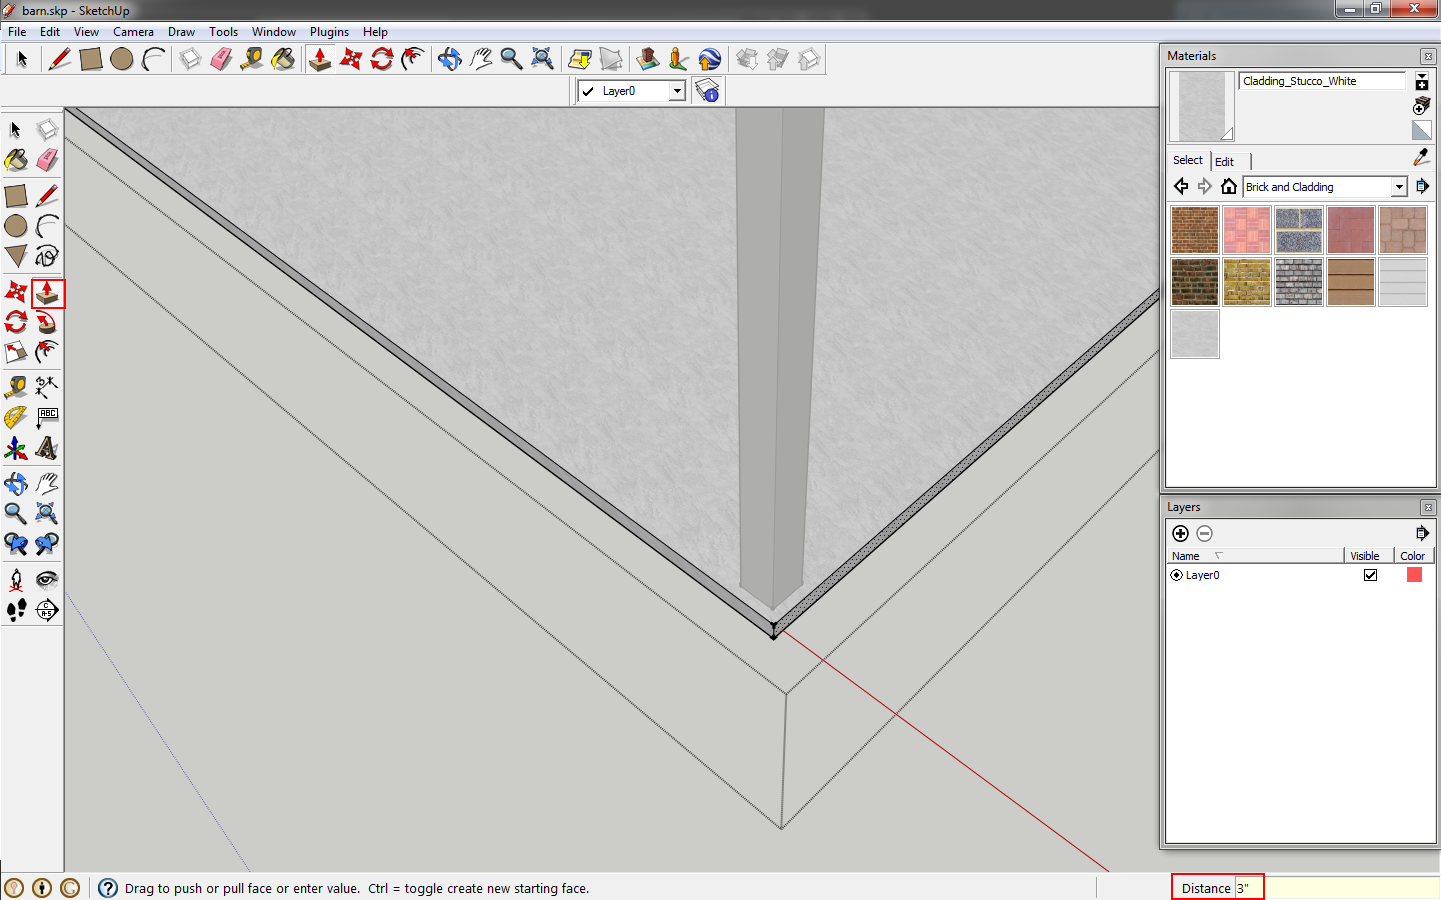 |
| Extrude the rectangle 4" down. |
Go to
asphalt and concrete in the materials window, select
concrete, then select
create material.
Lighten the color by dragging the slider next to the color wheel up, rename the material and click
ok. The material should automatically be selected and apply that to the floor component.
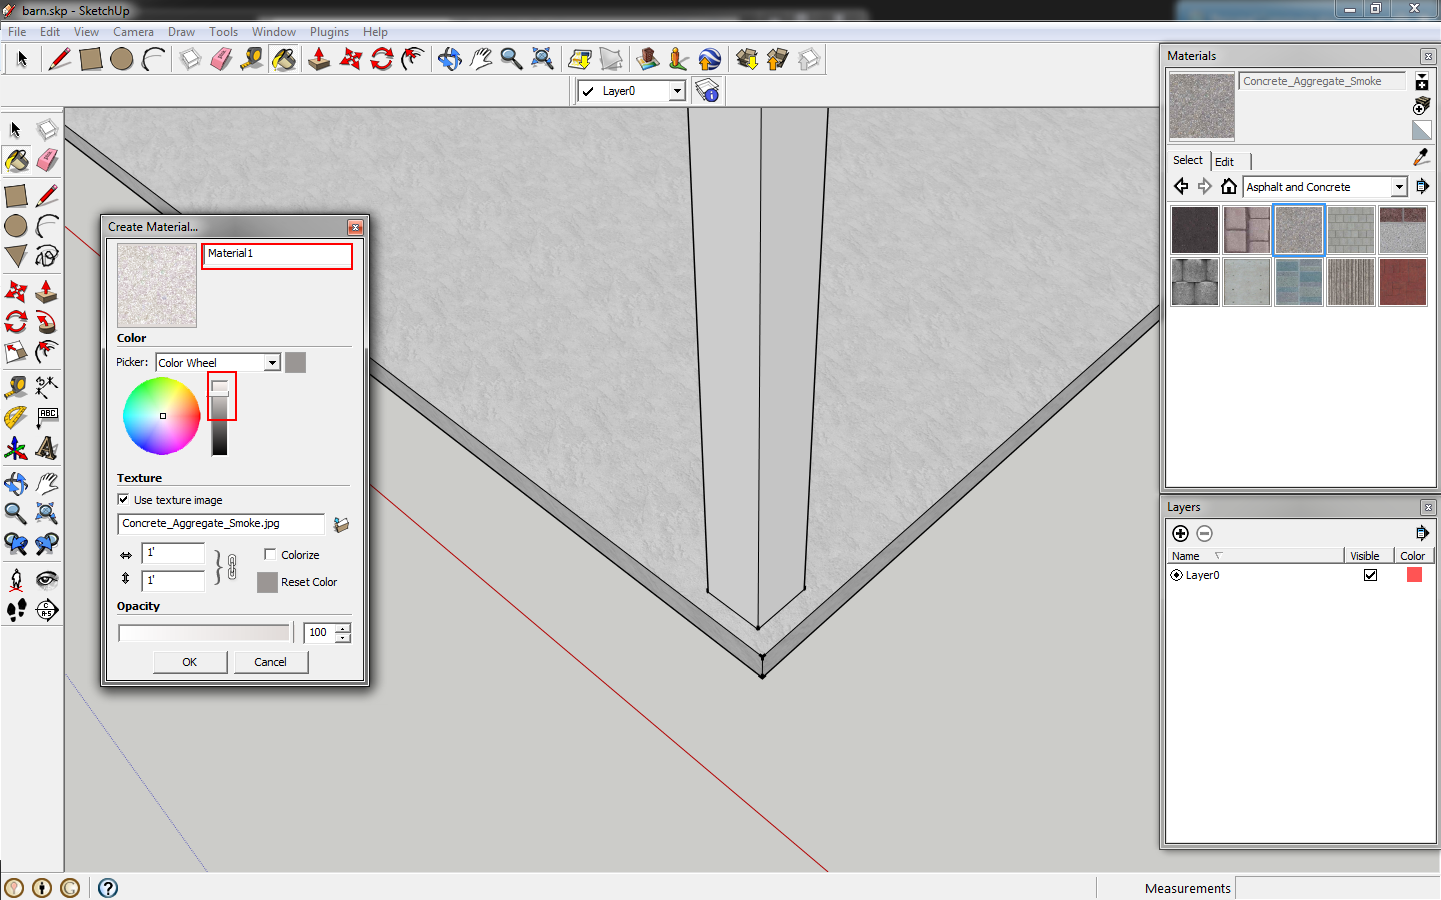 |
| Modify the color of the material, then apply it to the floor. |
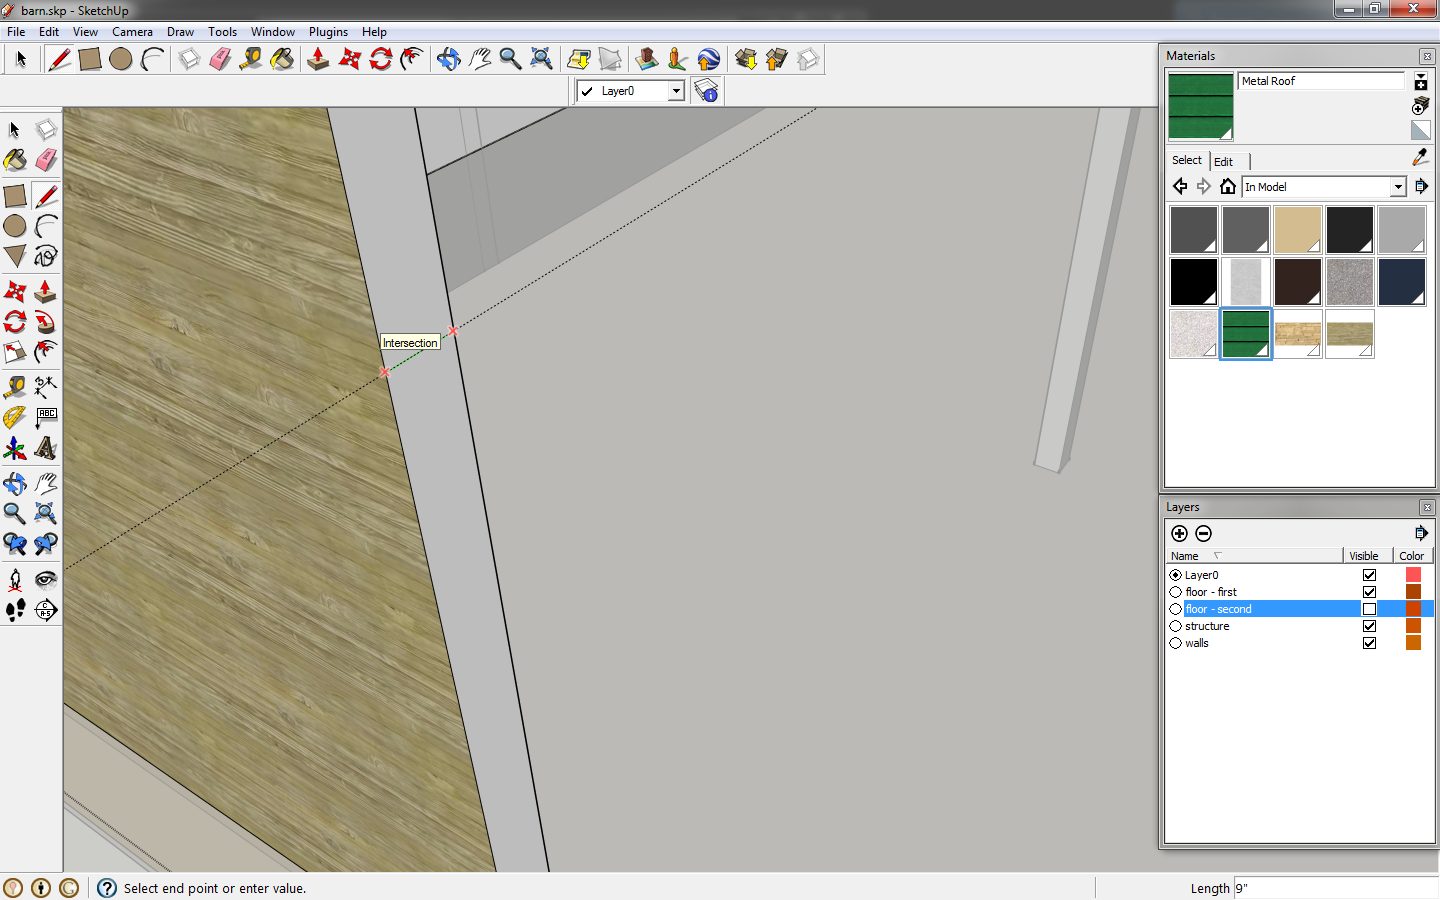
Draw a
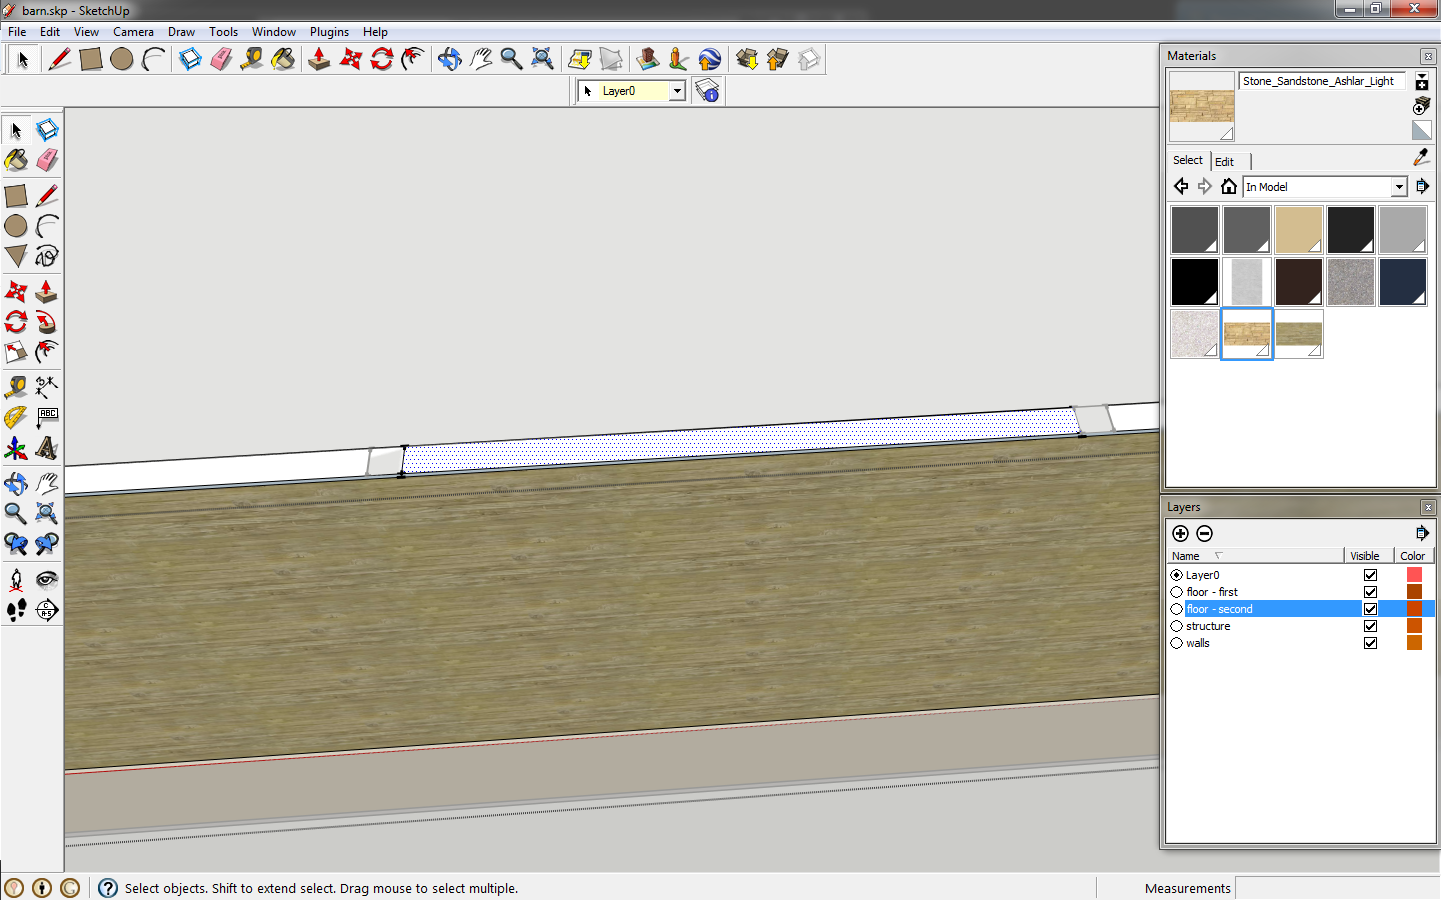
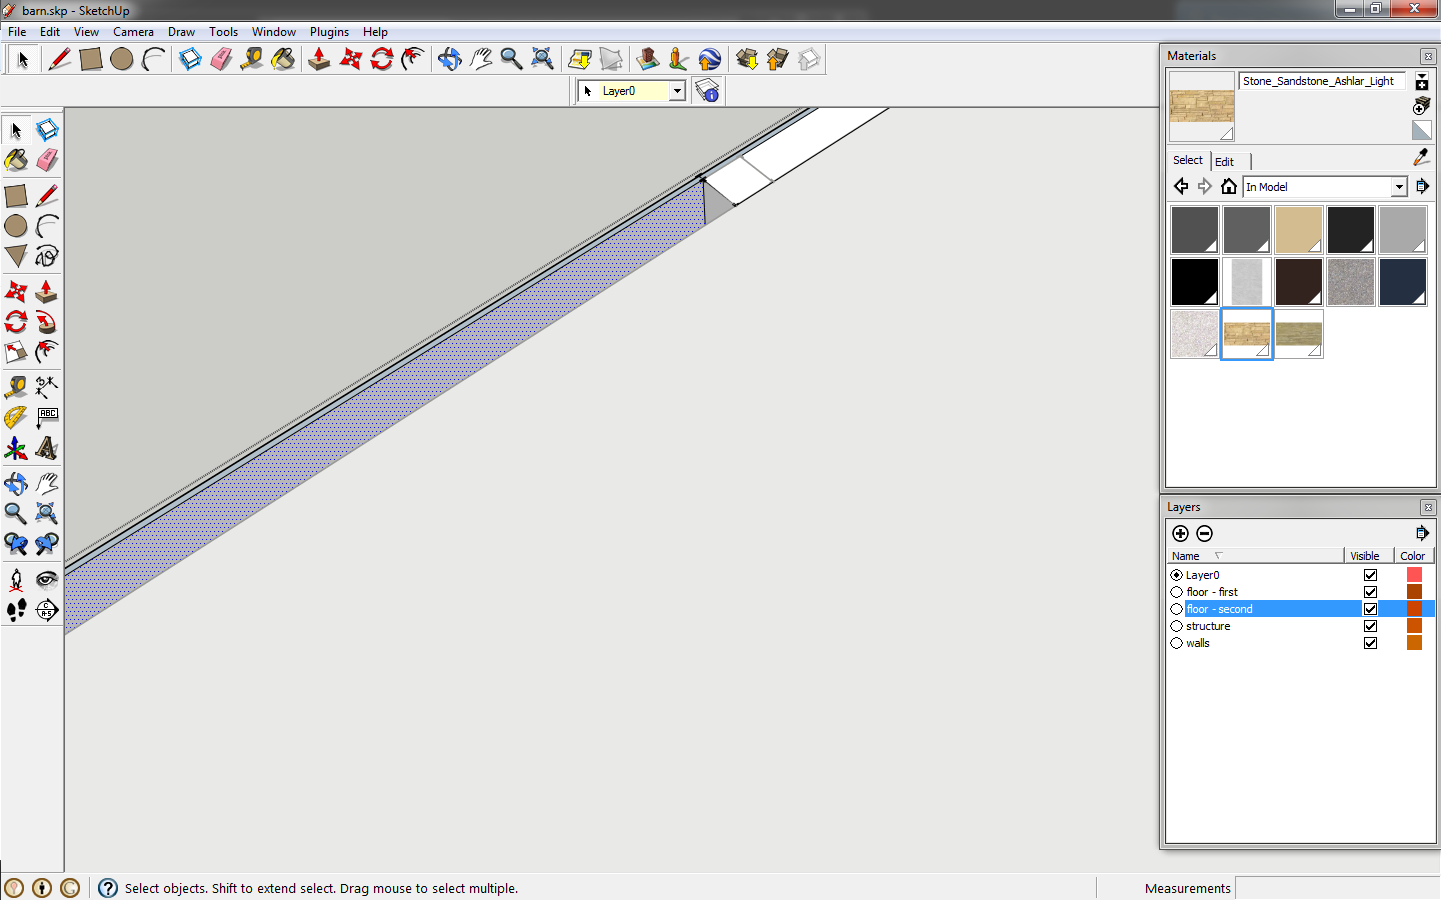
rectangle from the inside top corner to inside top corner at the top of the wall and make that a component. This is the second floor,
push/pull it up 12", then move the entire component down 12" so the top of the floor is at 16' (the top of your wall).
 |
| Draw the second floor. |
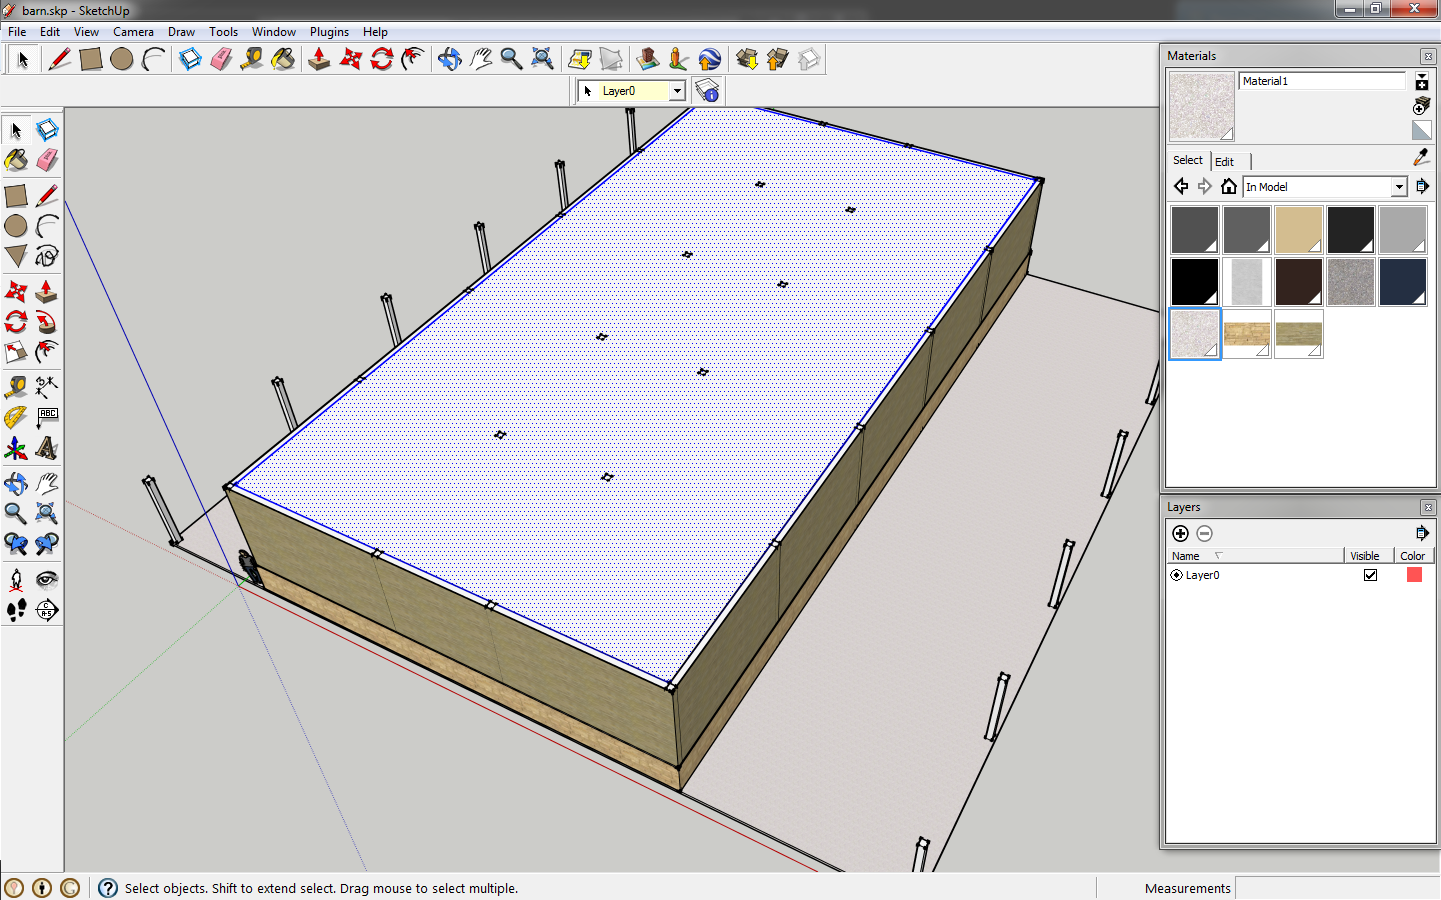
In the
Layers window, click the
add layer button. Add,
floor - second and
floor - first and
walls and
structure and
roof.
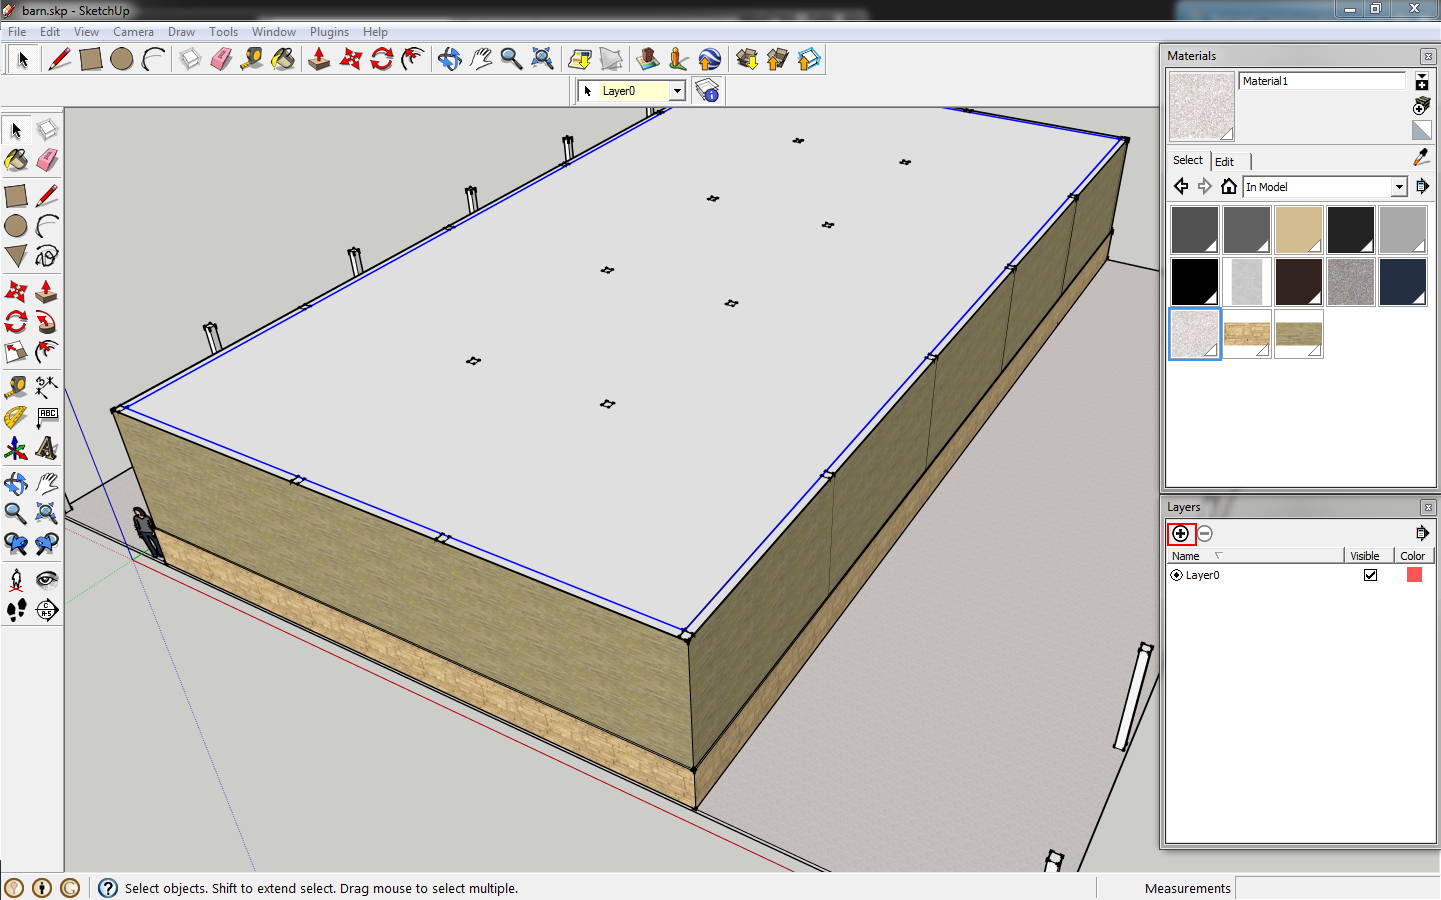 |
| Add layers. |
Click the second floor component, click the drop down at the top and select
floor - second. Do the same for the walls, structure, and first floor. Everything should have been drawn on
Layer0. Now you can toggle the visibility of these layers to isolate components. This is especially useful in more complex models so that you can see exactly what you want to edit.
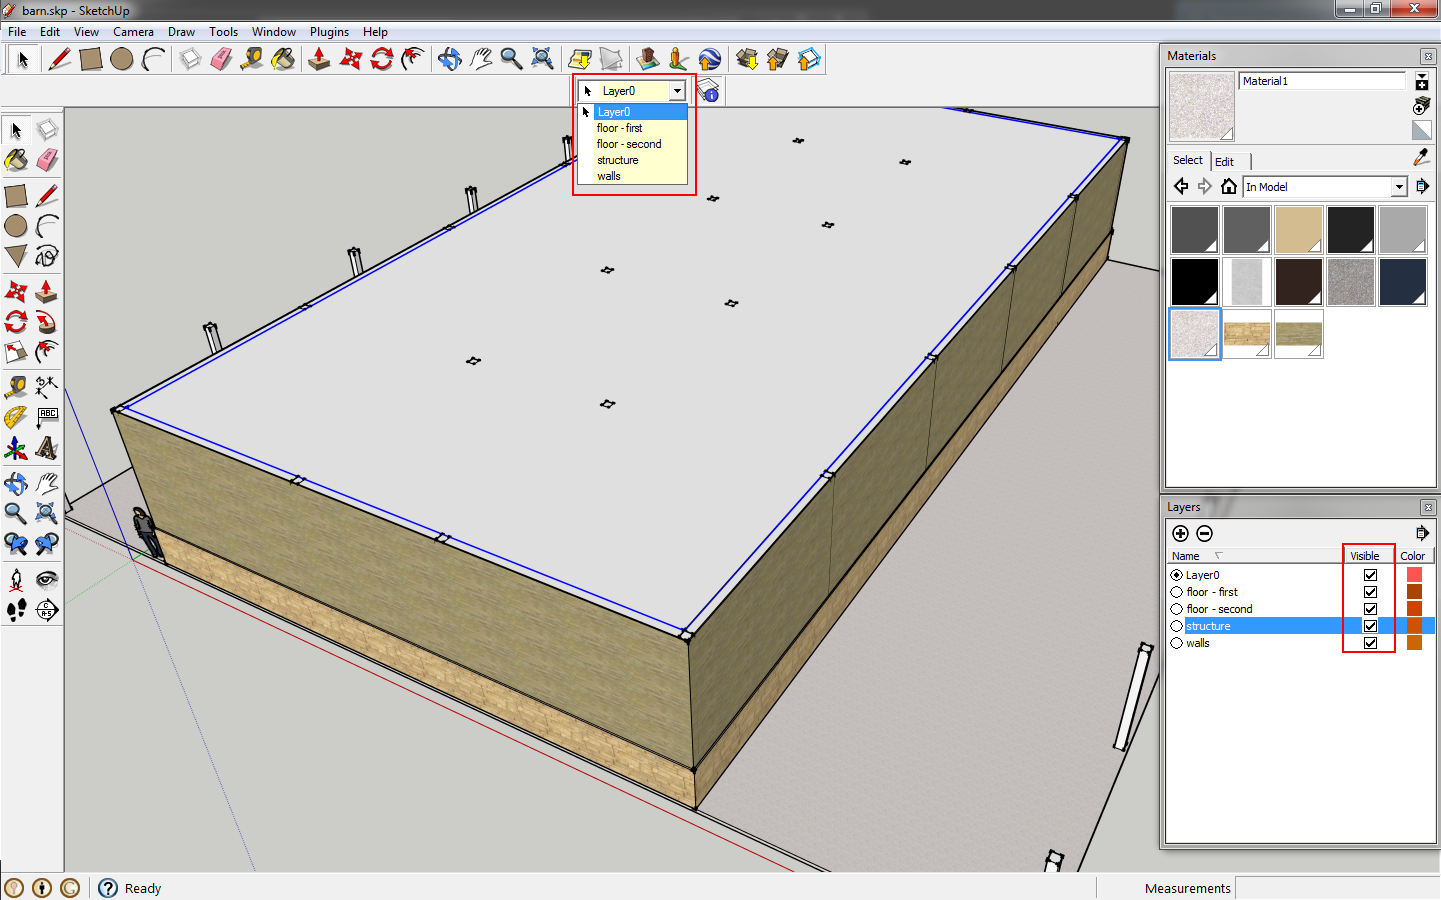 |
| Select your component and place them on layers. |
Draw a rectangle between the columns at the short end of the barn. This will be the door. Push the portion of wall vertically, down. Push the resulting face horizontally, out.
 |
| Draw a rectangle to mark the door location. |
 |
| Push the face. |
Erase the resulting lines, which will also delete the faces, to create an opening. Do the same thing in the stone portion of wall. Then do this to the other end.
 |
| Delete the highlighted lines. |
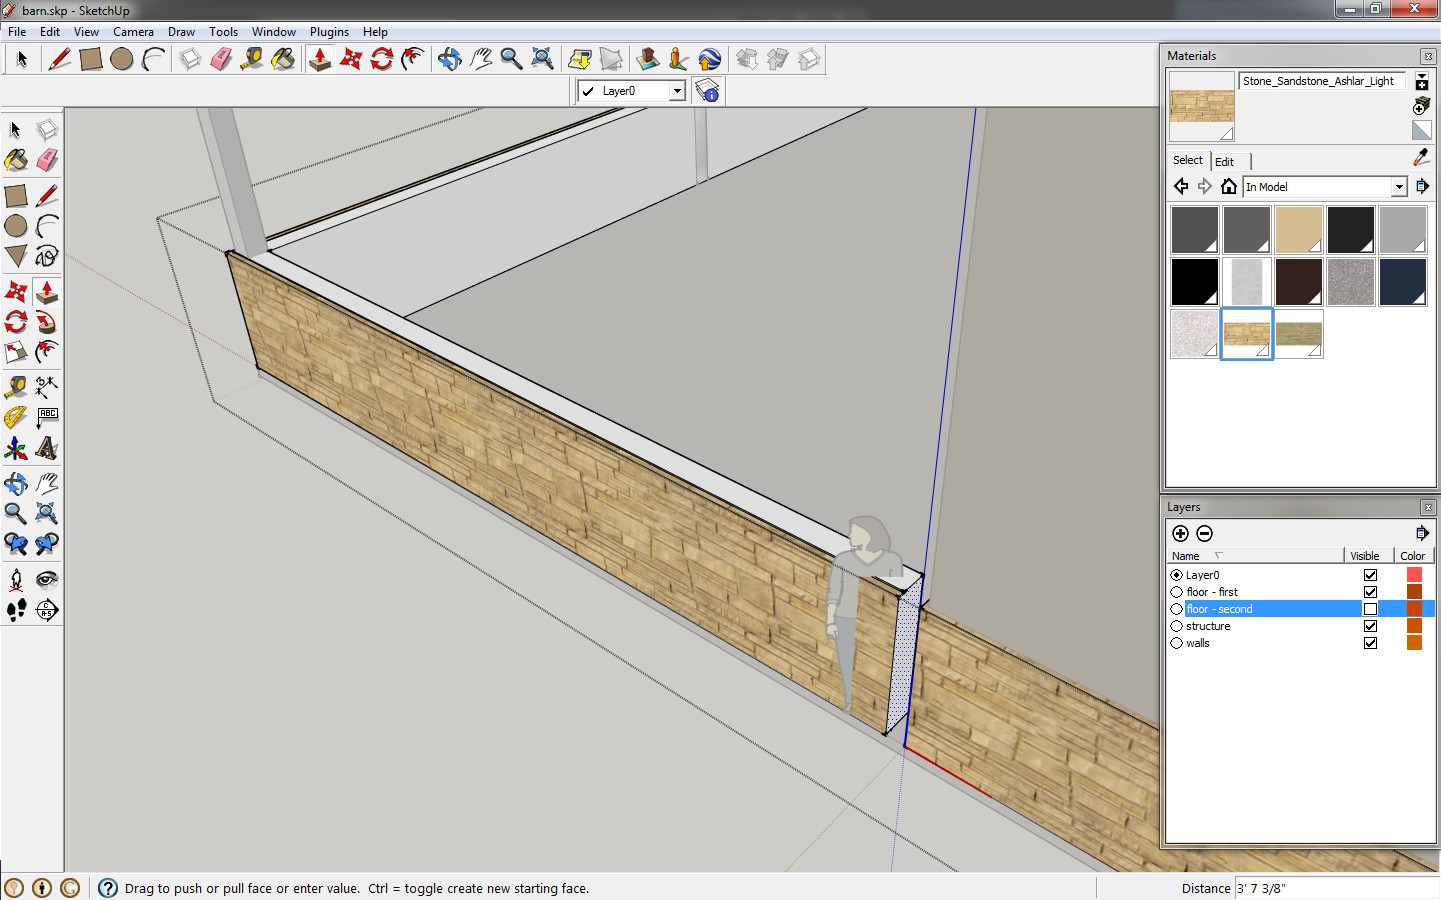
Double click the stone wall component, select only half of it and copy it 25'.
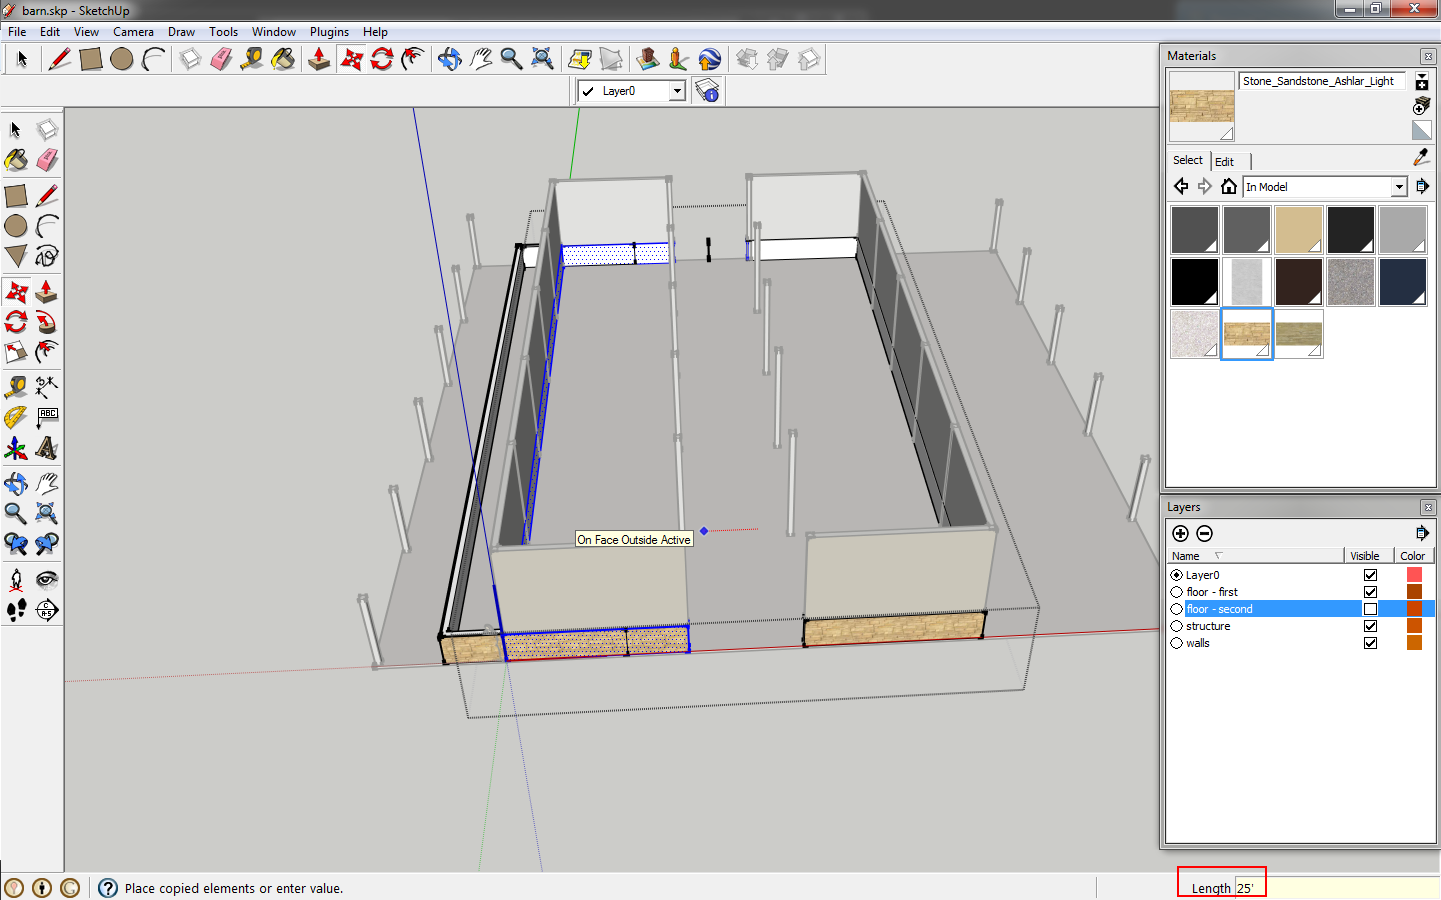 |
| Copy the component. |
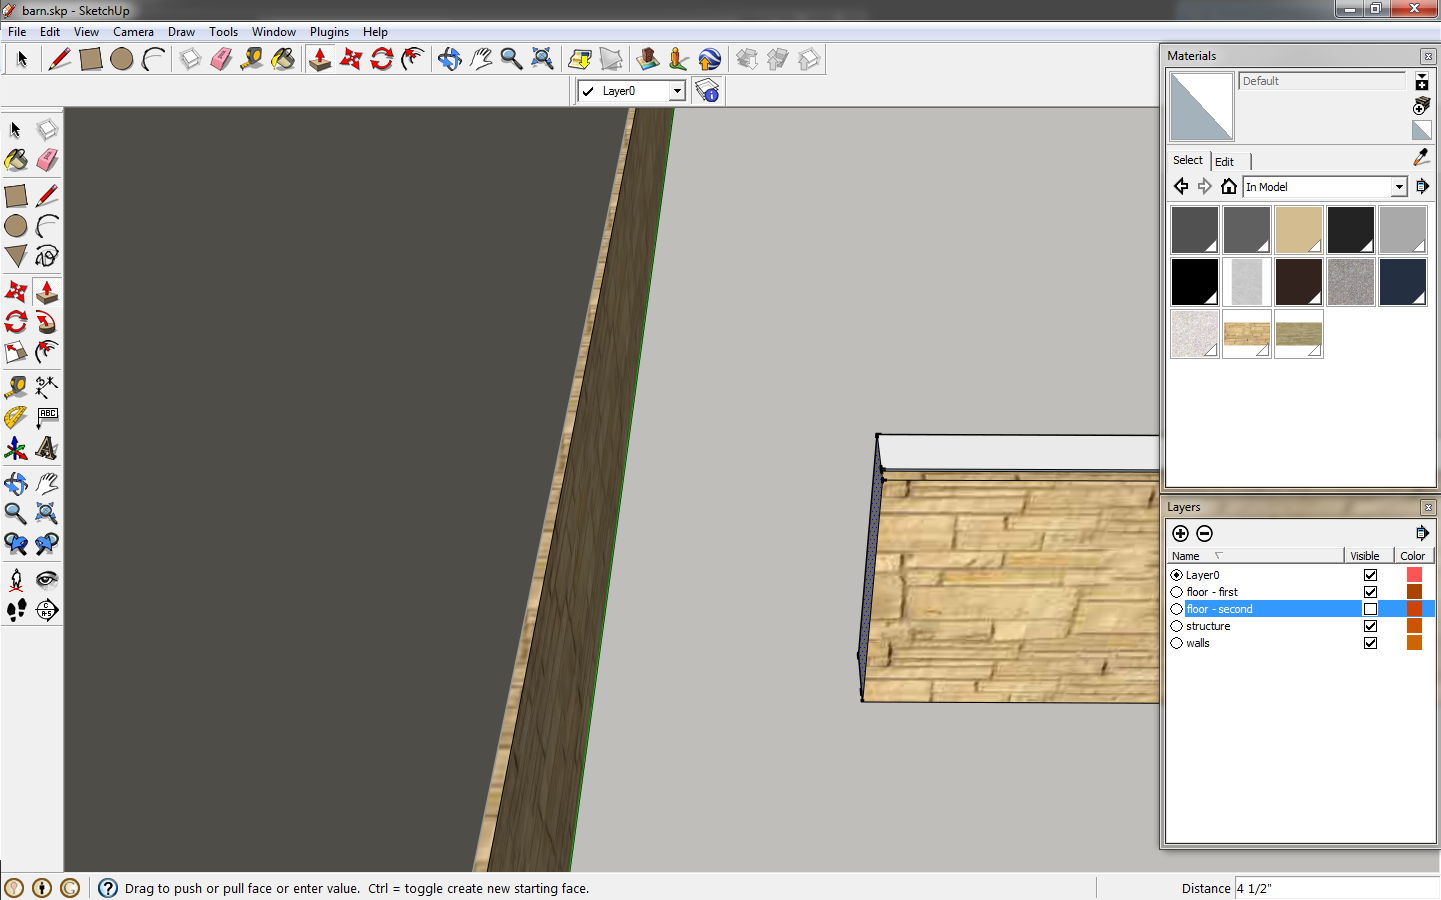
Pull the end to meet the wall, closing the gap, and erase the resulting line.
 |
| Pull the wall to meet. |
Move the other side of the wall in 60' so that the office occupies two bays. Pull the end to meet the adjacent wall.
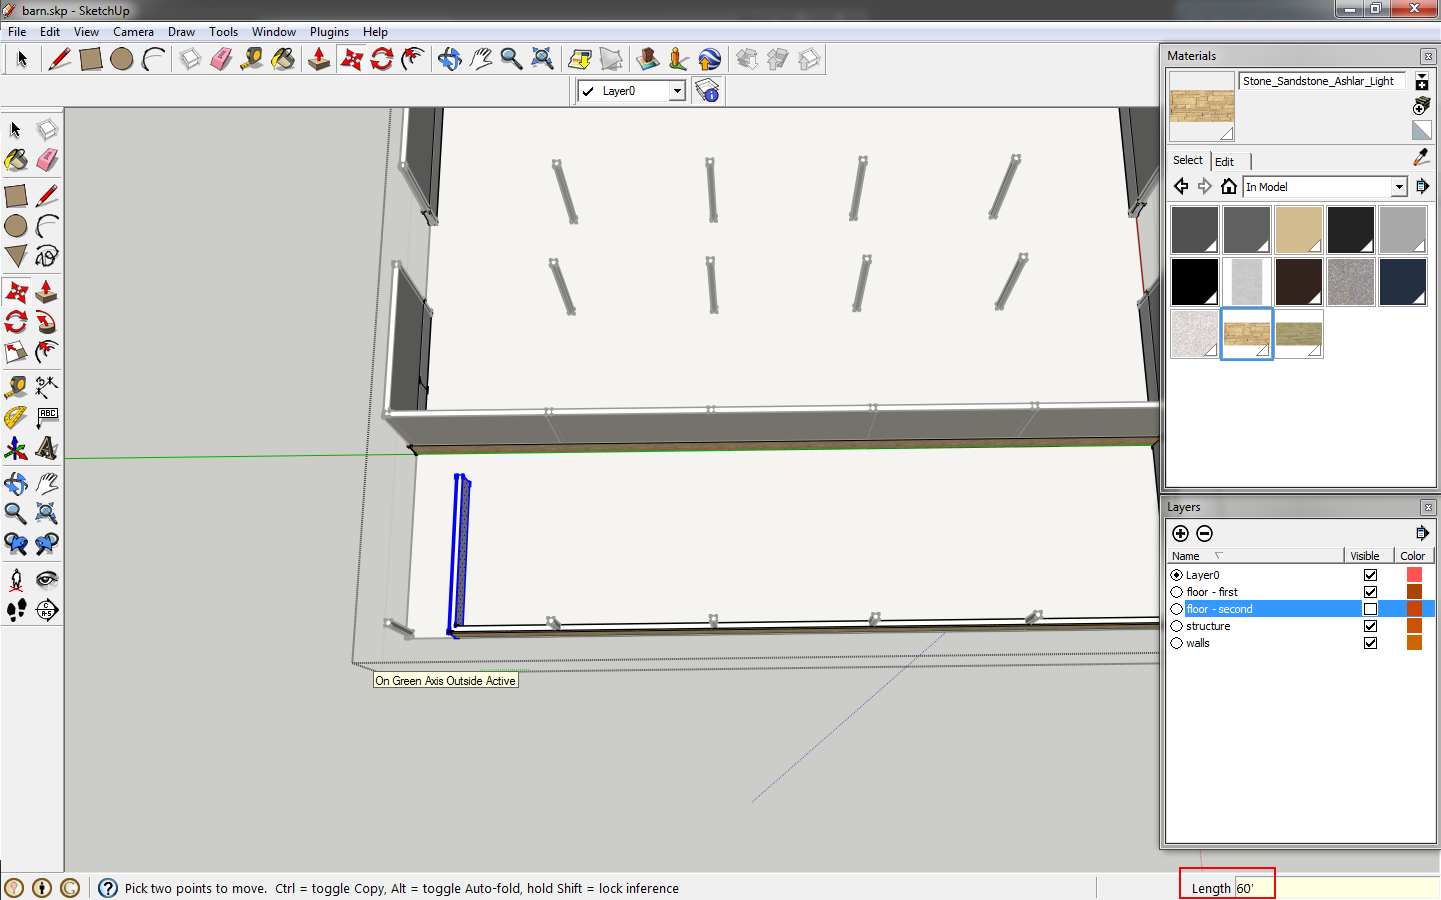 |
| Move the end of the wall 60'. |
 |
| Pull the wall to meet the adjacent wall. |
Run through the same process with the wood siding portion of the wall.
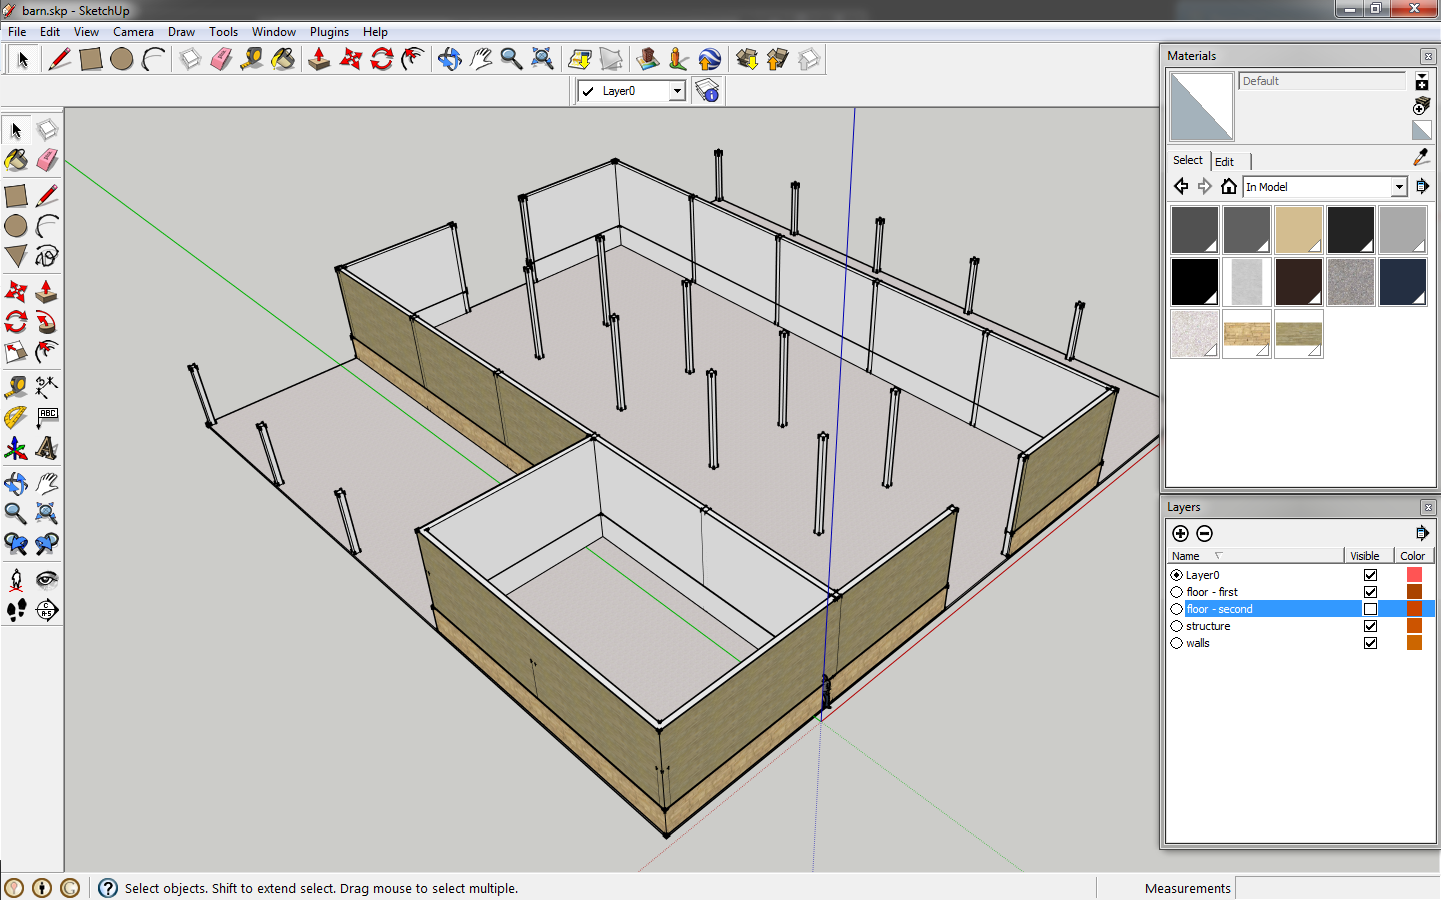 |
| The walls are done. |
Let's draw the roof. Sketchup has tools/plug-ins you can download to draw a roof. I don't have any installed right now and since your are most likely new to this we'll take the long way which will help your understanding. Take your line tool, draw a 12" horizontal line and a 9" vertical line. Connect them.
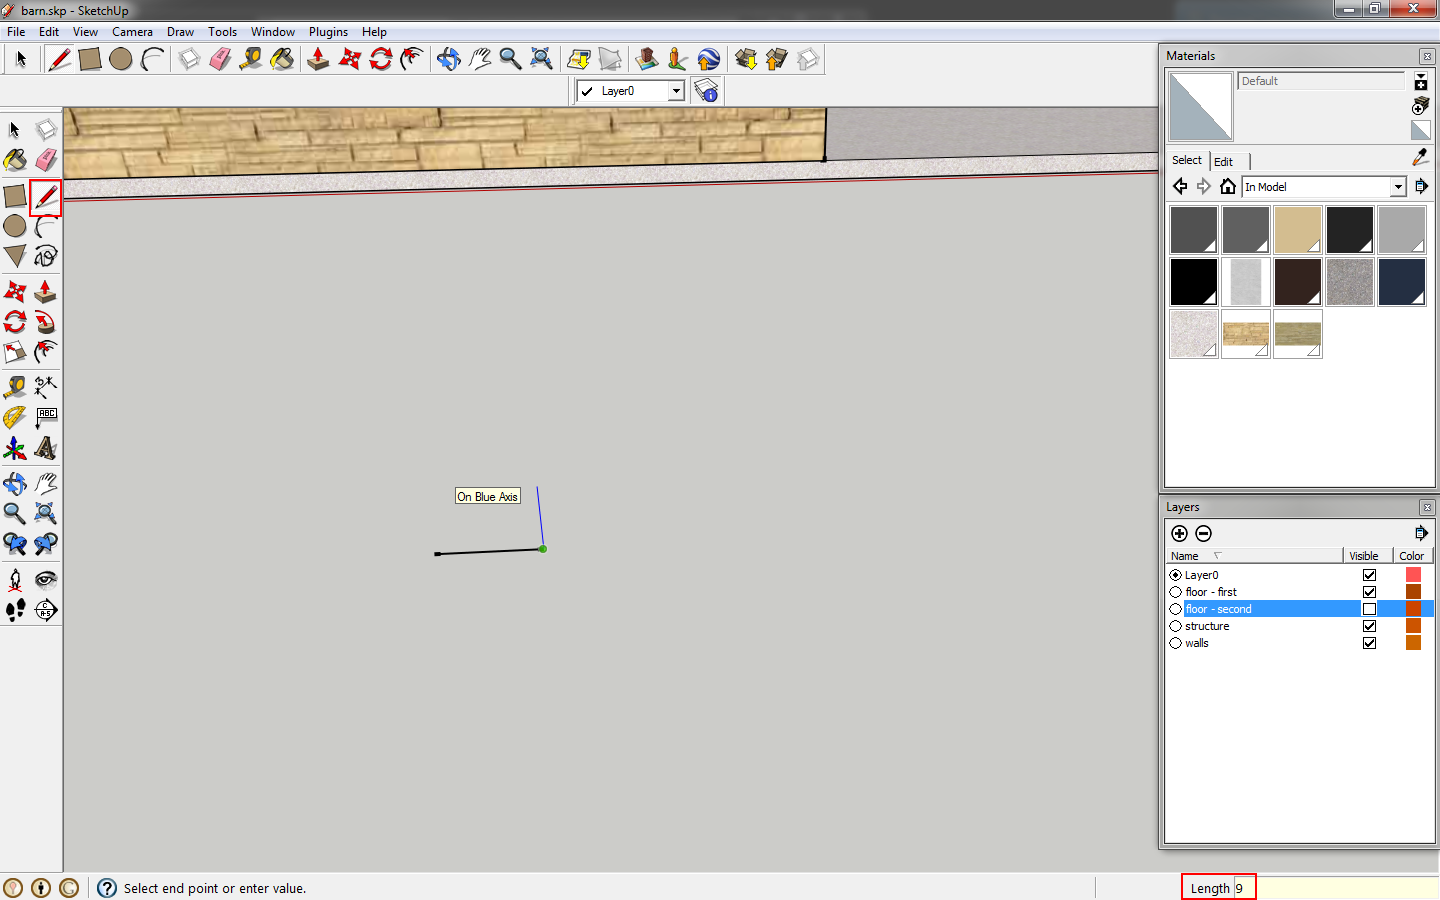 |
| Draw a triangle to create the slope of the roof. |
Click the
tape measure tool or key in
t. Click the edge of triangle, and notice that when you drag away you have a guideline following your cursor. Click again on the triangle edge. A guide is created.
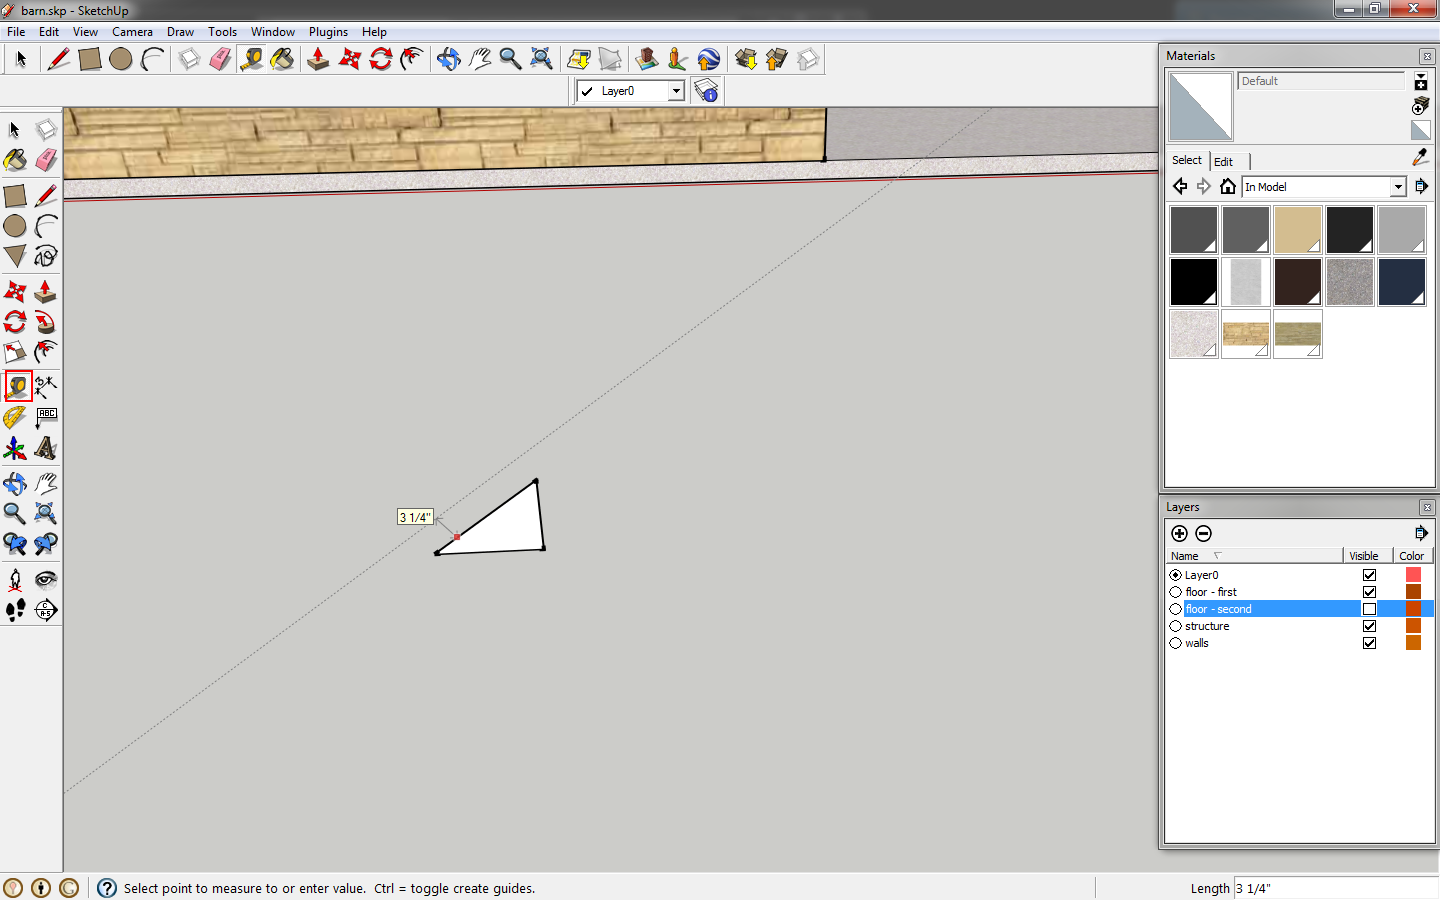 |
| Create a guide line that is parallel to the slope. |
Use the
line tool or key in
l to draw a line that will snap to the guide. Select the triangle, line, and guide, making them a component called
Roof- Main Building. This roof has a 9/12 slope, which mean it rises vertically 9" for every 12" horizontal run. Move the end of the line to the top of a wall corner.
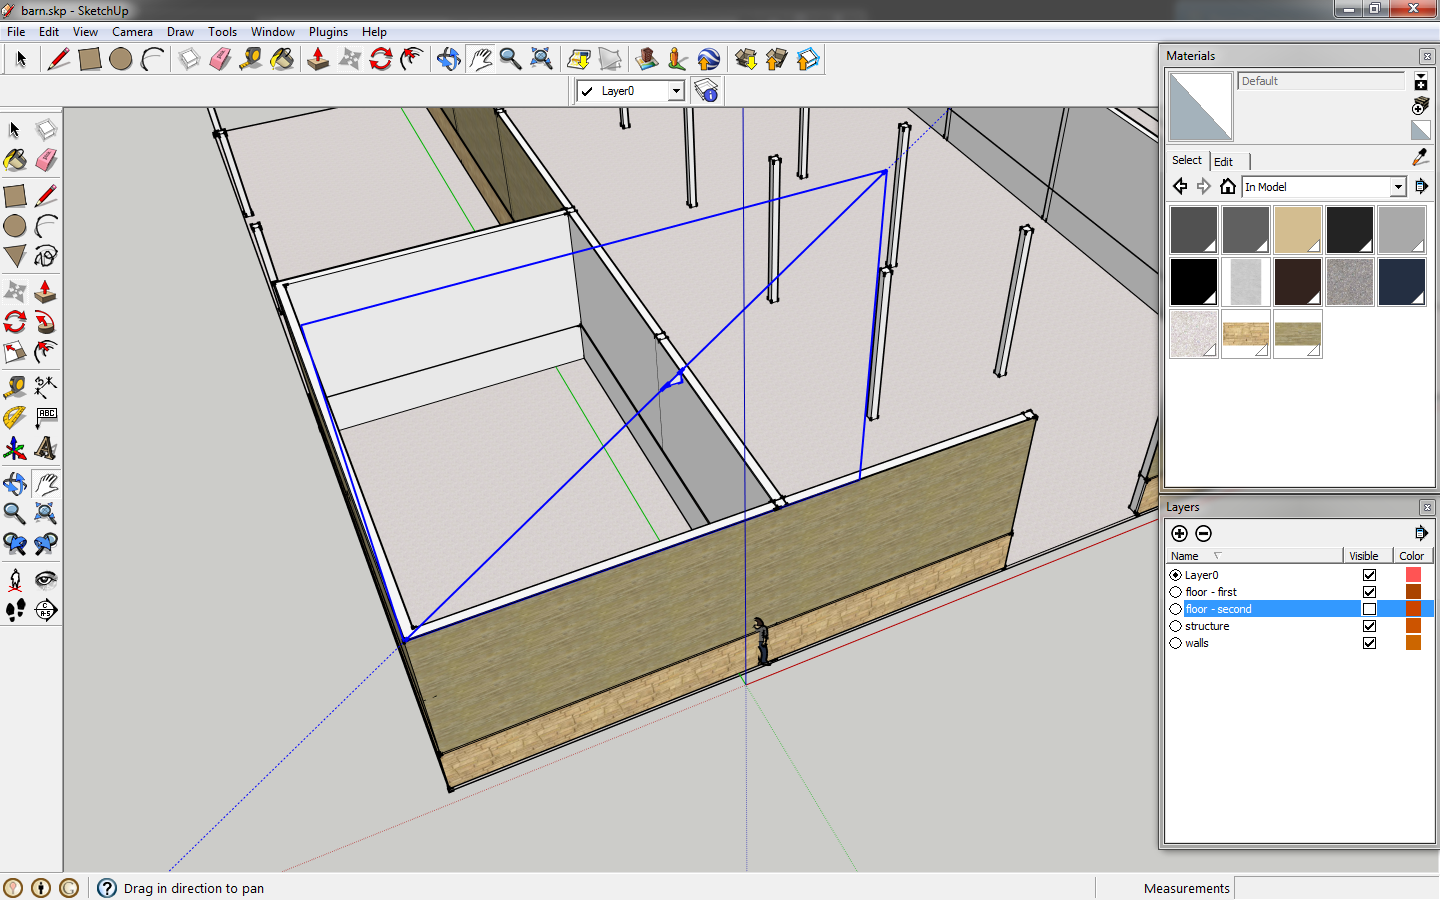 |
| Draw a line along your guide and move the line to the building corner. |
Edit the component, copy the angle. Then click
s or the
scale tool. Drag to the left and key in
-1. This mirrors the line. Sketchup does not have a dedicated mirror tool.
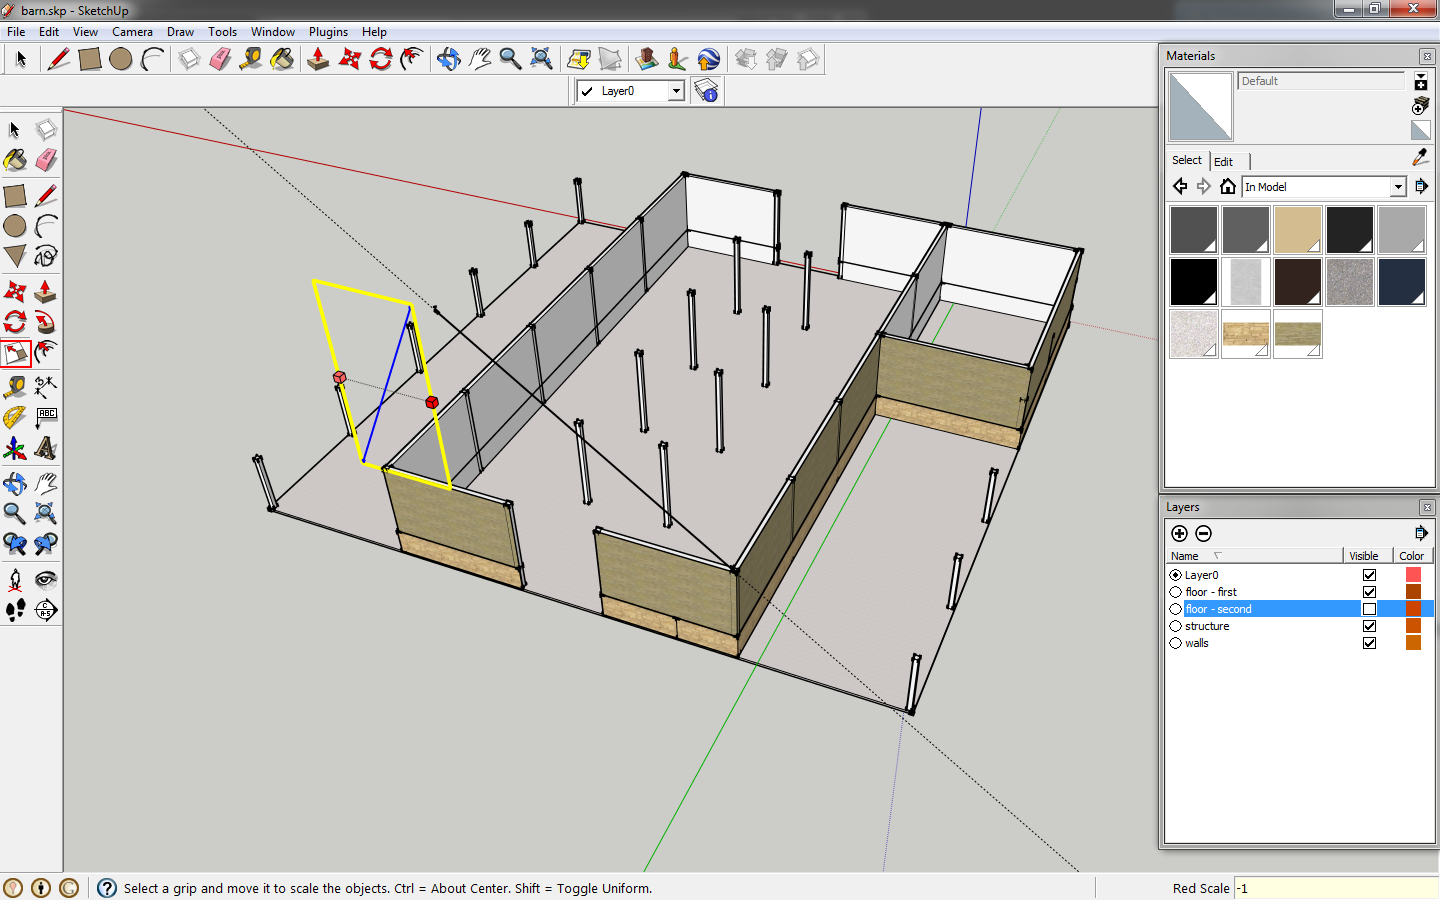 |
| Mirror the angle. |
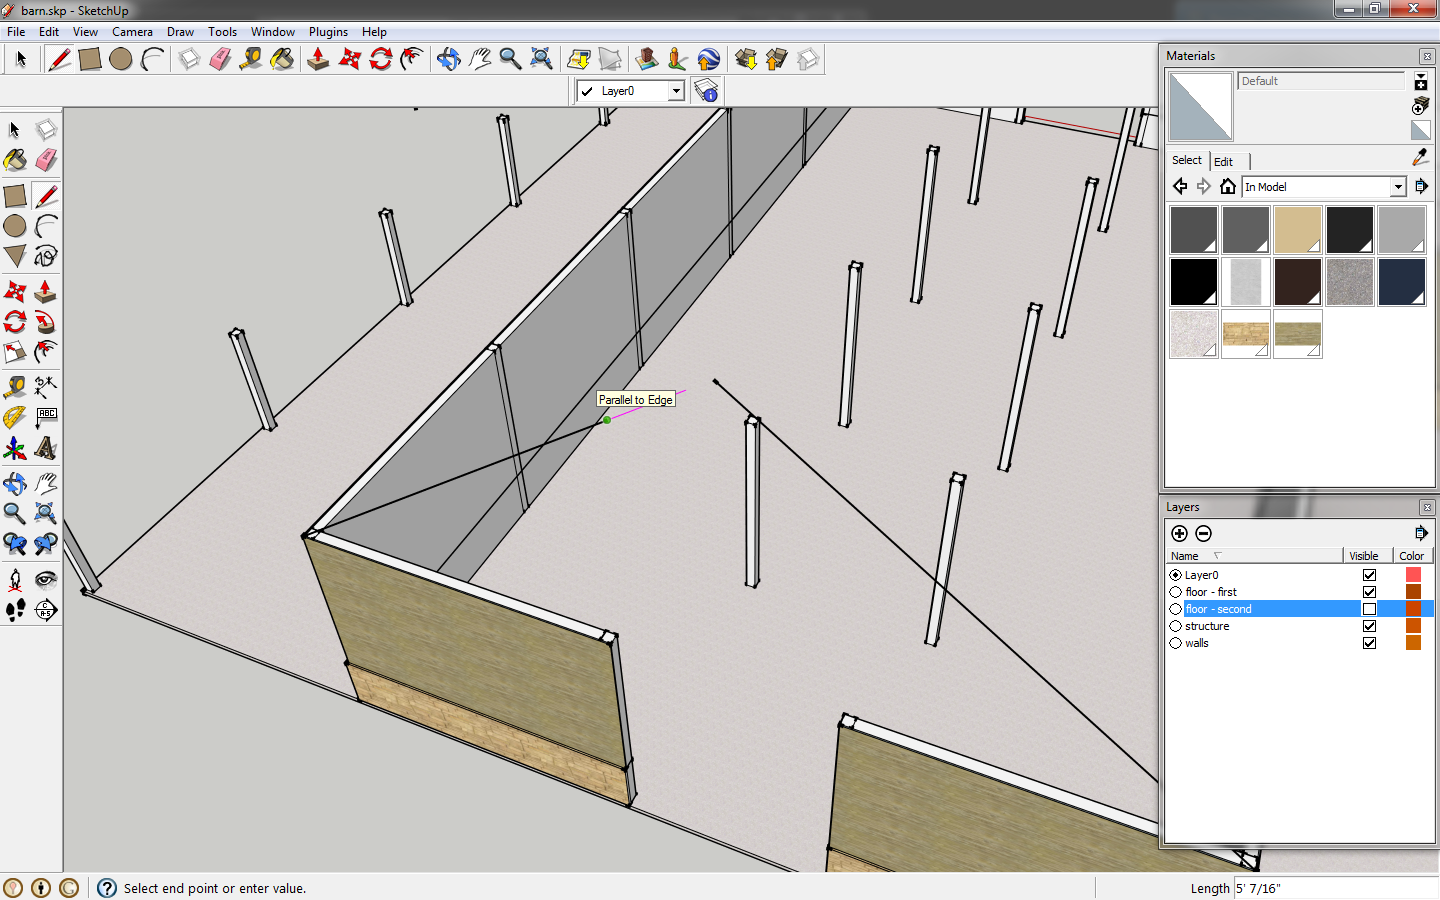
Move the line to the opposite corner, click
l or the
line tool and draw from the top end point at a parallel angle. The line needs to turn pink/purple which indicates the line you drawing is parallel. Do this to both sides to connect your triangle.
 |
| Extend the lines of your triangle to meet. |
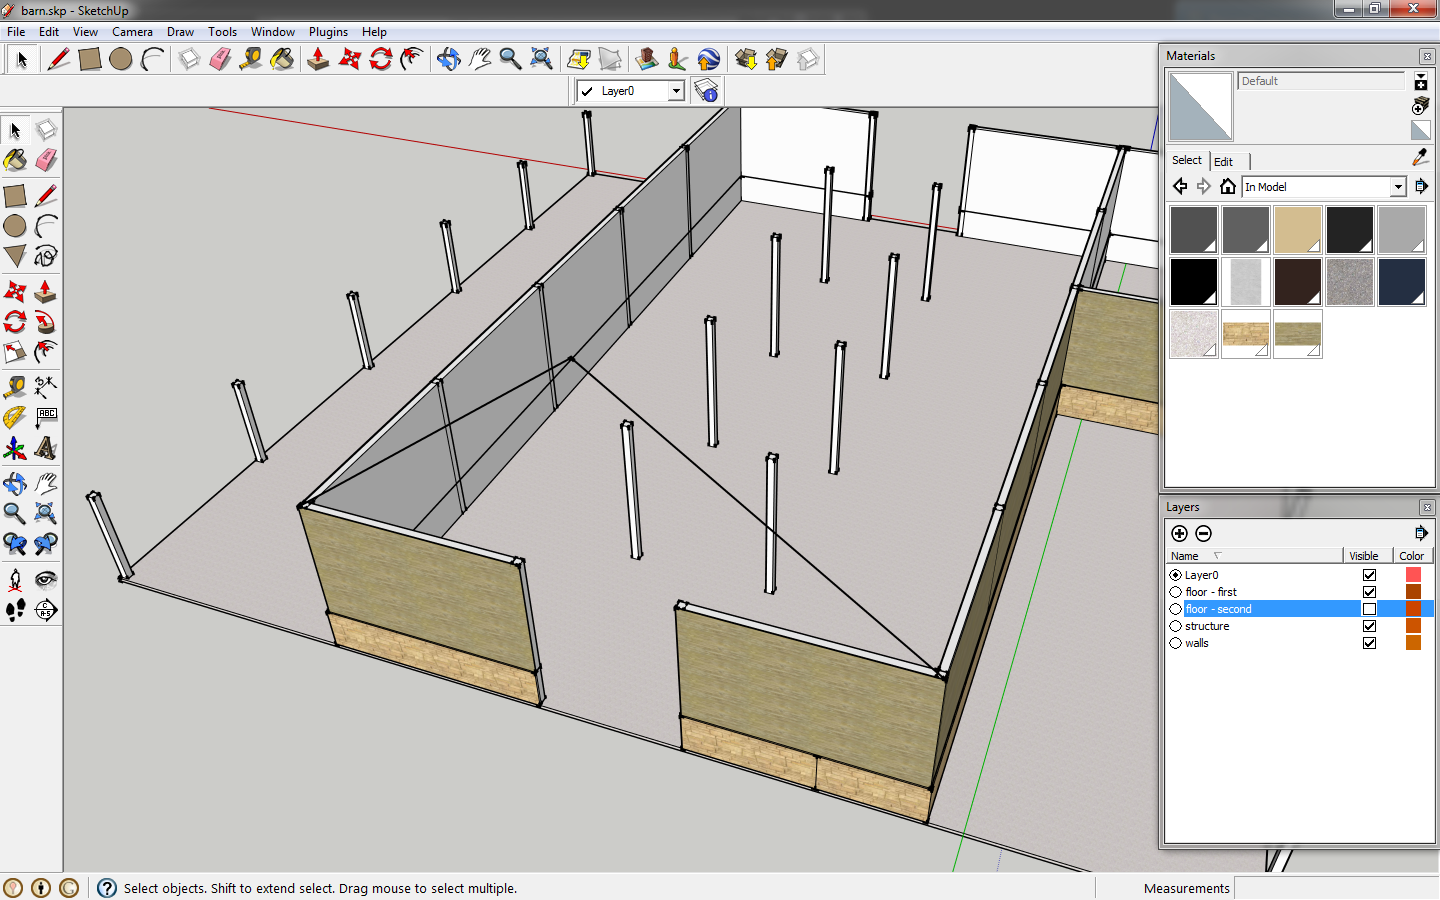 |
| This is the basic shape of your roof. |
Using the
tape measure tool, draw a vertical guide 12" off the corner of the building.
 |
| Use the tape measure to create a guide for the roof overhang. |
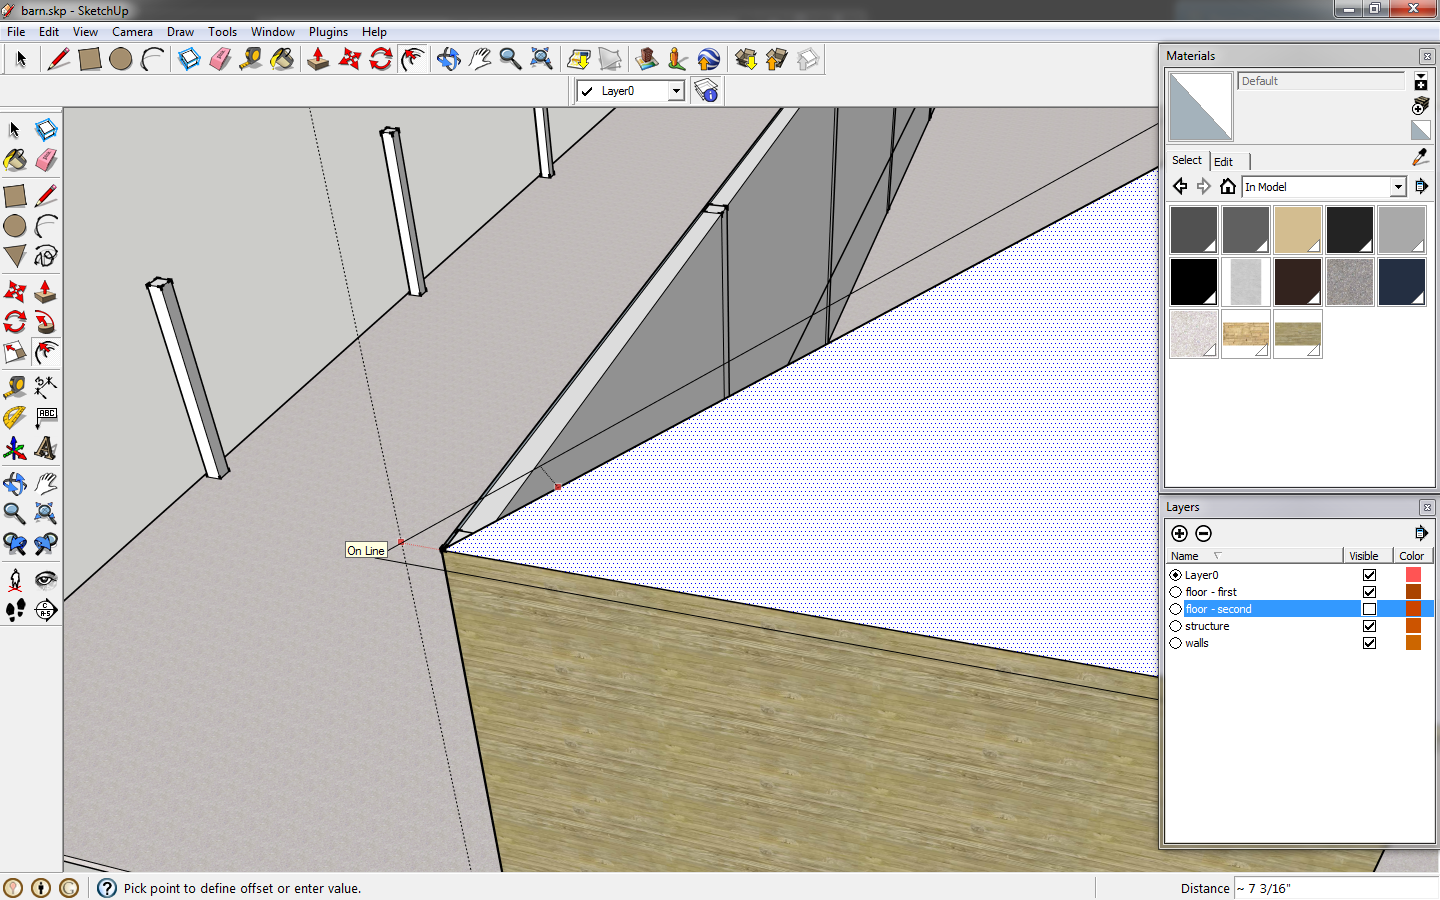
Use the
offset tool to offset the triangle to the guide. This will give our roof a standard 12" overhang.
 |
| Offset the triangle and click on the guide. |
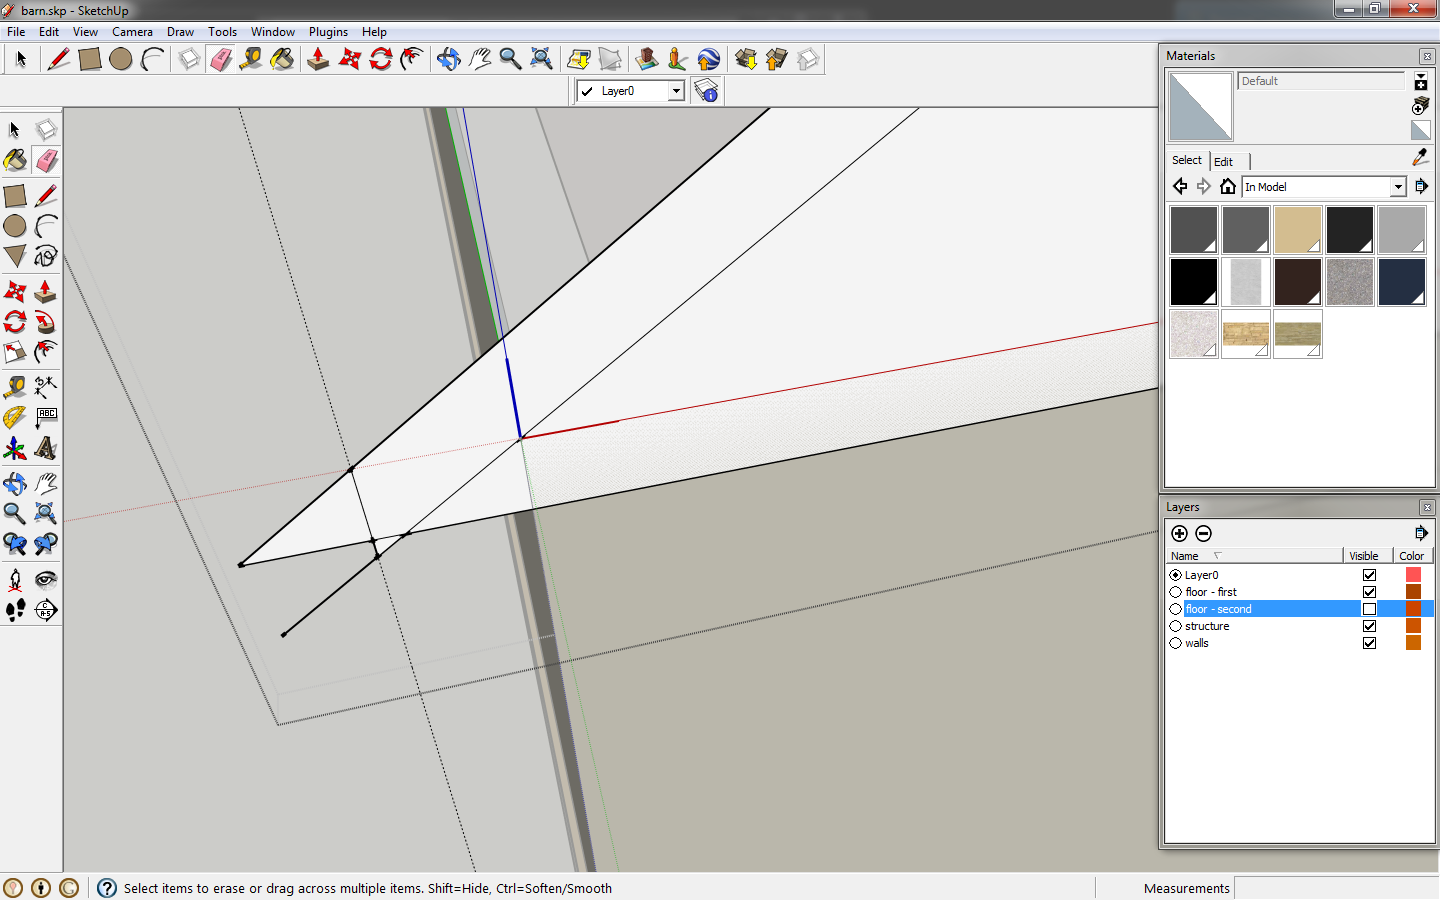
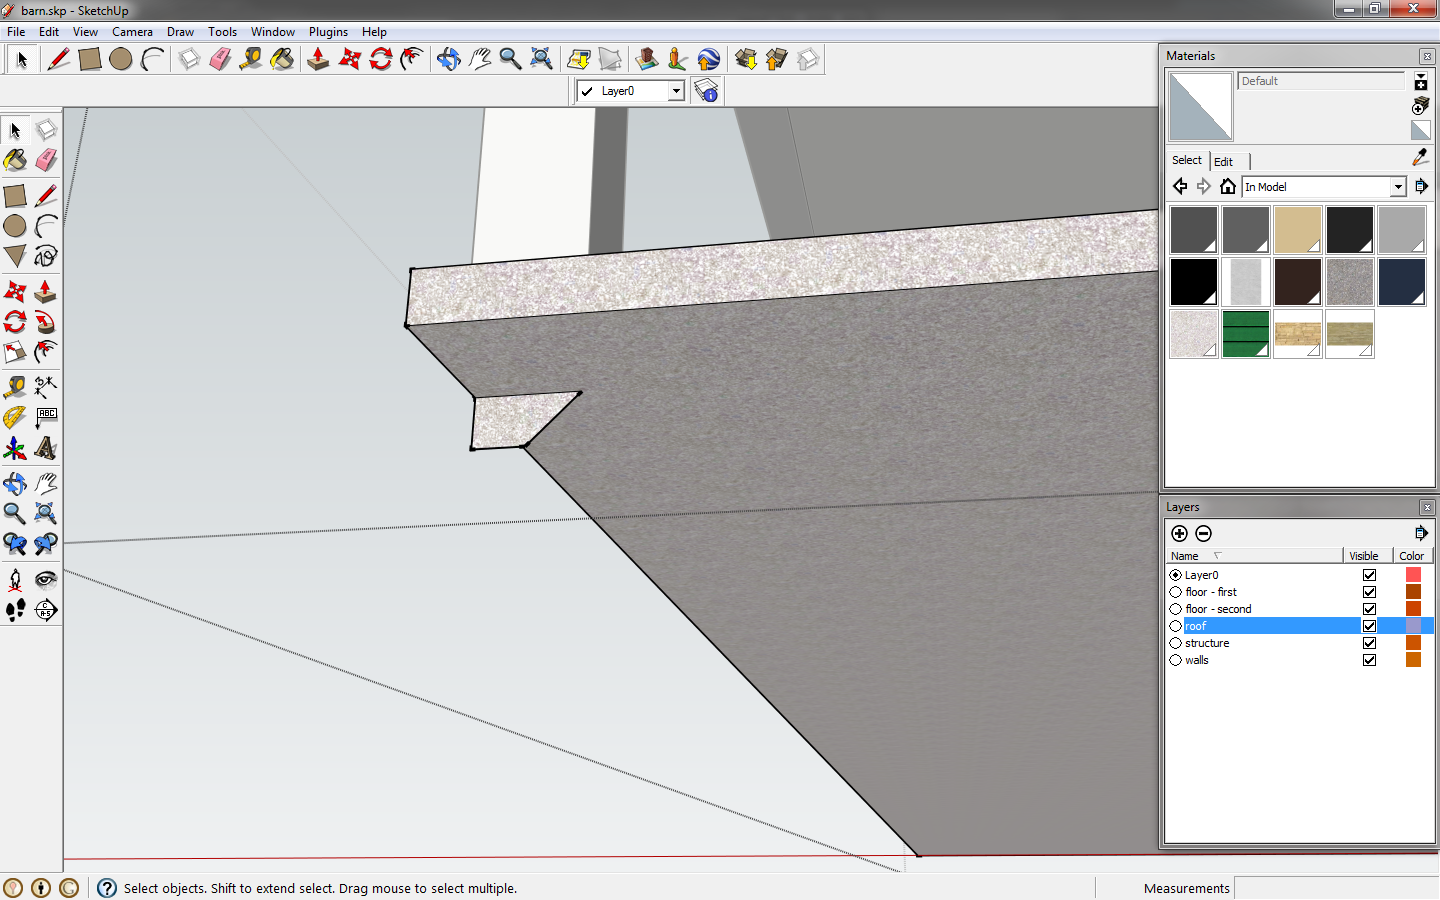
Draw and delete to get the profile below.
 |
| Draw a vertical line on the guide. |
 |
| Draw a horizontal line back to the building to represent the soffit. |
You only need a profile for half of the roof. Draw a vertical line from the peak down, and delete half of the roof profile. Exit the roof component.
 |
| The roof profile. |
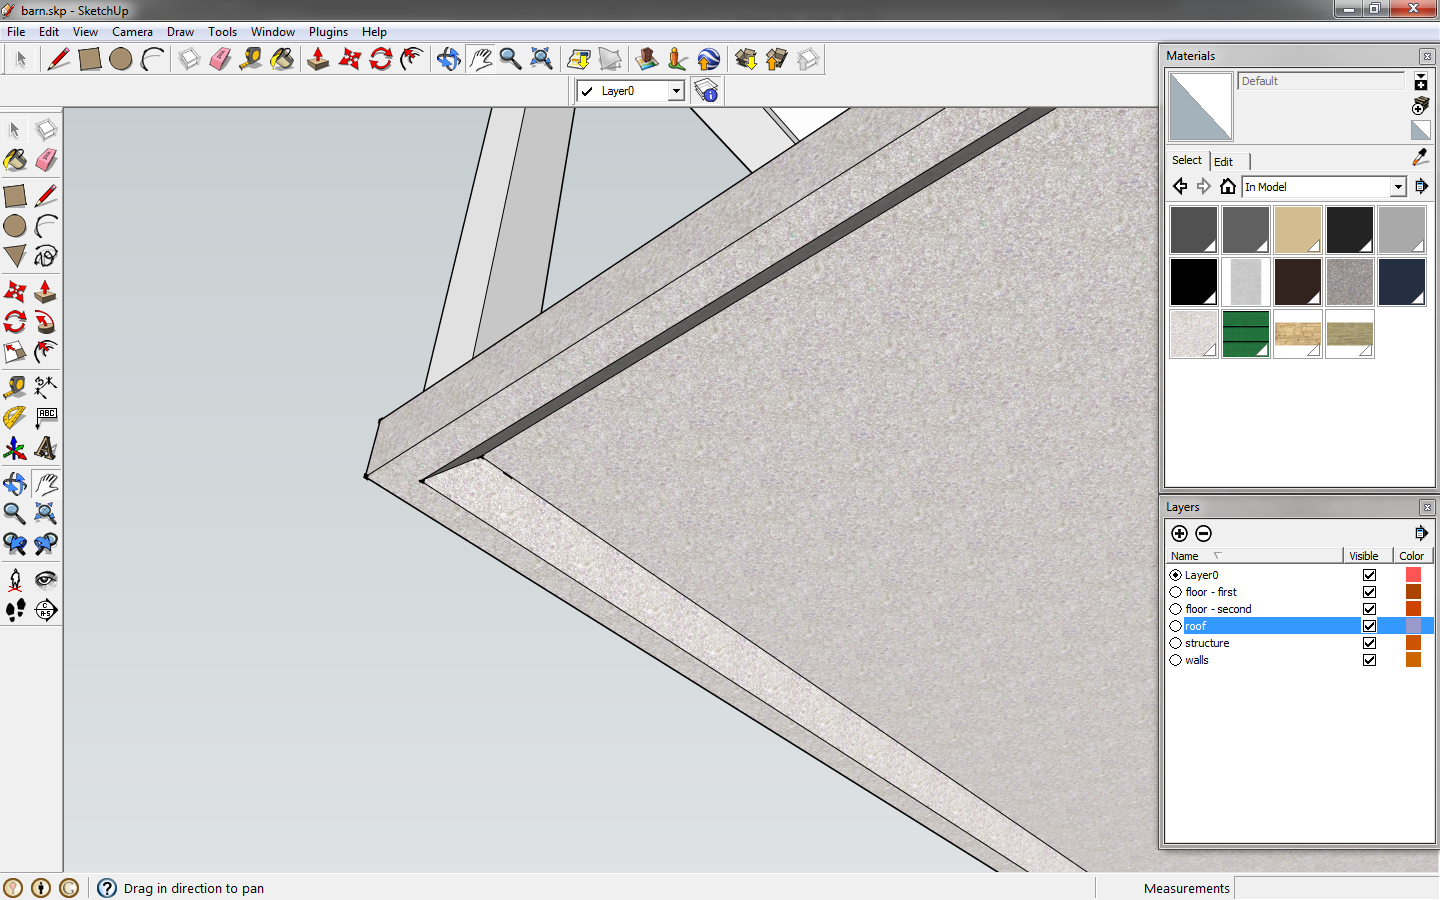
Copy and mirror the profile component with the scale tool.
 |
| Mirror the roof profile. |
Edit one of the profiles and
push/pull it. The roof should extend 12" past the short wall of the building. Since it's a component, editing one, edits both.
 |
| Extend the roof. |
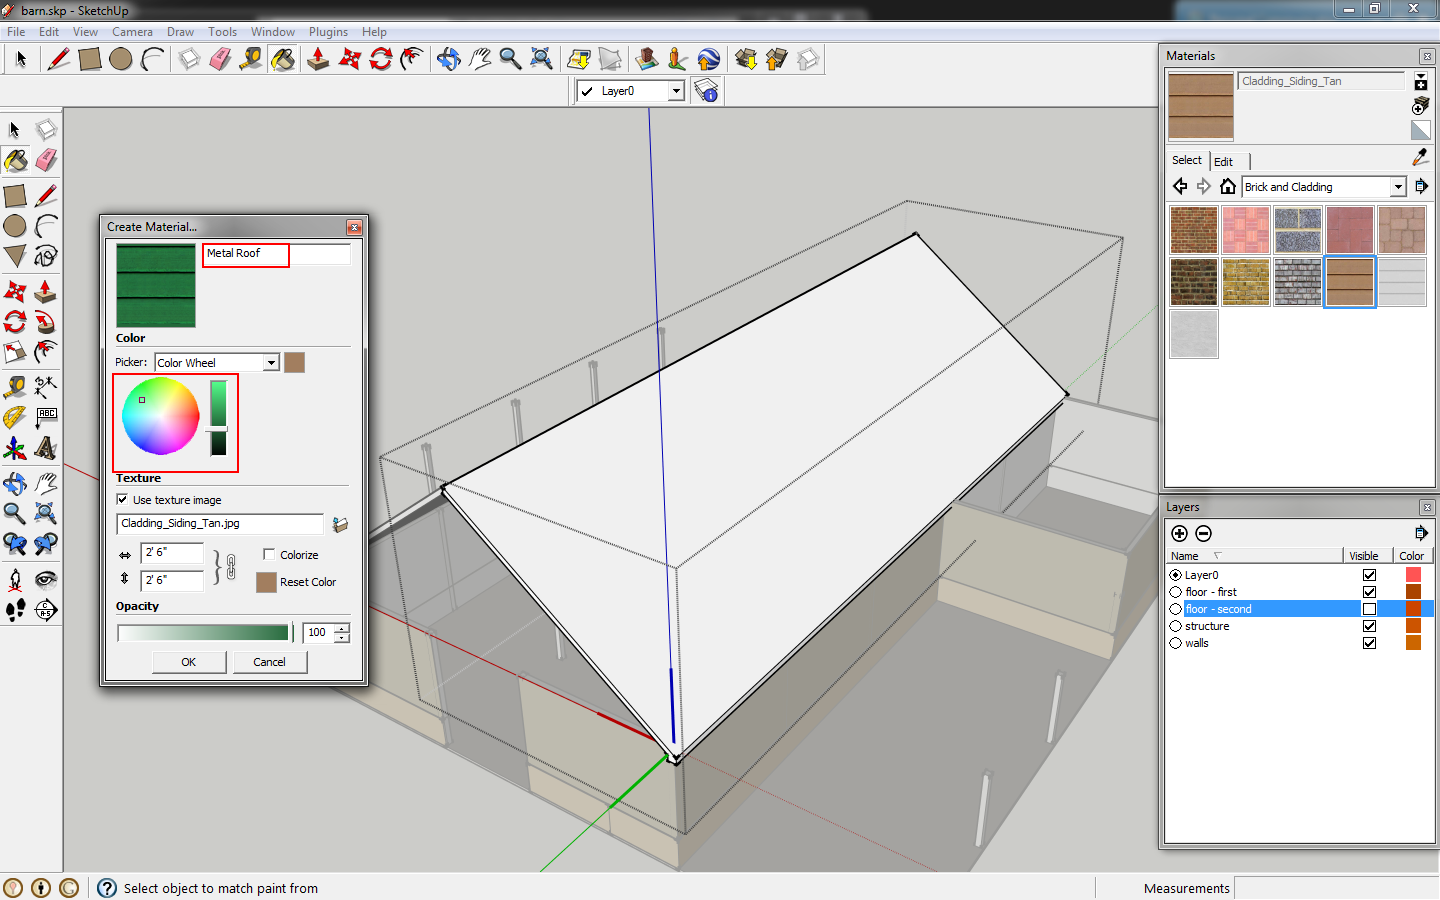
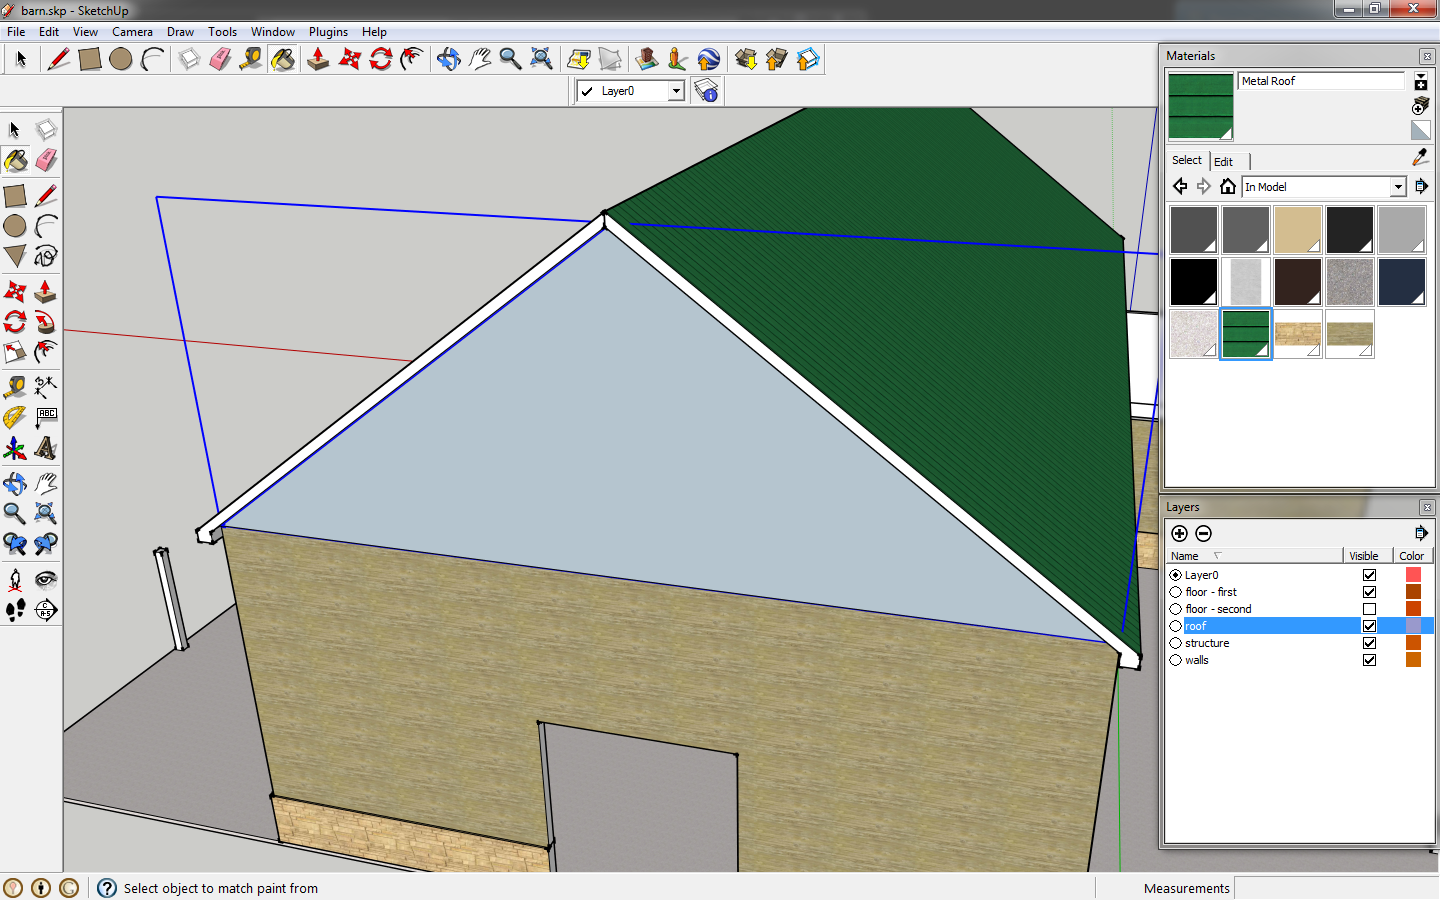
Go to the
materials window, select
brick and cladding, and the
cladding_siding_tan. Click
create new material. Rename it, modify the colors to suit and then apply the material to the roof. Applying a material to a component will change the materials of everything in the component as long as everything is the default material.
 |
| Create a new material for the roof. |
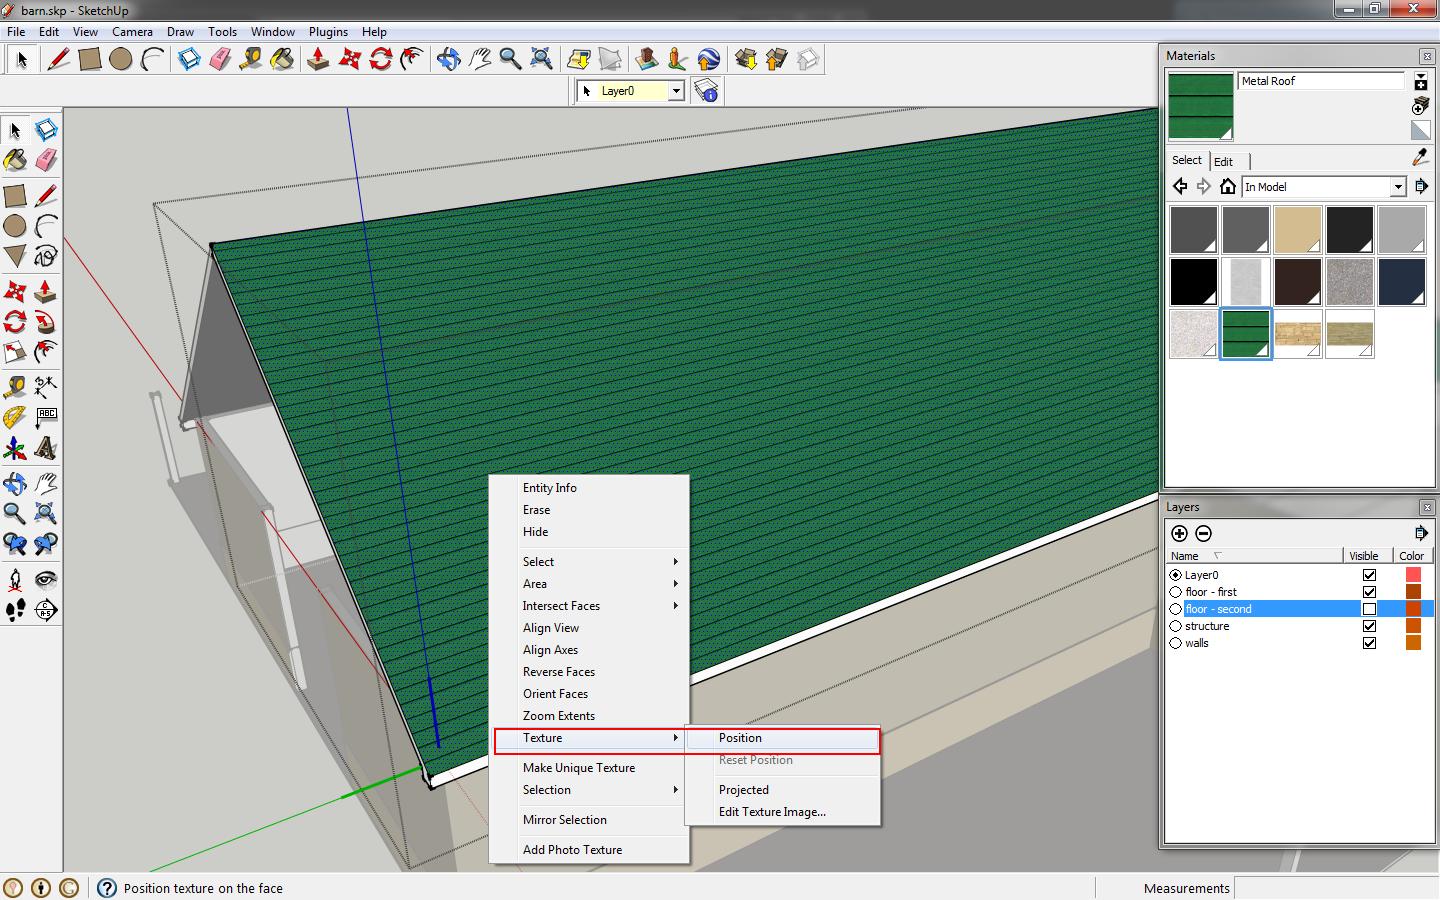
We need to reorient the material since it's running horizontal. The metal roof should run vertically. Right click the roof, select
texture, position.
 |
| Reorient the texture. |
Grab and hold the green pin, which will rotate the texture, it will snap at 90* and snap to the correct scale. The red pin moves the texture, the blue pin distorts the shape, and the yellow changes the perspective.
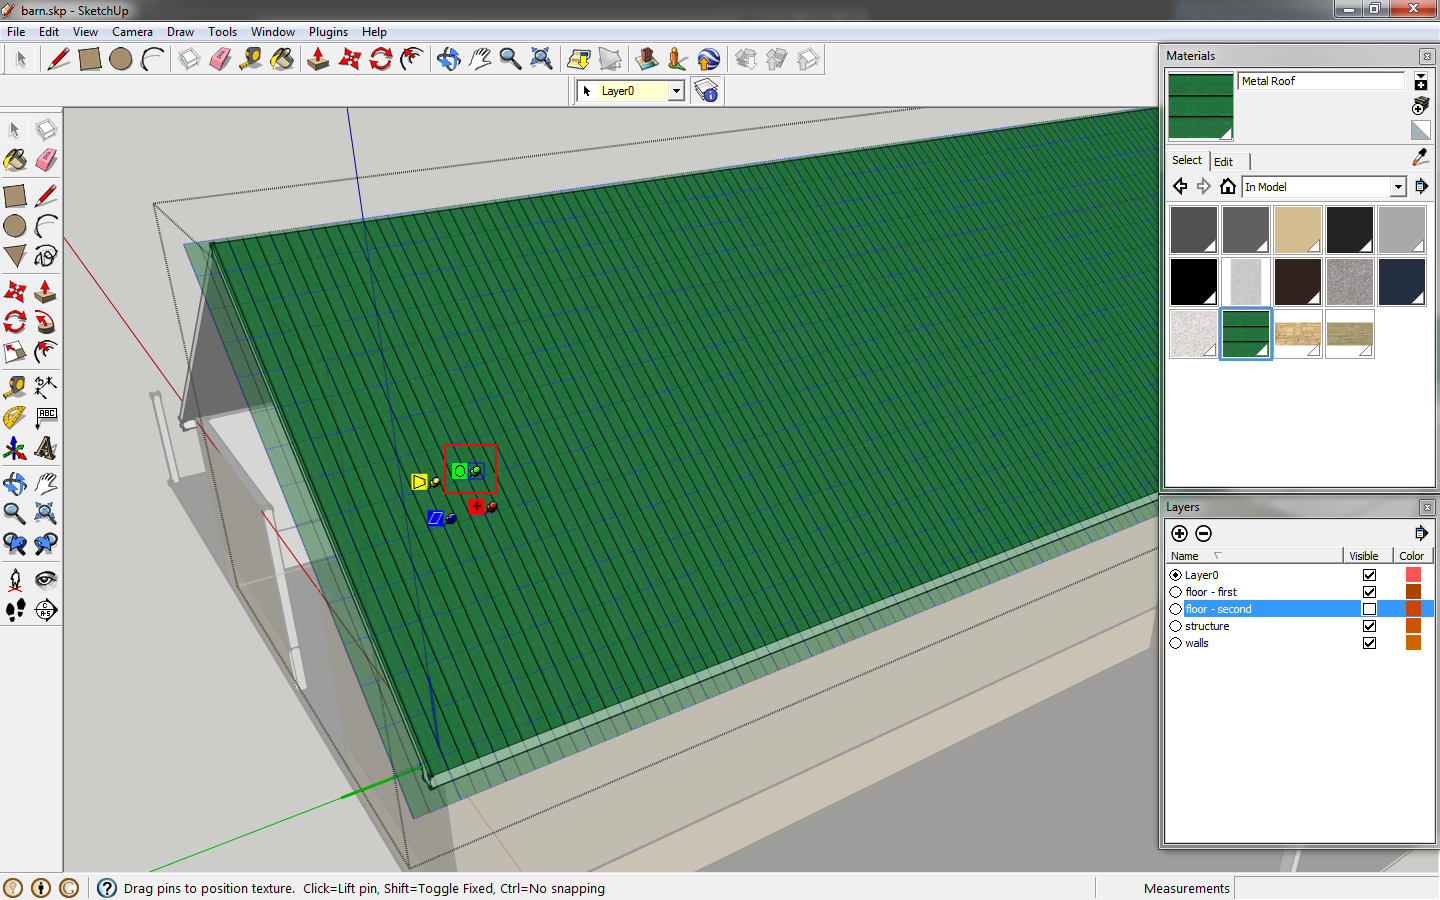 |
| Rotate the texture. |
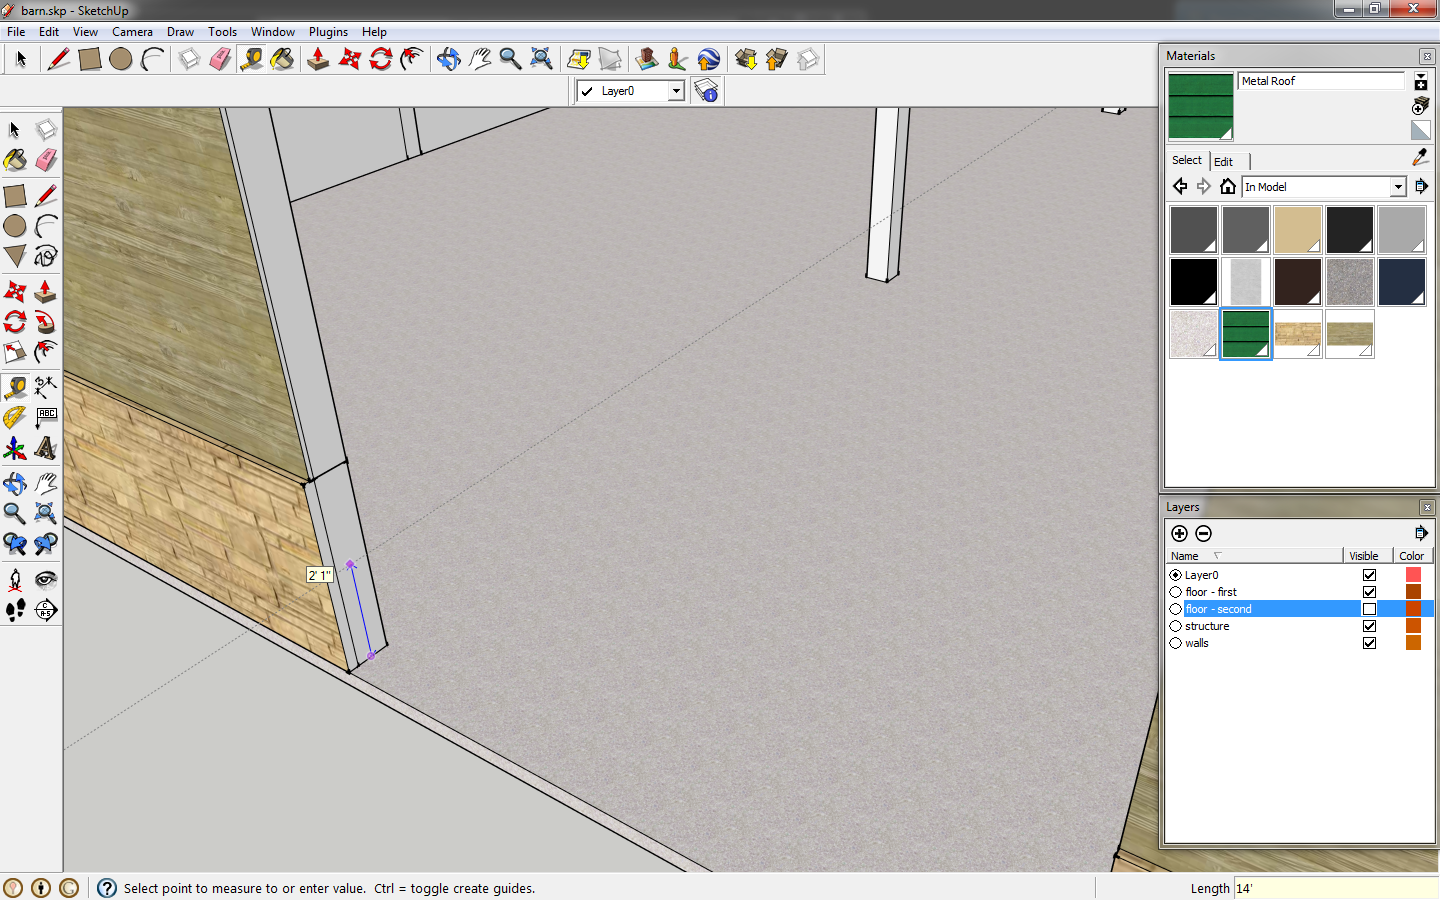
Raise the roof 9' as the second floor needs a 9' clear head height. Next,
push/pull the walls up 9' as well.
Now, let's frame out the doors. We want them 14' tall. Pull the jambs out 2" on each side to create a 13' opening. Do this for the wood siding and stone portion of the wall. Using the
tape measure tool, click the bottom edge of the door jamb then move your mouse up and key in
14'. Draw a horizontal line along the guide.
 |
| Draw a guide for the top of the door opening. |
 |
| Draw a horizontal line along the guide on the wall. |
Pull the portion of wall above the guide and line to meet the other side of the door jamb. Delete the resulting vertical lines from the join. Do the same for the other side. This would also be a good time to add your roof components to the
roof layer.
 |
| Pull the wall to finish the door opening. |
 |
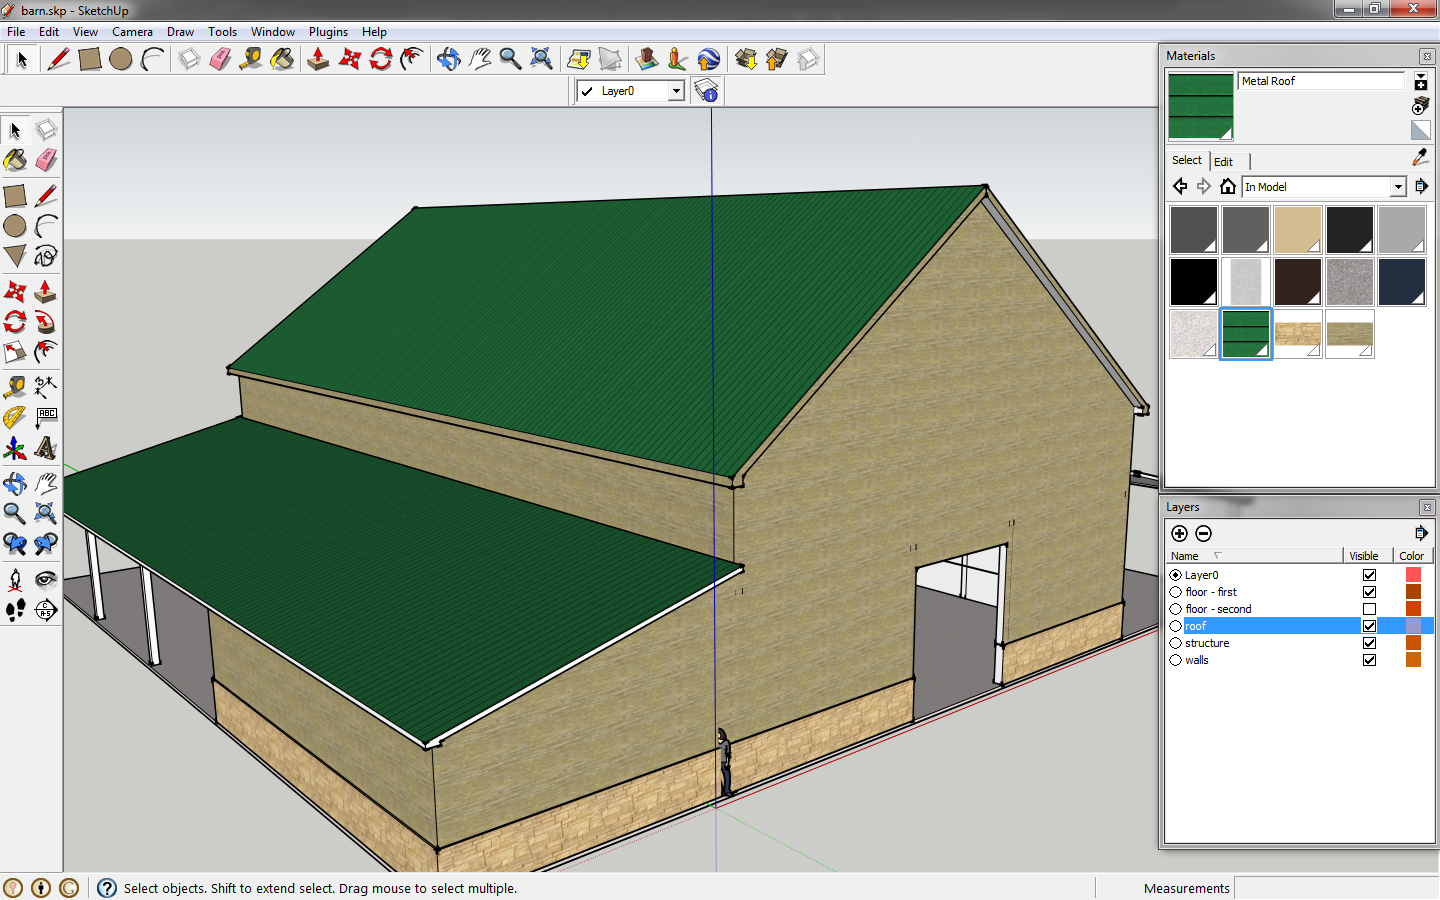
| Your model should look like this. |
Draw a triangle following the edges of your roof, then make it a component. This is your gable wall. Move it back 12" so it aligns with the wall.
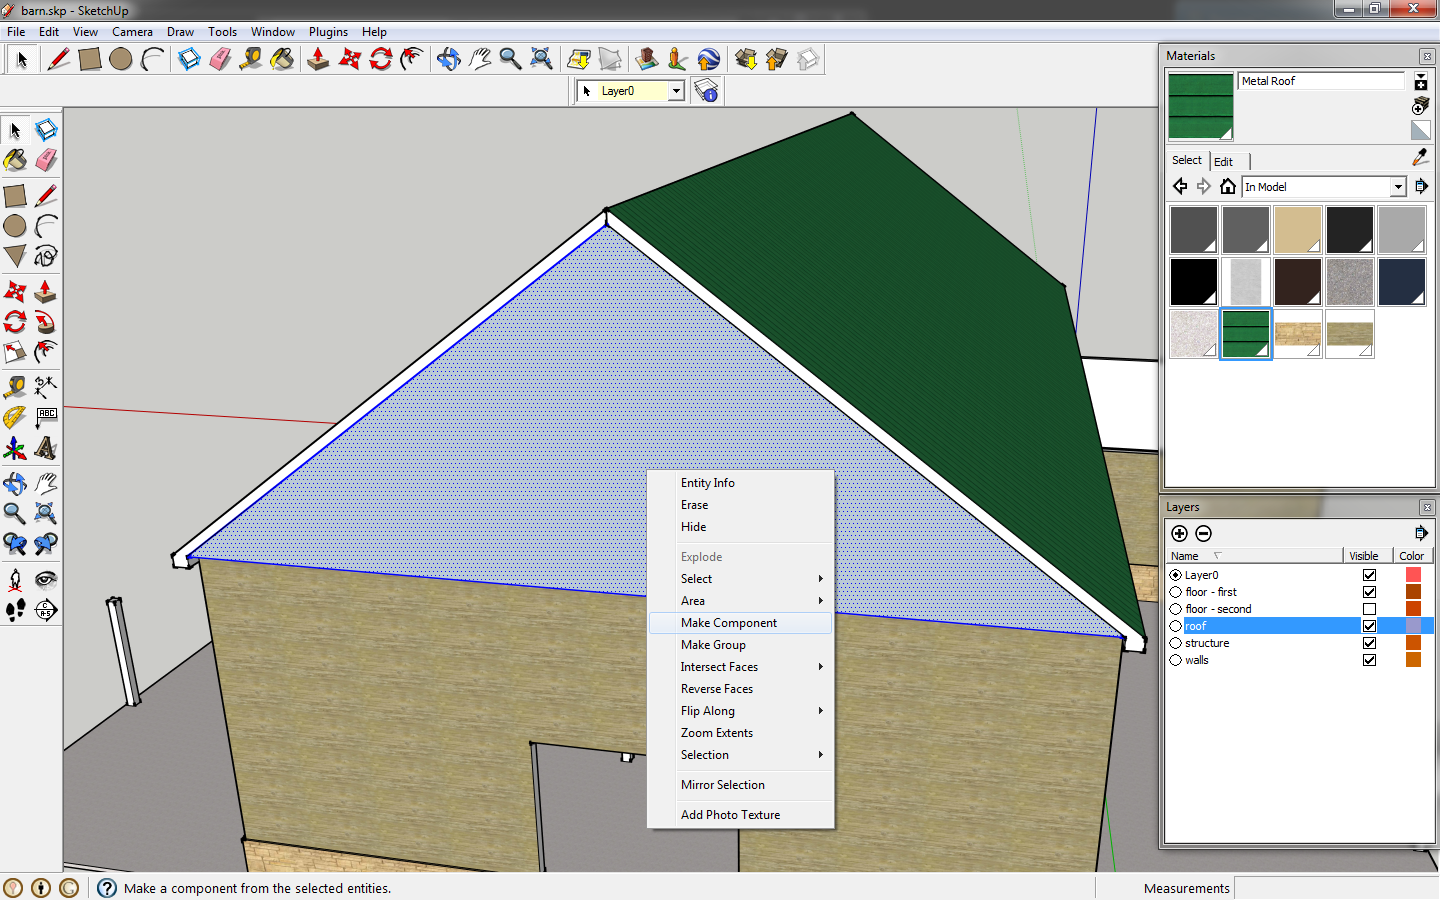 |
| Draw the gable wall. |
 |
| Move it back, flush with the wall below. |
Key in
b for your
brush tool. Click and hold
alt to sample the wood material on your wall, then let go of
alt and apply the material to your gable wall.
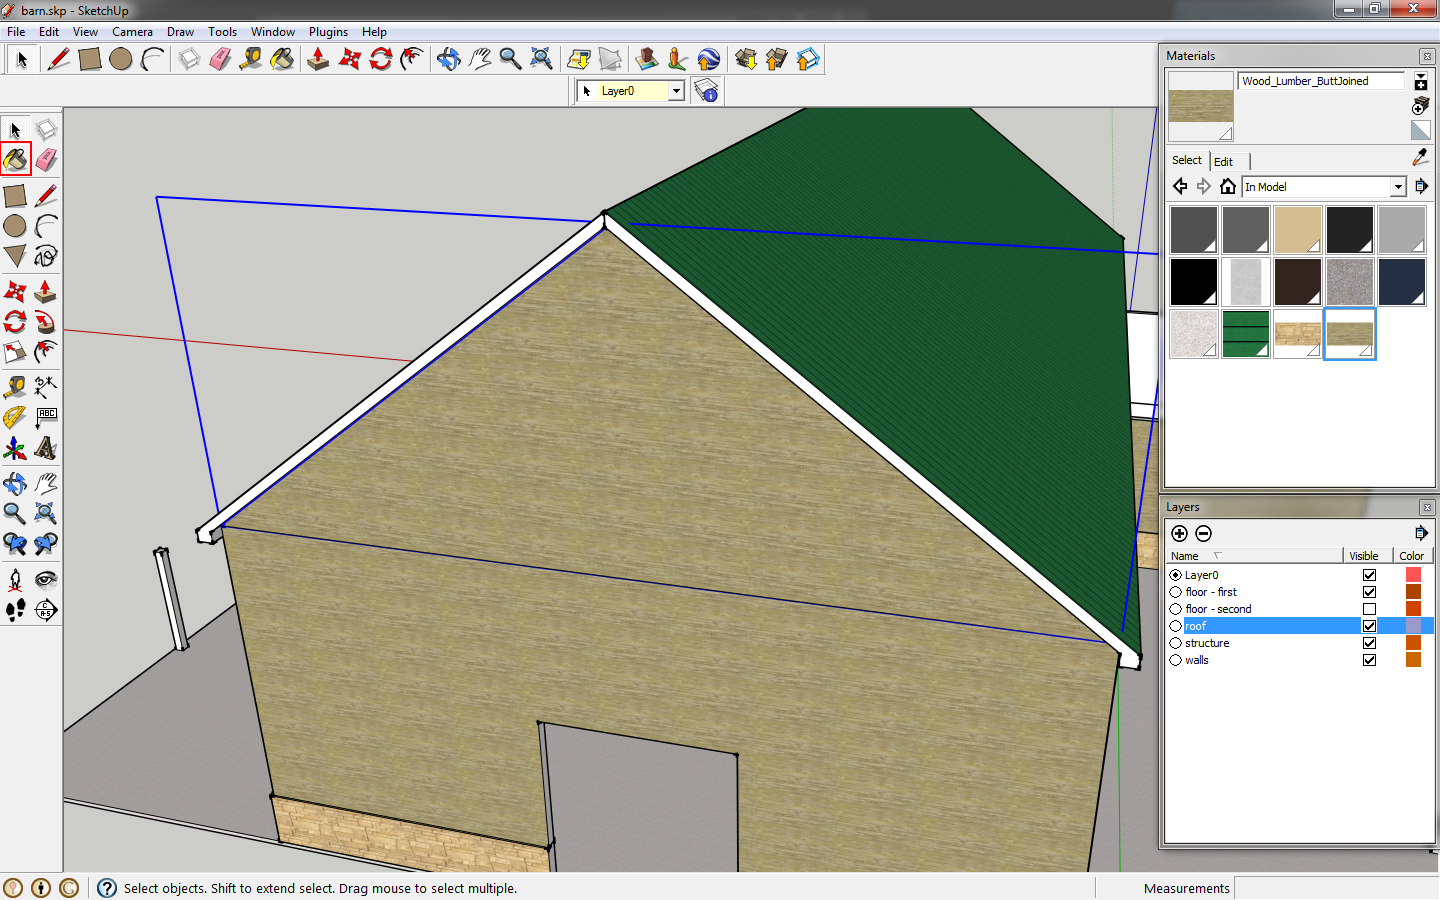 |
| Apply a material to the wall. |
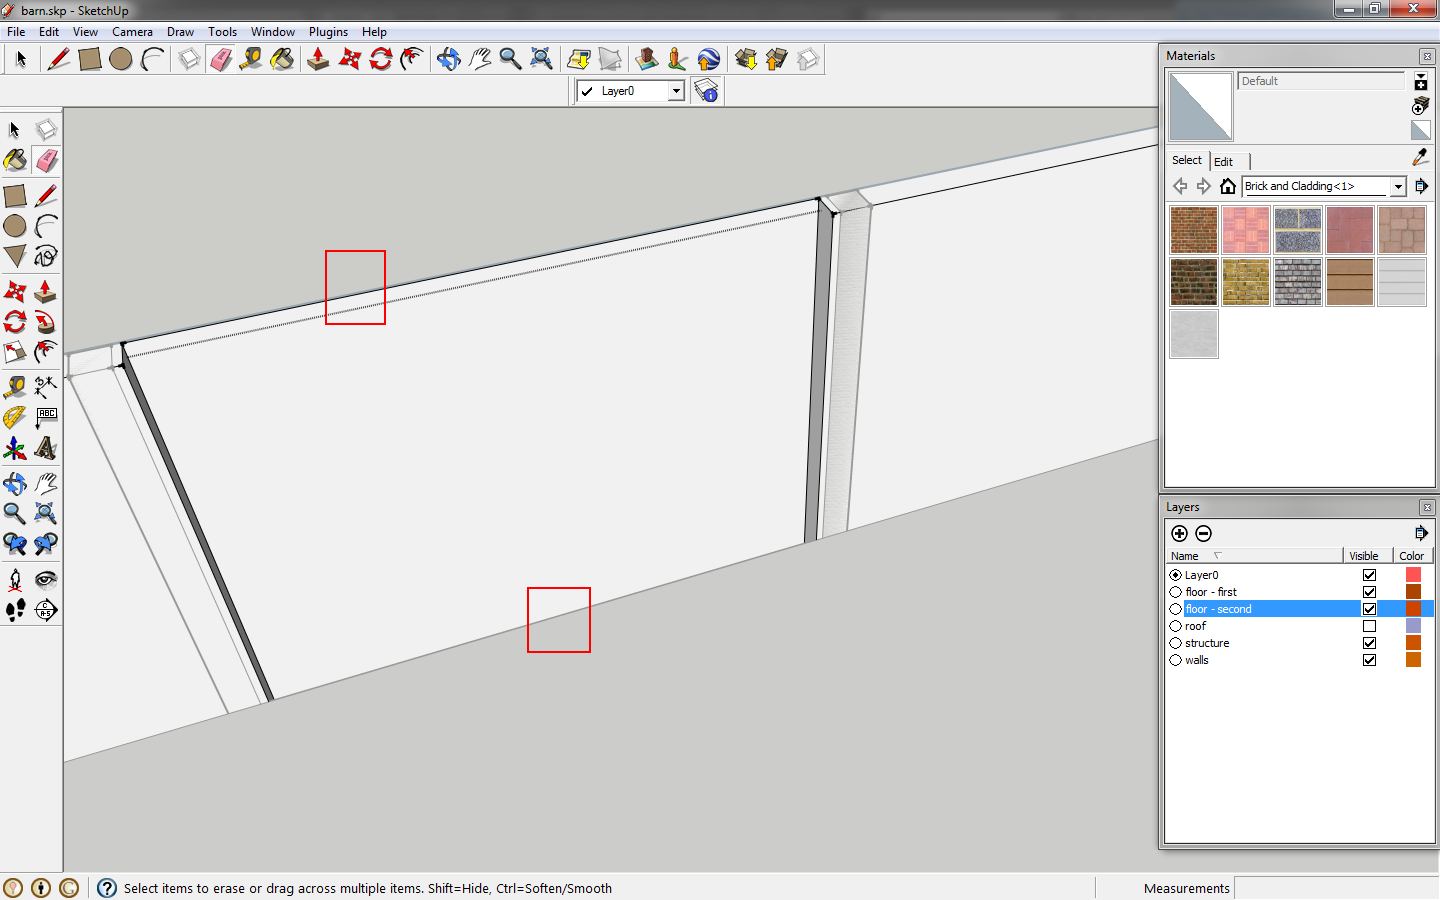
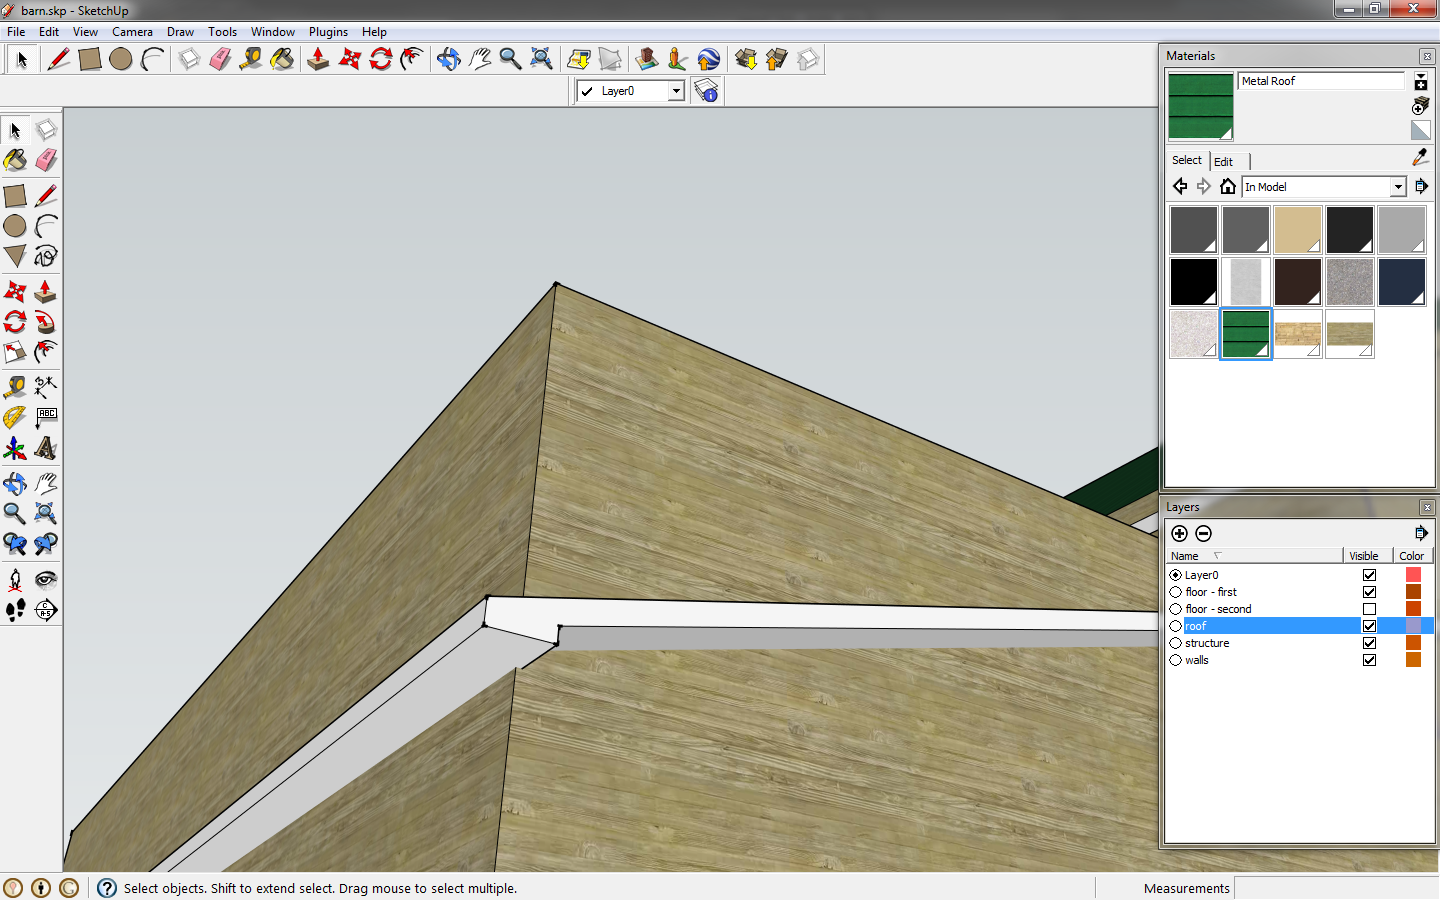
To remove the line between the gable wall and wall below, edit the gable wall component. Click
e or the
eraser tool. Holding
shift while using the eraser will hide the line instead of deleting it. Do the same for the wall component. We now have what appears to be a contiguous wall. Copy the wall to the other end, and hide the lines.
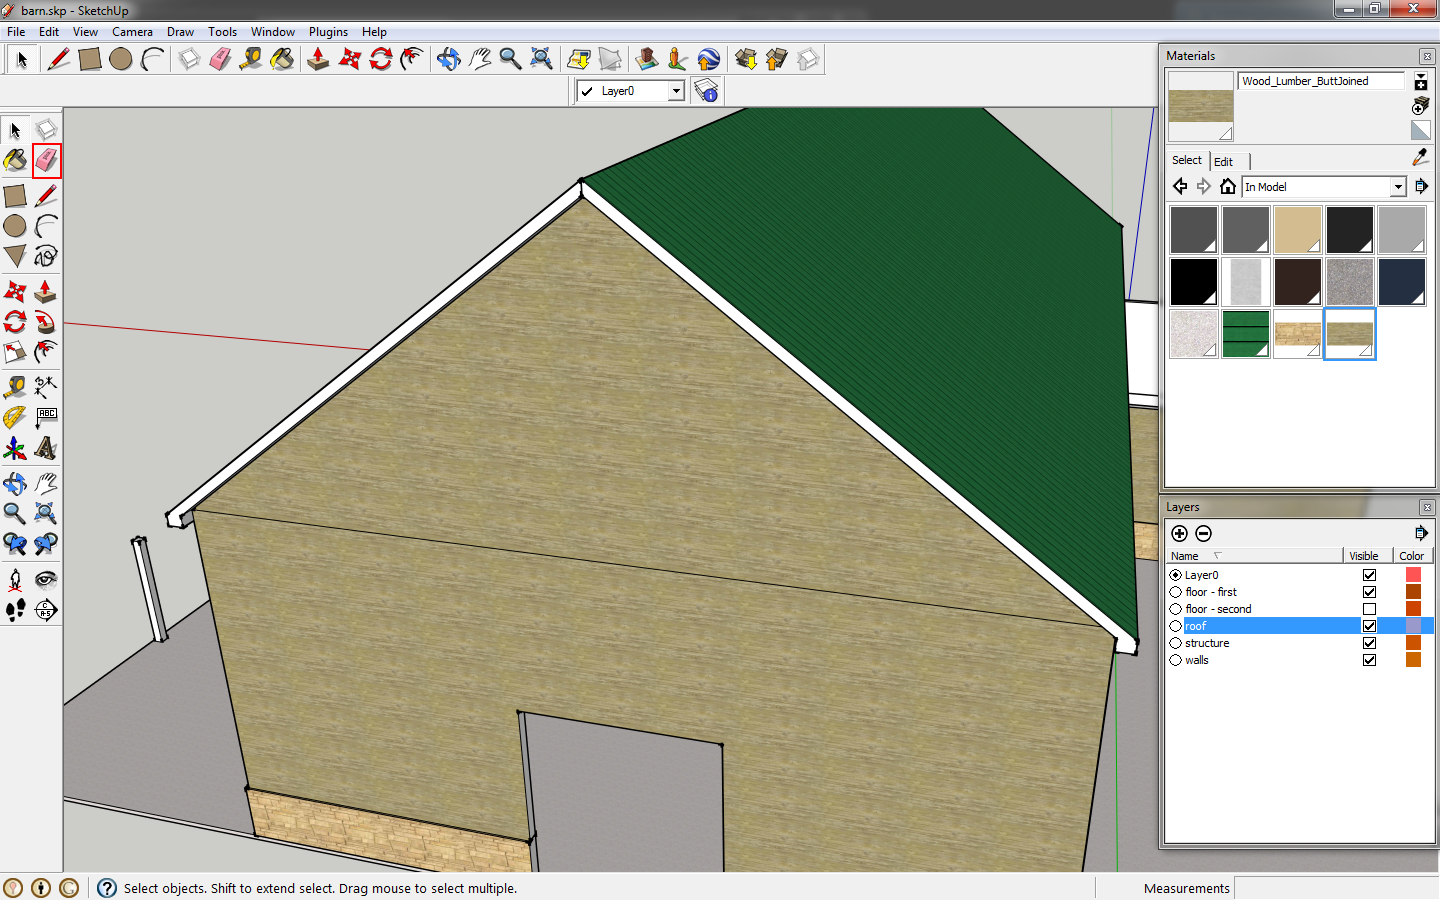 |
| Click the eraser tool to hide the horizontal line. |
 |
| Holding shift while erasing will hide the line. |
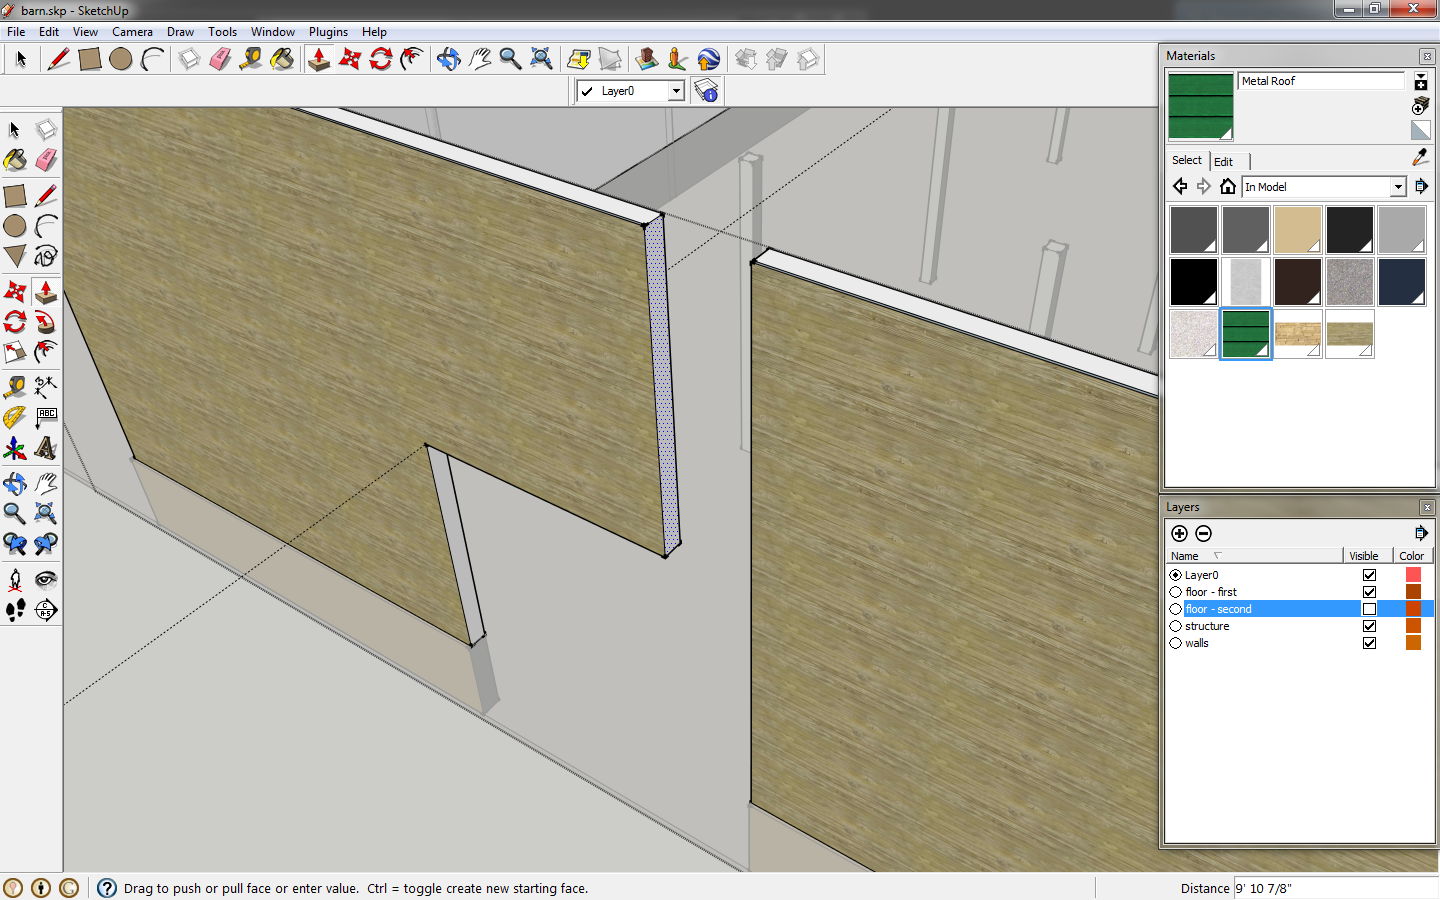
At the office area, draw a line across the top of the lower wall at the tall wall. You can delete the vertical lines above this wall, and then reapply the wood materials.
 |
| Draw a horizontal line connecting the top of the office walls. |
 |
| Reapply the wood material to the wall if necessary. |
Now we will draw the shed roof. This will have a 3/12 slope. So draw triangle with a 12" horizontal leg, 3" vertical leg, and connect them. Use the
tape measure or key in
t to create a guide. Select the items and make a component. Move the end of the angled line to the column. I raised the roof 24" for a better proportion. Draw a line at the intersection of the building and angle as shown. If you erase beyond that line, you will delete the extension of the line you can't see. Draw the roof profile with a 12" overhand and extrude it to the end of the building. Fix your columns.
 |
| The shed roof slope. |
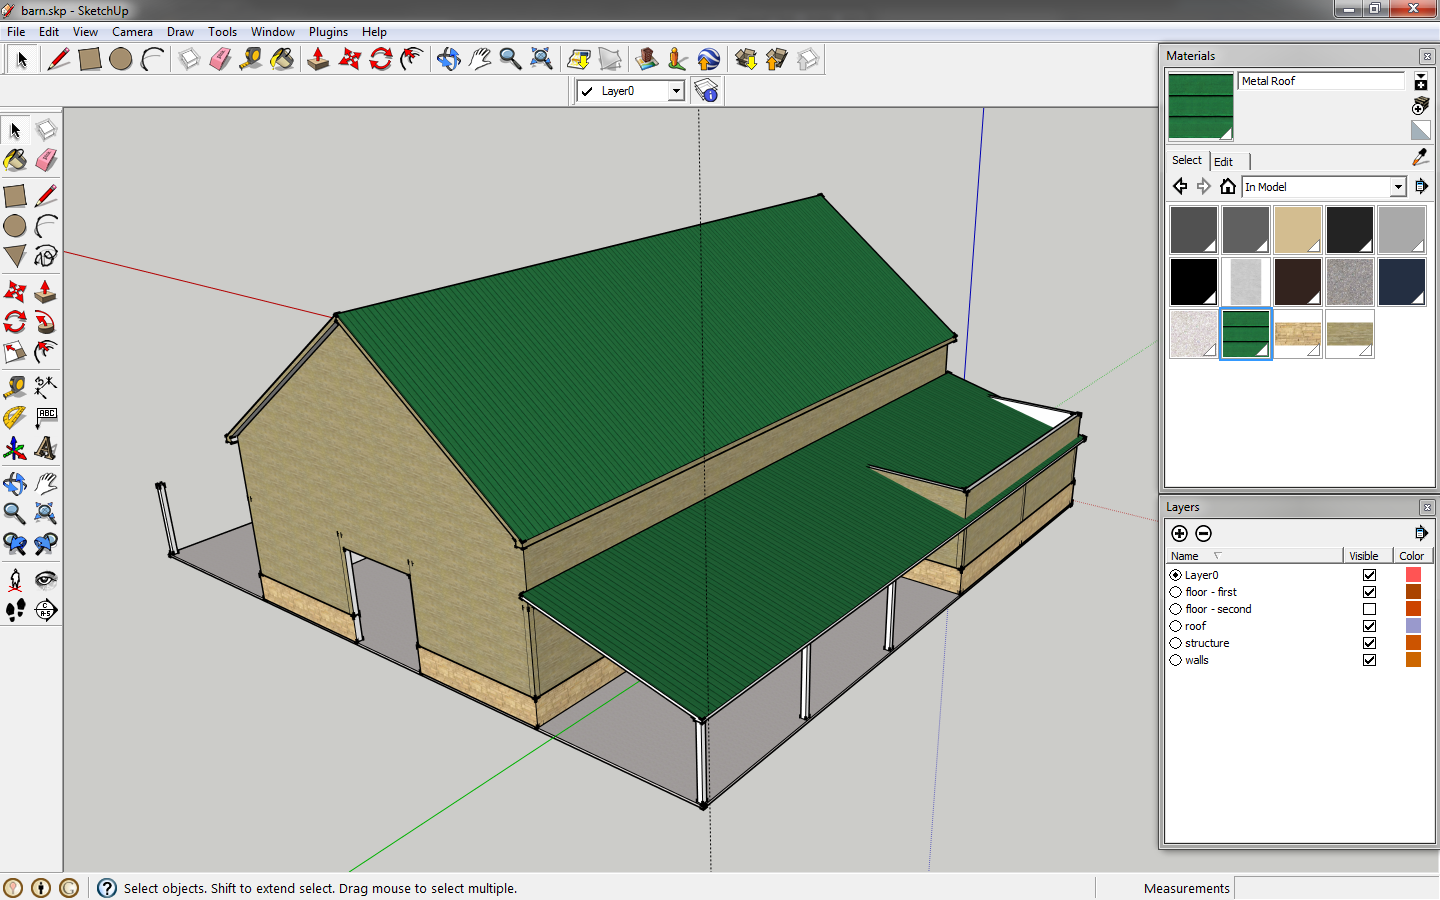 |
| Shed roof in place. |
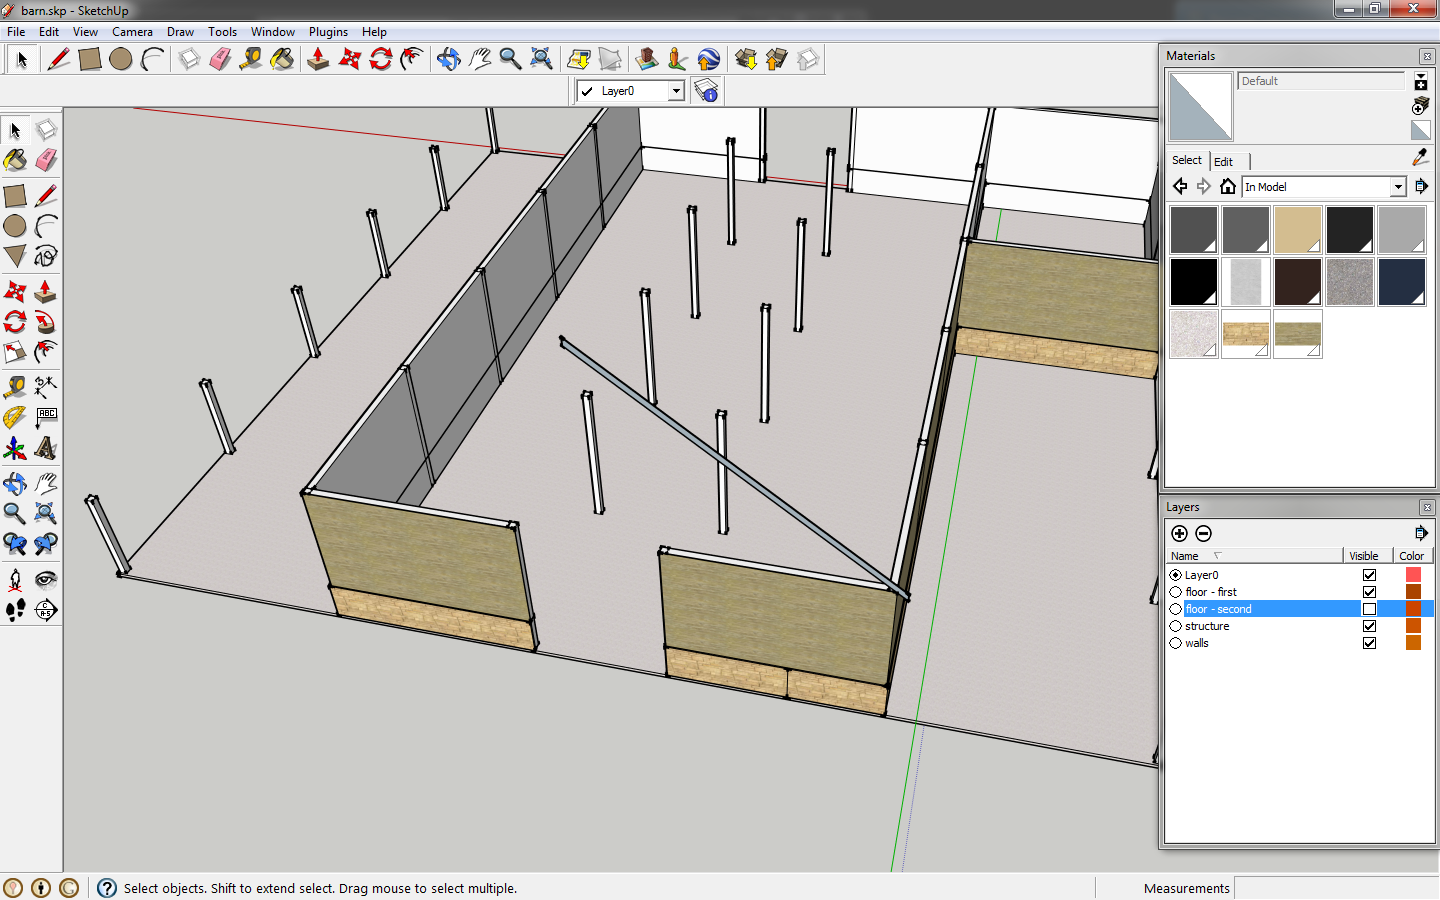
Copy the shed roof component to the other side and mirror it. Now we will fix the office. Measure the distance from the top of the wall to the bottom of the roof at the main building. Turn the roof layer off, and raise the office wall by the distance measured.
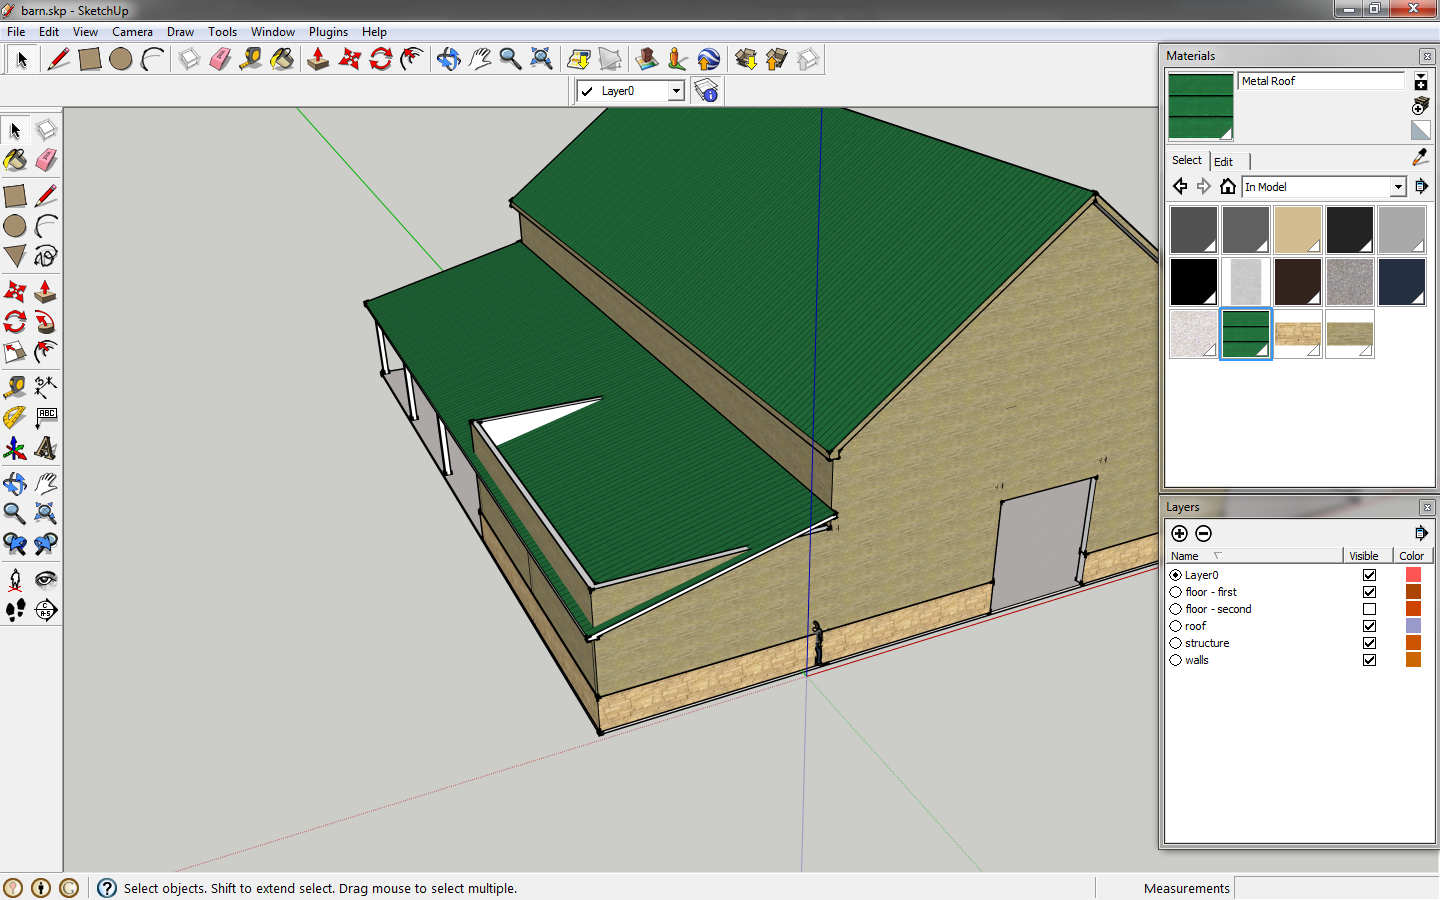 |
| The office walls need to slope with the roof. |
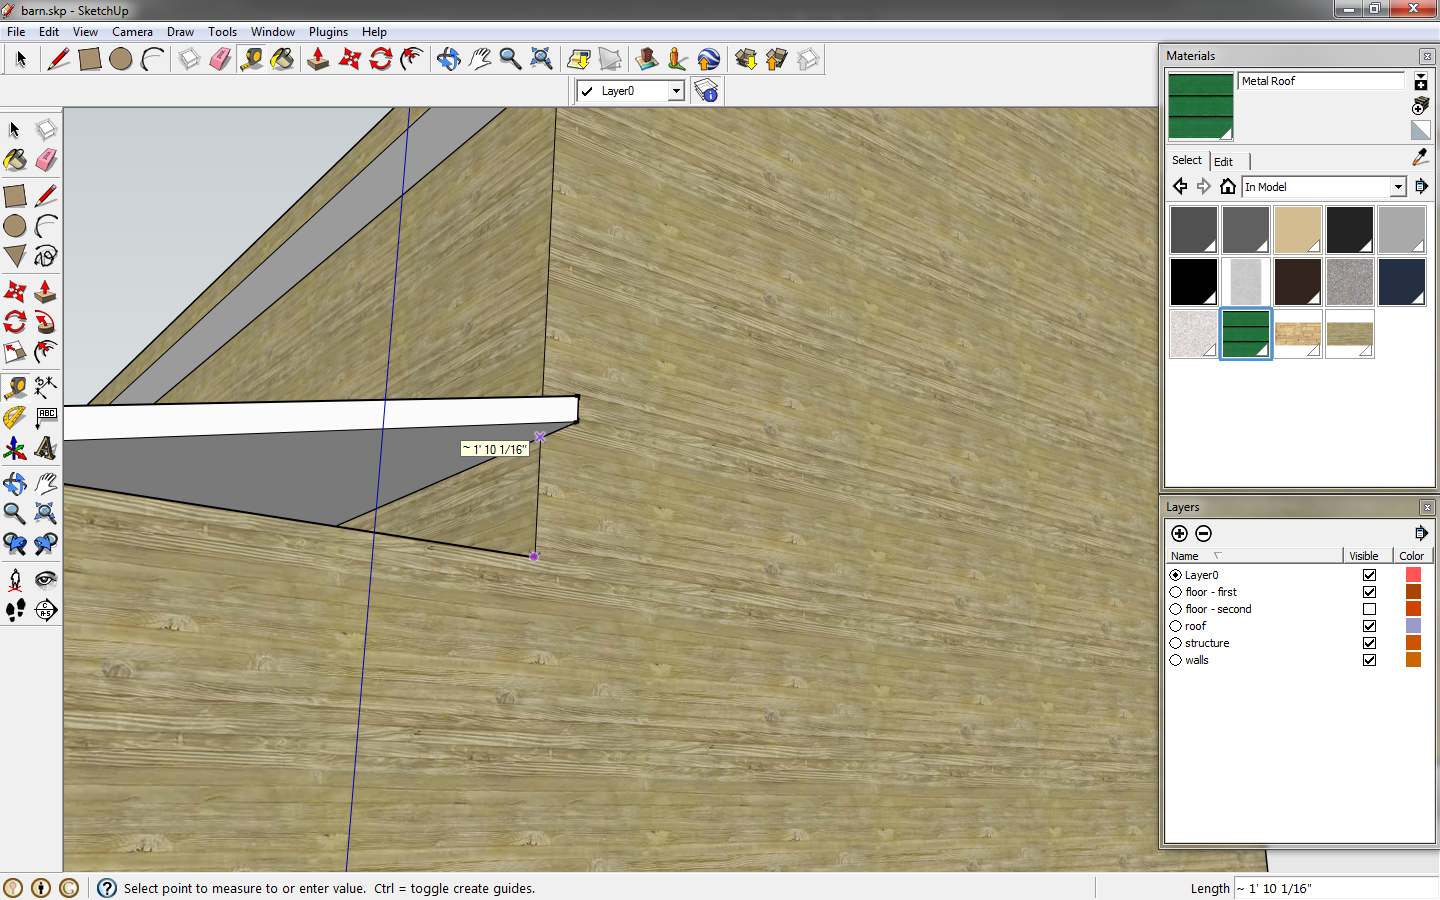 |
| Measure the distance from top of wall to bottom of roof. |
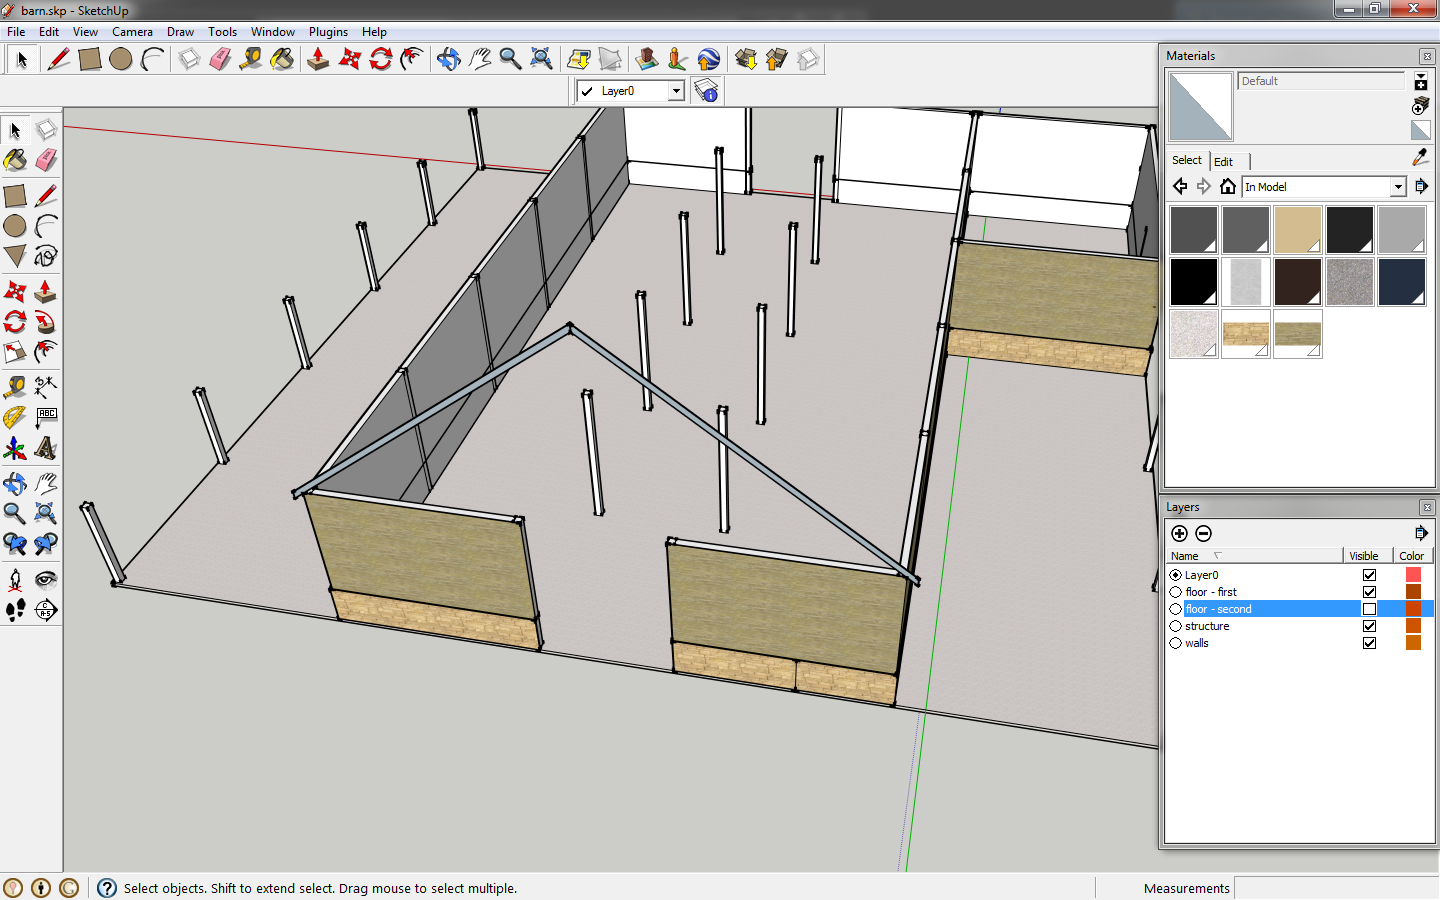
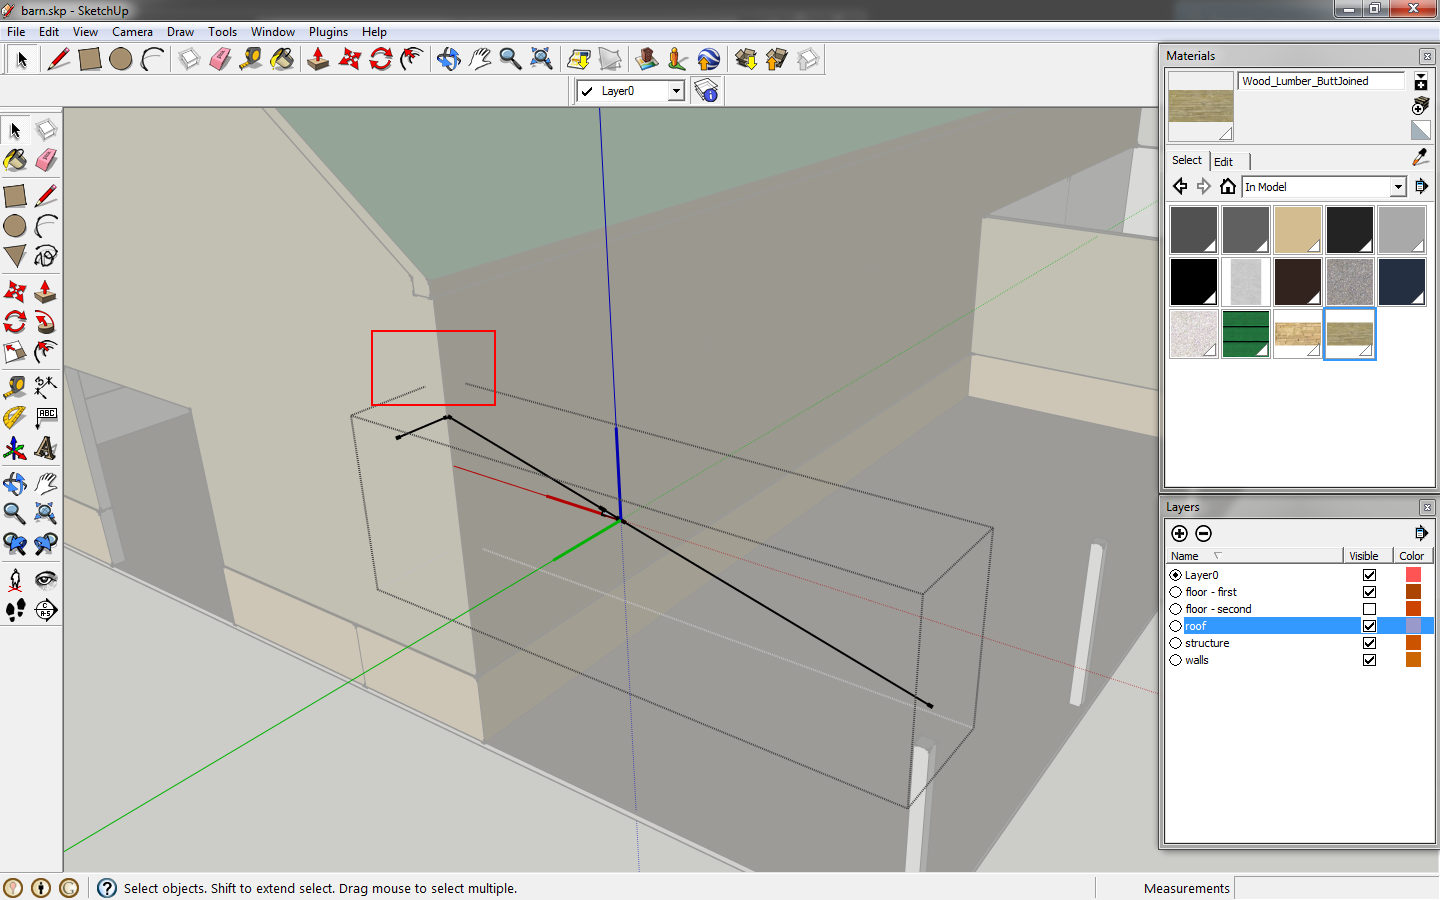
Turn the roof layer back on and measure how much taller the roof is from the bottom of the roof line at the office roof eave.
 |
| With this measurement we will angle the wall. |
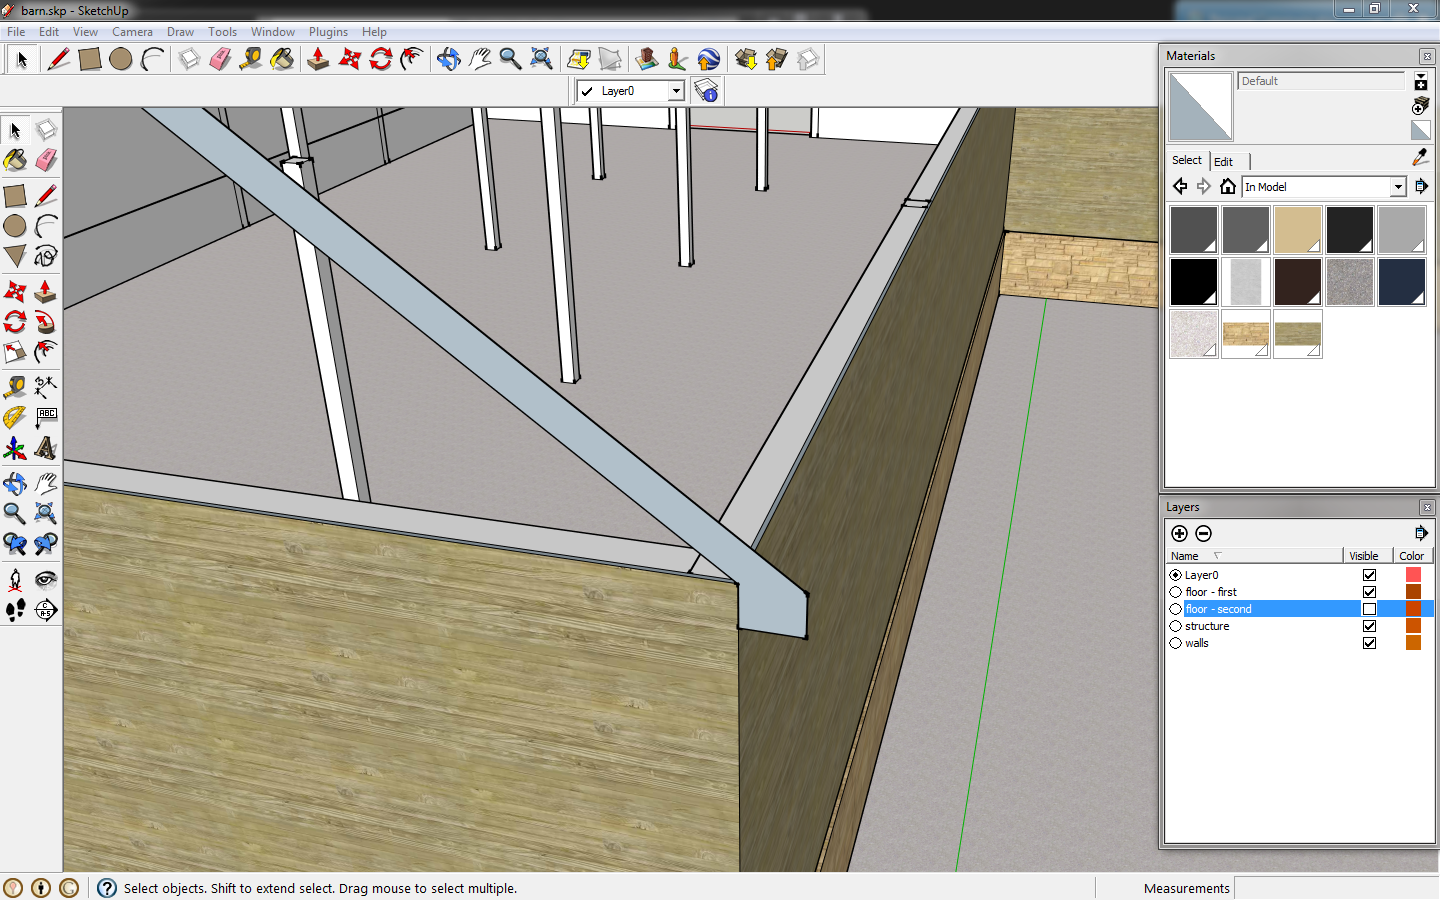
Split the wall on each side with a line. Select the faces of the top of the horizontal wall and move them down the distance measured in the previous step.
 |
| Select the faces of just the wall that is perpendicular to the roof slope. |
 |
| Move the wall down and you can turn on the roof layer. |
Lets adjust the first floor to have a turn-down slab. Double click the floor slab, draw 4", 8", 4" lines as shown.
 |
| Draw a rectangle that is 4"x8" which will be the turn down. |
Angle from the midpoint back and move the shape away from the corner.
 |
| Move the turn down back to prepare for the sweep. |
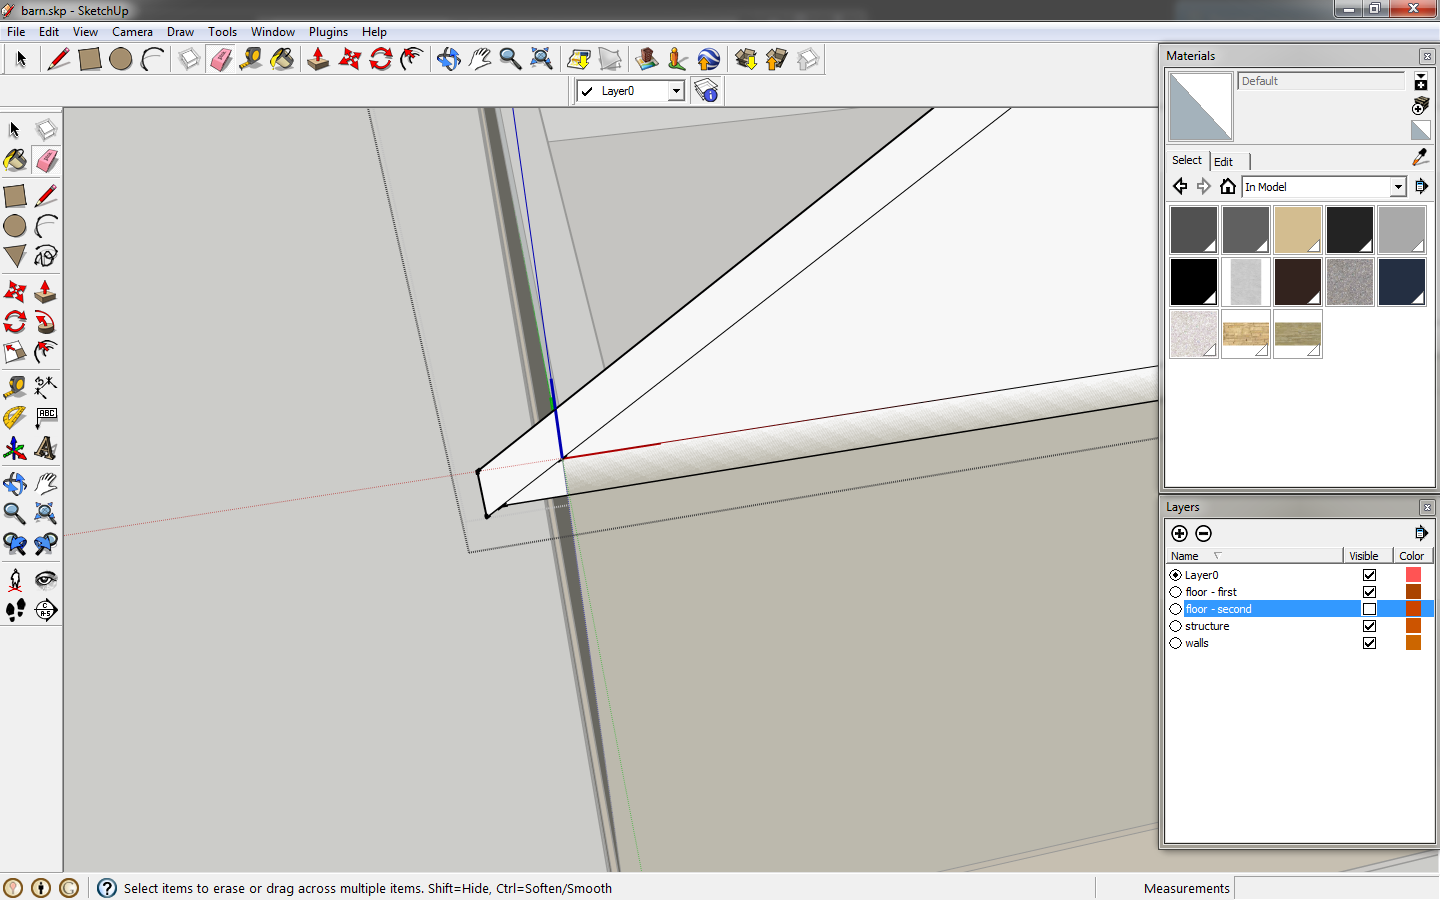
Select the bottom face of the slab, then click the
follow me tool. Click your shape and it will be swept around the face. Delete the line that is the former bottom edge of slab.
 |
| Select the bottom face of the slab, click the follow me tool and click the shape. |
Our barn needs detailing. While you could go to the
3d warhouse, I'm going to show you how to make some components in the next tutorial.
We covered the basic commands and how they are used, as well as work flow and keeping the model organized. In the next tutorial will add details to the barn and set up scenes.


No comments:
Post a Comment