I'm finally getting back to making videos. The production schedule is aggressive, so be on the lookout for videos. Today, I'm going to cover split screen compositing.
I used one actor for three different roles. While more time should have been spent on pre-production and planning, the concepts are helpful regardless. The split screen idea was developed on the fly, use my advice to perfect your process.
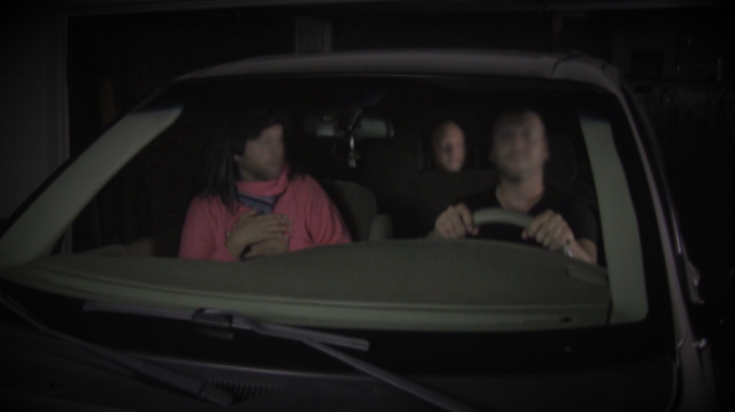 |
| One actor, three parts. The power of split screen. |
The important thing when compositing a split screen is to maintain your camera position, lighting (if present), and any other variables that affect the shot. You need to create three zones and keep the actor in each zone to making editing easier. All hope is not lost if the variables change, such as moving your camera, but it creates extra work during editing.
I moved the camera after the first scene, some of the lighting was rearranged, and I didn't take into account hand movements. Overall, it turned out okay.
The final arrangement has four video tracks, five stereo pairs, and an effects overlay. One video track for each of the three roles, and another to fix corrections like hand gestures. The audio tracks could probably have been condensed to four pairs. The effects track is a vignette that darkens the edges of the scenes.
 |
| Lots of tracks. |
To start, pick your base shot. This should be your best shot, taking into account any camera mistakes like I had.
 |
| The base shot. |
Next the second video track is overlaid. A DVE effect is applied and the shot cropped. Typically I would crop just the left side, but since the camera was moved, I cropped three sides to fit and look visually correct.
 |
| Add the second video track. |
 |
| Second track isolated. |
 |
| Third track isolated. |
I had a few scenes where the driver's hand gesture went through the rear-most character. I cropped the offending track, and I used a fourth video track and cropped it to just the driver's hand and placed it over the gesture. You can set the shot to a still or pick a different section and use that motion, if it lines up at all.
 |
| Conflicts will happen. |
I took the above shot, and overlaid a different shot of the hand. It looks better in a still than in motion, but it's better than the alternative.
 |
| Use an additional track to cover. |
Shooting like this, you will get instances where the character interaction don't match up. I took a section and froze it to a still. Slowing down parts that don't contain dialog would also work and look smoother. It would have been better if multiple angles and shots had been used. It would have provided cut points and made tracking the timing when filming easier.
To crop the tracks, apply a DVE effect. Click
'effects' at the bottom right of the timeline.
 |
| The DVE effect crops the track. |
Once the effect is placed, you can right click the track and access
'settings' to modify the crop boundaries.
 |
| Modify the crop regions after the DVE is set. |
Below are options on the DVE. You can modify the
position,
scale,
crop boundaries, and set a
shadow.
 |
| DVE options. |
The car was shot not moving, but using audio tracks for ambient car fill and traffic sounds can go a long way for faking it. If you compare the first image to the following, the vignette lends itself to a night shot.
You could also add a
color correction effect to adjust
brightness, gain,
gamma, and
hue to wash out colors and make the scene darker to fine tune the night affect.

No comments:
Post a Comment