

I stumbled upon three go-karts that had been sitting outside for far too long. The price was right, but the project was big. This is the restoration of a Carter Super Wheel.
I started with the Carter as it was the only live axle of the bunch. It needed a new engine, clutch, tires, and a seat
at a minimum.
 |
| I restored the red Carter on the left. |
Purchasing:
Kart Frame - free (depending on your area $60-10 for a non-running kart)
Engine/Clutch:
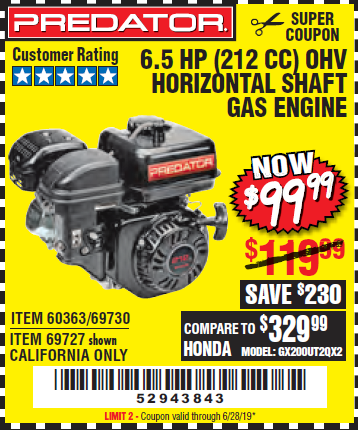
Engine 6.5hp 212cc - $100 (HF has since increased the price and discontinued coupons)
10 tooth Sprocket Clutch (Amazon) - $23
Alternative - Max-Torque Clutch - $34
Alternative - Clutch - Go Kart Minibike Centrifugal Clutch - $18
5/16" x 3/4" 24 tpi bolt for output shaft - $0.18
5/16" fender washer - $0.18
5/16" lock washer - $0.18
#40 roller chain 10' - $10 (chain # depends on the sprocket)
#40 master links - $3 (I went ahead and got a chain breaker that I used to put the chain back together without a master link)
Engine Mounting bolts:
(4) 5/16 - 18tpi x 1 1/2 - $1.68
(4) nylon nuts 5/16 - 18 tpi - $0.16
(4) 5/16-18 washers - $0.21
Seat:
(2) 5/16"-18 1.5" long bolt - $1.68
(2) 5/16"-18 nut - $0.21
(4) 5/16" washers - $0.14
3" Upholstery foam - $40 (I had leftover from another project)
Gray vinyl - $12
T-nuts and staples
Tires/Wheels:
Tires - $7 ea. (4) - 4.1/3.5-5
Intertube - $6.50 (4)
Steel wheels - $12 (x4) [don't get wheels from Harbor Freight]
Wheel Hub - $15 (x2)
Flanged Bearing - $2 (x4)
Paint:
(1) Rustoleum silver spray paint - $6
(1) Rustoleum Primer - $6
(2) Rustoleum blue spray paint - $6
Total Cost: $365.08
clutch engages when motor starts
DIY Go Carts forum
HF coupons - don't pay more than $100 for engine
Engine coupon $100
BMI for parts
Go Power sports for parts
OMB warehouse for parts
Northern Tool for parts
Kart Performance Estimator
Speed Calculator:
calculator
3600 max rpm (governed 212 cc predator) / 7.2 (gear reduction for 10t and 72t)= 500
500x20 (tire diameter) x3.14 (pi for circumference)= 31400
31,400/12 (inches to feet)= 2600
2600/5280 (feet to miles)= 0.5
.5x60 (minutes to hours)= 30 miles/hour.
Introduction
The first step was assessing the kart and figuring out what I
needed. I ended up stumbling on another project kart that I started
before this one that needed considerably less work. It was complete
and even had an engine (that ended up not running).

This one was a red Carter Brothers Super Wheel live axle with band brakes. The wheels are 4.1x3.5-5. It's 5'-2" long with a 46" wheel base.
Frame
I stripped the frame down, removing the engine, wheels, and miscellaneous
parts, cleaning the frame with a degreaser, then sanding it down. I
used sand paper, a grinder, a wire brush, and a pneumatic die grinder.
The die grinder sanded it down quickly, and first I went over any
heavy rust with a grinder. I used a wire brush and 80 grit pads for
crevices and corners. Portions that weren't rusted I used 220 grit sand
paper and scotch brite pads.
Welding occurred at this point. The Carter was missing 3.75" out of
the frame just in front of the rear axle. Who knows why. It looks like
after that piece was cut out it was still used, cracking two other frame
connections.
I smoothed the cuts with a grinder and welded in a filler piece, 1"
tube. I was very careful to match the filler piece with the cut out,
leaving no gaps. First I ground down the cuts on the cart to where they
were straight. Then I made measurements, finding the widest spot, then cut
the filler pipe. After that it was a lot of grinding and checking to
make sure the filler pipe was a snug fit with no gaps.
Any rough spots in the welds were ground down.
The steering shaft was rusted solid on the Carter.
Penetrating fluid over a couple of days didn't loosen the shaft. I resorted to a very large pipe on the steering fork for leverage. It
did bend the steering fork a bit, but I used a large crescent wrench to
straight it out. At first the shaft would just move a couple inches, then a
little more as I worked it back and forth until I got the full range of motion.
The Carter had an adjustable seat with places for bolts on each side. It
only had 1 bolt that was heavily rusted so I replaced it with two new ones.
I degreased all the parts of the frame again, primed, and then painted
everything. I left the live axle in place and taped it off. I painted the bottom, waited two days, painted the top,
waited two more days and reassembled. I painted the frame,
spindles, and tie rods blue. The brake and accelerator linkages
metallic silver, and the steering wheel silver. One can of primer covered the cart, with two cans for the color.


Engine
The motor was a Briggs & Stratton flat head. The engine and
clutch were no good. The new engine came from Harbor
Freight. It's a lower cost knock off of the Honda GX200 engine. You can't beat
the 212 cc Predator engine. It has a compression Ratio of 8.5:1, takes
fuel type: 87+ Octane. The engine oil capacity: 0.5 Quarts which is 16 ounces. Fuel capacity is .9 Gallons.

It's a 3/4" output shaft with a 3/16" keyway, which matches the clutch that came with the project. The Predator does come with key stock.


There is a cable clamp for the throttle cable and a cable anchor for the cable.
Engine Break-In:
After mounting the engine, fill the oil
and check the level. The Predator takes 16 ounces. Give the pull start a
slow pull to make sure everything turns
over okay. Check your engine max throttle screw because the factory
sets it pretty low. I left mine all the way in to start. Fill the
tank with gas.
To
start the engine, just turn the red knob to ON, turn on the gas valve with the
black lever, turn the grey lever to choke and pull the rope. While some
recommend a 3 hour break in, I rode the kart for about two hours and changed
the oil. It's recommended to NOT run the engine wide open until after break in.
I leave the choke on for just about 30 seconds, then shut it all the way off.
For future reference, cleaning the Predator carb.
Throttle & Brake Cables
The Carter throttle cable was in fine shape, or so it looked. I didn't
try it until the kart was assembled, and the cable would not slide
through the sheath. I put WD-40 in each end of the sheath and let it sit
overnight. The next day I took the cable out and greased it. After that
it worked fine.
If you need to replace the throttle cable, bicycle cable is cheaper.
If your kart uses cable for the brakes, use go kart brake cable. It lasts longer and is safer. Many carts use steel bar anyway.
When tensioning the throttle cable, the gas pedal should hit exactly at
full throttle, match them up or adjust them until it matches.
Clutch
I'm using a 10 tooth clutch sprocket. The 5/16" bolt and washers threads into the end of the output shaft of the engine to
keep the clutch on the shaft. The length depends on where the sprocket
seats. You want at least a half inch threaded into the output shaft with the clutch teeth and sprocket teeth lining up.
Many clutches have a set screw. This should screw into the keyway. You don't want to mar the shaft.
The keyway is the slot. The locking part is the key. A piece of 1/4" x
1/4" keystock is what's usually used. It's just square steel rod that is
cut to desired length.
The Predator comes with a keystock, and the clutch I bought has a built in keystock.
Keystock
home depot keystock
Oil the clutch bushing often. You can run a spacer or lock collar to keep the clutch from shifting towards the engine. I haven't done this, and also haven't had a problem.
Sprockets & Chain
The Carter uses a #41 chain with a 54 tooth sprocket.
chain size information
Allow between 1/4 inch and 3/8 inch flex for proper adjustment, if you
have more than 1/2" flex it needs to be adjusted as the chain will come off. Loosen the engine
mount bolts and slide the engine, or add washers to the bolts to lift
the engine.
I bought chain from Tractor Supply, #40. #40 chain will work in the place of #41, but #41 won't work in place of #40.
#41 has a .5" pitch & 6.35 mm width between plates
#40 has a .5" pitch & 7.9375 mm with between plates
I used this chain guide
to make sure the two could interchange. I used a chain breaker to press
out studs and then press them in. If you don't have a chain breaker you
can use a punch and nut and master link. The master link opening
should point towards the back of the kart.
Gearing:
For gearing 6:1 is the commonly recommended ratio for tires up to a 15" tire on a fun kart.
Once you get taller tires, its more difficult to get the kart moving
with that gearing. Gearing is the drive axle sprocket teeth divided by
the clutch sprocket teeth. The Carter has 54 teeth and 10 teeth. This is
a 5.4:1 ratio. The lower the ratio the less acceleration, but more top
end.
Brakes
The Carter brake rod had been installed wrong, which wore a notch into
the rod and prematurely wore down the top of the band brake. The rod ran
under the bracket when it should have run above. I had to have the
notch welded to fill it in, then ground it down.
Wheels & Tires
The Carter had one wheel rusted through. The kart has a 3" bolt
pattern, and that's not a common pattern you can buy for a wheel.
I bought steel split wheels with a 2-13/16" bolt pattern. While that
won't quite fit my rear hubs, filing the wheel hole just 1/8" will fix
that.
I needed to buy at least one hub, and went ahead and bought two just so
the front hubs would match on the Carter. This would also match the
wheel bolt pattern.
I considered buying all new hubs for the Carter as I preferred
galvanized wheels just for aesthetics, but that would increase my price
quite a bit and the site I was browsing didn't have 3/4" live axle hubs
so I scrapped that idea.
With 5" diameter wheels, the max height is 12". 6" wheels are more common, so the tires are cheaper.
Steering Wheel
The steering wheel on the Carter was metal and rusted pretty good in one
spot. I used expanding foam to fill the inside and then applied body
filler. Hopefully the foam is stiff enough. Even with no backing body
filler will take a while to start bubbling, with the foam backing I hope
it will suffice.


Kill Switch
The kill switch on the kart still worked. Here are two examples.
I ran a wire from the low oil sensor wire, which i unplugged and capped
on the engine side. On the relay side, I connected by 14 gauge wire
from the kill switch, using the same cover. My switch is self grounding,
but if your toggle switch has two blades, you would connect the wire
from the relay to one, and then run a wire from the other blade to a
screw in the kart for a ground.
Seat
The seat is 3/4" plywood and 3" upholstery foam. I cut the plywood to
fit the seat and used the existing holes, marking where to install
t-nuts. I cut the foam to fit the plywood, then glued the foam to the
plywood. It's best to cut the foam 1" wider than the wood all the way
around.
While you can find cheaper foam, upholstery foam is firmer which means
it won't feel like you're sinking all the way through it when you sit on
it.
I stapled one side of the vinyl to the plywood, stretched it across and
stapled the other side. I folded the vinyl at the ends. There isn't a
great way to work out the wrinkles. For the curved back portion, i
stapled in two pleats on each side to make it look uniform.
It's fine to staple a bit and then have to pull up a few staples and redo it.


Reassembly
Putting everything together isn't difficult as there aren't that many parts. I greased the rear axle before putting the wheels on. Taping sockets/wrenches will help prevent scratching the paint during the process.
Conclusion
My only regret is not applying a bit of filler to the
floor pan to smooth it out a bit. From sitting in a field for so long it
has some minor pitting. Other than that I like the results and it's a lot of
fun to drive.I used to have a CB antenna that I threw away a
couple years ago. It would have been perfect to modify into a flag mount.


I still have a Kenbar Streaker and a unidentified scrub brakes kart. I'm thinking the single axle Streaker is a great candidate for a dual engine setup. Unfortunately Harbor Freight has raised the prices on engines and stopped coupons, which will significantly increase the cost of future projects.
Very good work, that turned out great.
ReplyDeleteI also have a carter super wheels single seat yard cart. Your restoration job is top notch.
Thank you!
Delete