

I've never had a real work bench. It was time to make the centerpiece of my shop.
A couple of years ago, I decided to rearrange my shop. Instead of putting things where they fit, I started a plan from scratch, arranging the shop to fit work flow. I upgraded electrical, the lights, painted the walls, and added a ceiling. The one thing missing after redoing the shop was a workbench. It was the centerpiece of my shop in the plans, it just didn't exist yet.
The top is 2x4s with a 2x4 frame and 4x4 posts. There are drawers along each side and a plywood bottom shelf. I used a hitch receiver for a removable vise. I also have plans to create a system for retractable bench dogs. The top is 6'-3"x4'-0" and it's 42" tall.
Buy List (Base Bench)
- (38) 2x4
- (2) 4x4
- (2) 4'x8'
- 1.5" Aluminum angle for drawer pulls
- (3) 26" Drawer slides
- (2) 16" Drawer slides
Removable Vise
- Removable Vise
- Vise Mount Plate
- (6) 3/8"x6" Carriage bolts / (6) Nuts / (12) Washers
- $38
- (1) quart polyurethane
- (1) quart paint
- $20
Cut List
- (38) 6'-3" 2x4 top
- (2) 5'-8" supports (mortise ends)
- (4) 3'-5" supports (mortise ends)
- (2) 3'-6.5" bottom shelf support (mortise ends)
- (4) 3'2" 4x4 legs (mortise top)
- (1) 3'-7.5"x5'11" plywood bottom shelf
- (2) 3'-2"x5.75" plywood (sides)
- (4) 9.25" 2x4 drawer support (mortise end)
- (2) 3'5.25" 2x4 drawer support (mortise ends)
Drawers
- (5) 1'9"x5" drawer face
- (10) 1'-6"x5" drawer sides
- (5) 1'-6.5" drawer back
- (5) 1'5.25"x1'6.5" drawer bottom
 |
| 4x4 posts |
 |
| 2x4s |
I went through a lot of iterations for this bench. Mostly revising the top from plywood to 2x4s and debating on a sacrificial top. I started the project in Sketchup. A 3d model makes the construction much easier.
I added a plate to mount a removable vise, bench dogs, and decided to add drawers. I have three drawers on one side and two on the other because of the vise.

The top of the table is at 42" tall. I made a cardboard mockup to make sure of the height before I started, but I knew 36" tall was too short. The table height is perfect when standing and the perfect height with a standard bar/counter stool.
Structure
The structure consists of 4x4 legs and 2x4 bracing. I decided to mortise and tenon the joints. I had never tried this type of joint before. I cut mortises first, then the tenon. The tenon should be no thinner than half the board thickness. The length of the tenon should be roughly four times the tenon thickness.
I
used a router to cut the tenons, .25" less all the way around with a
1.5" length.The router has a fair amount of tear out, doing it again I
would probably use a band saw.
For the mortises, I cut
them out with 1" forstner bit, then a hammer and chisel for the corners.
I then test fit the tenons and trimmed as necessary for the fit. They
came out great considering it was my first time trying this joining
technique. It helped that they are blind/concealed.
I then mortised braces into the 2x4 cross members. These are only 1" deep so the ends are concealed within the 2x4s.
In my build I did this later, but the top needs 2x4 cross braces. One at each end and two in the middle are sufficient. I added the bracing later as the 2x4 top was sagging. I shimmed each end to try to get the top back to level in my build. Building these braces in the beginning would have helped.
The bottom shelf is plywood. I almost couldn't fit the shelf in place. I should have put it in place when assembling the table. Instead I added it when the structure was glued up and the top in place. I was close to needing to cut the plywood in half to fit. I got it to flex just enough to get it in.
I cut the 2x4s to length with a chop saw, cut the legs with a table saw, two cuts front and back as the table saw doesn't cut deep enough for a 4x4.
 |
| The future top. |
 |
| Tenon |

 |
| Mortises were marked, accounting for the tenon. |
 |
| Forstner bit to start the mortise. |


 |
| Completed mortise |
 |
| Each post has (4) mortises. |


Top
While I originally conceived the top as (2) layers of plywood, I didn't think it would be strong enough. When I decided to add a vise mount I knew plywood would not work.
The reason to glue 2x4s face to face instead of edge to edge is that lumber expands across it's width. This configuration is less stress on the joints.
I used off cuts for a few of the bench top boards. If I were doing this again, I would not do that. It's not worth the ~$15 in savings to deal with the hassle of splices. They need additional support during glue up.
I ripped 1/4" off each 2x4 for the top as the corners have a bevel, then ripped all the boards to a 3" width.
 |
| Original 2x4 |
 |
| Each end of the 2x4 ripped for a flat end. |
For the top, I have 4 bar clamps that are at least 5' long. I started with the 2x4s on the concrete shop floor. The floor is level, I checked that to make sure.

My first issue is that the clamps need to be centered on the ends of the boards. If the bar clamp is on top, the clamp face is offset towards the top of the 2x4 and causes the boards to buckle when tightened. While I got these 2x4s from a lumber yard they still having some bowing and twisting to them. Wood from a big box store would be even worse.
With the clamp on the end, the clamp handle isn't high enough off the floor to turn.
A threaded rod through the 2x4s would alleviate some of the issues. Lining up a hole shouldn't be a big problem, but I was already on the clamp path and didn't want to drill (64) holes or see a threaded rod sticking out of the table top.
I then moved the table top onto the unfinished bench. The only issue there is supporting the splices, but once the boards were clamped tight enough that issue resolved itself.
I spent too much time trying to get everything straight and square in a single glue up. 2x4s just aren't. After coming up with various ways to try to clamp the table in one go, I realized I should clamp it in smaller sections. This will make it more manageable and allow me try to get the boards to line up better. I don't have enough clamps for all 32 boards, but I do have enough clamps for 5 or 6 at a time. When a board was bowed, I clamped it along the length so it lines up with the others.
I glued it up in (6) separate section. I made the ends even with the adjacent boards, and then clamped the bow out of any other boards. I wish I had spent a bit more time clamping down bowed boards, even only gluing (3) boards at a time. While a belt sander makes quick work of high boards, lower boards are more of a challenge. A bit more time in getting the boards flush with each other would have saved time on the back end. Getting any low spots out, even if it means the board is higher at the ends will save trouble in the end.

 |
| I clamped individual sections. |

 |
| Marking the tenon for the post. |
I
used scissor jacks to position the top in place and slowly lower it
onto the posts. After a bit of hammering, the top was in place. (32)
2x4s gets heavy. The finished top weights roughly 200 pounds.
I didn't think a glued up top would sag across 4', but it does. Part of that is the twisting and shape of the boards. Some gaps couldn't be clamped tight during glue up or would have made the top cup.
What I first thought was a result of gluing up the entire top was that the (2) opposite corners cupped slightly. I considered cutting reliefs, before realizing the top was bowing. While I tried to clamp any warping out of the boards during glue up, some boards wouldn't mate quite flush.
Of course, I didn't realize what was happening until the top was in place and I realized the cupping was getting worse.
I put in supports on the short sides between posts and I ran (2) 2x4s in the middle between drawer supports and attached it to the top. This will keep the top straight.
This would have worked better installing the supports for the top before the top was in place. Next time!
I used a pocket jig to attach the supports between posts, adding shims
as necessary to level out the top. The supports helped straighten out
the top. I can still spot a little bit of cupping, but most people
wouldn't notice.
I used sawdust and wood glue to fill gaps around the posts. I used epoxy in smaller holes/gaps.
 |
| Prepping for final glue up. |
 |
| A belt sander helped flatten the top. |
 |
| Epoxy filled any gaps. I used glue/sawdust for larger gaps but thin gaps got expoy. |

 |
| Touch up with epoxy. |
 |
| The belt sander got the boards flat/even. |

A belt sander knocked the top down to nearly smooth. A belt sander creates a lot of dust, EVERYWHERE. I made more work for myself than I needed. I should have made sure I made the boards flush during glue up.
 |
| I put the first set of holes in the wrong location. Used a dowel to fill. |
I drilled 4 holes for my future bench dog set up. I debated on
whether I wanted to drill holes into my just finished table top. I
decided I did, then proceed to drill four holes in the wrong spot. I
filled the holes with 1" wood dowels that were the perfect size, filed,
sanded, and marked it up as a lesson learned.
Drawers
Five drawers total were installed. Three on on side and two on the
other. The vise mount will take up one bay. I plan to go back and add a
plywood shelf in the bay below the vice mount. It's dead space and that
would add a bit of function.
I had ball bearing slides I picked up on sale a few years ago. I hadn't
measured them, and they ended up being 26" long. They are made for
computer/server racks, but are heavy duty. The depth I have for both
drawers combined is only ~43".
Luckily Amazon has 16" ball bearing slides that are the exact length
needed. The slides will butt, mounted to the 2x4 support attached to the
top.
 |
| Drawer slide. |
The drawers are 3/4" plywood with a 3/4" groove in the sides and back for the bottom of the drawer.
When installing the slides, I mounted slides to the drawer, then fit the
slide receiver to those slides and dry fit. I pushed one side of the
drawer/slide tight against the support on one side and shimmed the
other side as needed. With shims in place, I used washers to match the
shims. There isn't much wiggle room with ball bearing slides.
The slides are installed with wood screws.
I did have to enlarge holes in the receiver slide and create an access
hole to install screws from inside of the track for the computer rack
slides.
Be sure to measure your drawers during the dry fit and make sure they are square.
I had to cut them apart and piece them back together. They fit perfect in the opening without hardware, but hardware is important.


 I
recessed the hardware in the drawer faces to gain more hardware
clearance. When it came time to attach drawer faces I quickly began
rethinking that idea. Cutting a recess wasn't too difficult luckily, but
it is an extra step that could lead to a mistake. It's also not worth
the effort to gain 1/2" extra space.
I
recessed the hardware in the drawer faces to gain more hardware
clearance. When it came time to attach drawer faces I quickly began
rethinking that idea. Cutting a recess wasn't too difficult luckily, but
it is an extra step that could lead to a mistake. It's also not worth
the effort to gain 1/2" extra space.


Vise Mount
The vise mount is a hitch receiver welded to 3/8" steel plate. Carriage bolts
(6) and washers go through the plate and table. I thought about
recessing the washers and bolt heads, but then I would have open space
around the head that would collect sawdust. I decided to just recess the
washer, but didn't have a forstner bit large enough.

 Once I test fit the plate, I removed it so I could add paint/finish to the table.
Conclusion
I clear coated the top and painted the structure
and drawers. I wanted wood grain of the top to remain visible, but the
structure is made of up different colors of wood studs and plywood.
Paint was the only way to unify it, though I did clear the plywood shelf
just so it would remain lighter.
The top isn't as flat as I had hoped. Without additional tools, I wish I had attached cross braces to the underneath of the table top right after glue up. I could have put the top down on the floor, made sure it was relatively flat and then added cross bracing and shims as needed.
Adding the braces later
once the top was in place and already sagging wasn't as effective. I also wish I had paid
more attention to making the studs flush withe each other during glue
up. I made sure the ends were flush, but down the middle there was a
fair amount of variance. I belt sanded the table flat, but it isn't
necessarily level. I've got one corner with a slight cup that bugs me.
Standing height is absolutely perfect. Sitting height will be too once I get a bar stool. The issue with adding drawers is that my knees are too high and hit the long brace under the drawers. A lower stool would solve the knee issue, but then the table would be too high. The best trade off is being higher and sitting farther back with less knee space. If I use my shorter stool, the table is just too tall. The fix for this would be deleting the drawers, but I'm not willing to do that. Another option is installing the drawers below the bottom shelf, but I don't want to have to stoop over to access the drawers.
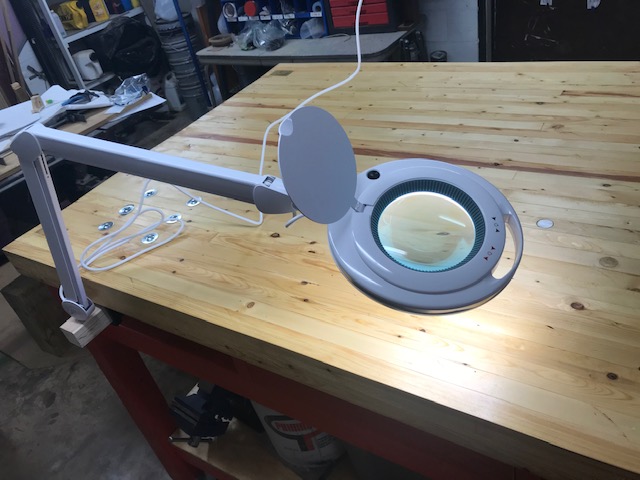
I've also glued and cut down plywood to fit the hitch receiver that acts as a mount for a swivel light.


The
bench dogs soon became a future project. I wanted to have the how to as
part of this post, but I'm not sure when they'll get finished. The
posts are 1" aluminum rod and will be attached to a crankshaft that will
raise and lower the bench dogs via a single crank.


No comments:
Post a Comment