

I've always wanted to build a computer, I just hadn't had the opportunity.
I cobbled my son's former computer together with what I had around. The power supply was going out, so we opted to build a new computer, reusing a few components.
I had replaced memory, hard drives, and graphics cards. I had never built a computer from scratch. The first step was research to understand what components were 'good,' what fit together and how, and just general information about this process.
Overall it went smoothly. I was certain I'd be missing a cord, cable, or some other vital component during the build but that wasn't the case. I built the computer in an afternoon and spent another day just trying to get a Windows OS going. Installing the OS was the most difficult part. Watch the video if you want to skip the read.
This is definitely a budget build. A build can quickly go over budget. I saved by reusing the graphics card and hard drives.
Purchase List:
-Case: Thermaltake Versa H18 with Tempered Glass $55
-Power supply: Corsair CX750M 80 Plus Bronze $80
-Motherboard: MSI MAG B560M Bazooka $160
-Processor: Intel Core i5 $154 (Amazon Lightning deal)
-Processor cooler: ID-Cooling CPU Air Cooler 120mm $24
-Memory: Silicon Power 16GB (8GBx2) $50
-(2) Case Fans: Arctic P14 140 mm $13 each
-PC LED Flexible Light Strip $9
-Hard drive: Reused PS3 500 GB (new $70-$100 for a HDD or SSD)
-Graphics cards : Reused GTX 760 ($100 from eBay or $300 for a new card)
-Operating system: Windows 10 ($100 if you don't have a license)
-Reused monitors, mouse, keyboard, speakers
Subtotal: $658 easily $1100 if all parts were purchased new. Even more if you have to purchase peripherals
scissor
Introduction
Before making any purchases I checked to make sure components were compatible. The crucial information to confirm is that the processor and motherboard will work together. This will be listed on the product page of the motherboard. I researched other builds on the internet that used similar components prior to even considering making a purchase just to understand terms and components. After looking at a few builds, you begin to see commonly used components and terms.
If you waited for deals and discounts you could save more. I managed to get $50 off the processor on a Lighting deal.
Since this was my first attempt at building a computer, I read all of the product instructions to make sure I wasn't missing anything. Most of the instructions were really good. The power supply documents were lacking.
Components
 |
| Case: Side |
 |
| Case: Front |
 |
| Motherboard |
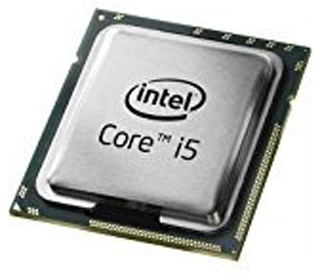 |
| Processor |
 |
| Memory |
 |
| Power supply |
Motherboard Assembly
The
only motherboards I had handled before came from pre-built computers
like Dell, HP, Lenovo. This motherboard was much beefier, with large
heat sinks and clear labeling of ports.
 |
| 1. Accessory ports 2. Processor power connector 3. Processor/CPU socket 4. PCI-E Graphics card slot 5. Memory slots 6. Motherboard main power connector 7. Sata hard drive ports |
I made sure to seat the processor perfectly. There is a metal clamp assembly that has to be opened to set the processor. Also, you'll need to pop out the plastic protective cover. Once the processor is seated, you clamp it in with the metal assembly. This part made me nervous as it takes a bit of force.
Then I had to apply thermal grease to the processor. Grease came with the cooler. The instructions are pea or rice grain size. Don't spread it, the pressure of the heat sink will do that. Before applying the grease I installed the backing plate for the heat sink. The cooler came with all of the necessary screws, brackets, and stand offs. I installed a backer plate, standoffs, then brackets. Once the brackets were in place, I applied the grease, gently put the heat sink on top, centered, and screwed it down. You should NOT see grease seep out from the edges of the processor. If so, take off the heat sink, clean it up and reapply less. Pea size worked for me.
The heat sink fan clamps to the sink with brackets. I positioned the fan, which has arrows indicating direction, to push air to the rear case fan through the heat sink. This is the typical orientation per Google.
I installed the memory which must go in certain slots, see the instruction manual. Make sure the clips on both ends of the memory slots are open. They should snap closed as you install the memory.
Case Assembly
I really liked the case. It's nicely designed with a lot of features like numerous spots for zip ties, customization in fan placement, and the case is designed to hide wires for a clean look since one of the side panels is glass.
The case included all of the standoffs and screws for the motherboard. At this point I installed the motherboard into the case. I just did the screws tight enough. Once I felt any resistance I quit tightening.
The motherboard comes with a trim plate that clips into the back of the case prior to the motherboard install for the various rear ports.
With the motherboard in place, I installed the cables for the front face of the case. This includes, power switch, lights, audio, and USB ports.
The case has a spot for fans at the front and top. A fan comes preinstalled in the back. My fans were too deep for the top mount, blocked by the motherboard heat sink. I installed both in the front of the case. While the instructions show mounting the front fans outside of the case behind the face plate, they were too deep. I installed them inboard of the front of the case. The fans came with screws. The case is slotted to mount the fans higher or lower. The 4 pin connections attach to the motherboard. All of the ports are labeled on the board and detailed in the manual.
The power supply installs at the back bottom. It comes with screws. A 24 pin connector connects to the motherboard while an 8 pin connector provides power to the processor.
Power Supply Installation
It's a modular power supply, which means the cords can be detached completely aside from the motherboard and processor power connections. The power supply doesn't have any instructions. It has many cables, but I picked out the cables for the graphics card and hard drives. There's also a connection for the Molex connector for the LED at the front of the case. This can be daisy chained for the magnetic LED lights inside the case.
Test One
With all of this done I cut on the system. Nothing happened. I then removed the power supply and jumped pins 4 &5 to test it. The fan came on which means the power supply is good. I reinstalled the power supply and tried again. Success. I'm thinking maybe I didn't have the 24 pin connector fully engaged. Switching on the computer at this point opens the BIOS. The computer can't boot as there is no OS.
Operating System Installation
I was reusing hard drives and assumed the computer could boot the OS from the old hard drive. That's not the case for whatever reason. I tried different hard drives, different port orders, etc but the computer could never pick up the OS. Apparently a new motherboard likes a fresh Windows install.
I had another hard drive I reformatted. I used an external hard drive connector to attached it to another computer, right clicked on it, and formatted it. Choose NTFS file type. Since this was a PS3 hard drive I deleted the existing partitions before formatting.
I then downloaded the Windows 10 installation media. You need to double click this file to install it on the USB. I copied and pasted it on the USB the first time which obviously won't work.
At this point I attempted installation with the USB. I got a message that Windows was unable to create a new system partition or locate an existing partition. This video was a great help, as I would not have figured this out on my own. The video runs through command prompts to format the drive, create a partition, and transfer the install. See the comments under the video as the drive needs to be converted to GPT. Otherwise you'll get another error during install. With all this done, installation of the OS finally began. This takes a while.
Conclusion
It works! That was my biggest concern, after that was the heat sink and processor. Doing this again, the process would be a lot easier as I learned a lot along the way. I've always wanted to build a computer, so that was definitely a bonus. It works, looks great, and it was a fun project. I really like the case, and the price seems very reasonable. The glass panel is just cool. LEDs are a must, otherwise you can't see much inside.
How much did I save? I'm not sure. It's difficult to find a pre-built
that matches spec for spec. Looking just on Lenovo's site the closest
matches are over $1000.
 |
| Completed build |
 |
| Lights on |
No comments:
Post a Comment