You can get cheap blast gates, but they're not great. Nicer ones are more expensive, but you can build your own that work well and don't break the bank.
Blast
gates restrict air flow to one tool, otherwise you wouldn't get enough
suction in a dust collection setup. Gates are made from 1/2" and 1/4" MDF as it's cheap and smooth. I need
11 for my set up.
While I could get rather simple ones for a few bucks, I don't want a gate with a track that will eventually fill with sawdust and impede operation. The nicer gates are $12 each so I'm going to make my own.
Purchase List:
- (1) 4"x10' PVC pipe (or 4" coupler)
- 1/2" MDF 2'x4' for the Gate Body and handles
- 1/4" MDF 2'x4' for blade and spacers/sides
- 1/2" wood screws
round file
router
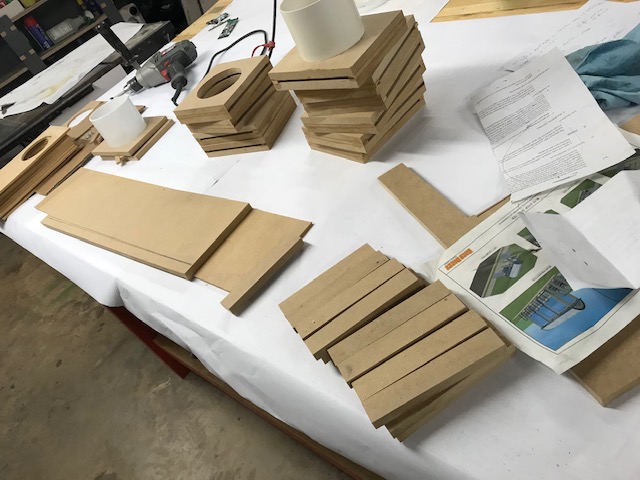
- (2) 6.75"x6" 1/2" MDF Gate Body - 4 3/16" hole for the pvc pipe or 4.5" hole for coupler
- (2) 6"x0.5" 1/4" MDF spacers/sides
- 4' PVC pipe cut to 4" or coupler cut in half
- (1) 5.75"x11.75" 1/4" MDF blade
- (2) 5.75"x1" MDF for blade handle on each end
How to make blast gates reference
Blast Gates
Initially I planned to cut couplers
in half for each side of the gate, but that would just add an extra
joint between the wye and the gate since I will install the gate right off the wye. Using 4" PVC removes the coupler
joint. also, the other side of the gate will connect to the 4" flex hose or a 4" to 2.25" adapter.
The blade has a hole cut into it, which does make it longer, but it removes a track that could fill with sawdust. It's frequently called a self-cleaning gate. With a track, it will eventually fill with sawdust and won't completely shut, reducing air flow. My gates don't have a track, but I do need space on each side of the gate for open and closed orientation.
I created a circle cutting jig for the holes.
Half of my gates had too much resistance to slide smoothly after glue up of the body. I sanded them lightly with a sander until the fit was better. It won't take much sanding, only a couple of passes.
I glued the handle on one side of the gate, but screwed it on the other side in case I ever need to remove the gate or if the fit becomes an issue and I need to sand it down, I have that option.
The body of the gate is 1/2" MDF with (2) 1/4" MDF spacers on two sides. The blades are 1/4" with 1/2" MDF handle glued on one side and 1/2" MDF handle screwed on the other side. I used a round file to smooth out any rough cuts from the circle jig.
I oriented the gate in the closed position before gluing the handle, and I did the same when screwing the other handle in. This ensures full close or full open when the handle is flush with the body.
I cut a half circle out of the handles with a
forstner bit to make pulling the blade easier. I painted just the body
of the gates and the handles. I was concerned that painting the blades
could cause them to swell slightly and I didn't want to have to resand
them. I also like the contrast between the white body and brown gate.
 |
| Open |
 |
| Closed |
I cut 2.5" long PVC pipe to caulk into each side of the
gate. I caulked the opening before inserting the PVC and the joint after
the PVC pipe was in place. Have the gate closed while doing this so you
don't encroach upon the blade path. After inserting the PVC pipe, ensure the blade operates and wipe away any excess caulk.


No comments:
Post a Comment