 |
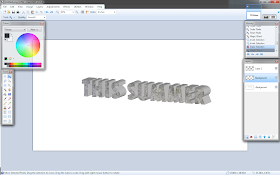
| The finished text. |
I'm going to walk you through each command as we create the text.
Creating 3d Text
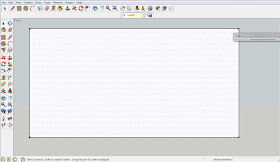
Open Sketchup (SU). The image below is your work area.
 |
| This is Sketchup. The menu bar is across the top With toolbars below the menu bar and on the left side of the work area |
The view screen will reorient.
Then click the person (if present), and hit the 'delete' key.
On the menu, next to View, click: Camera> Parallel Projection.
On the menu, click: Window>Styles. A dialog box will open, click the 'design style' style. If you hover over the images, descriptive text will appear.
There are various design styles to choose from, that can alter line weights.
On the menu click: View> Axes.
The axis needs to be unchecked so that it is removed from the view.
Type: 'R' for the rectangle command, left click in the bottom left corner and again in the top right corner.
You now have a white rectangle on your screen.
Wheel the center mouse button (cmb), or type 'O' and hold the left mouse button (lmb) so your view looks like the image below, then type 'Q' to rotate, click a corner of your rectangle, then click the opposite corner, then move your mouse to the right or left side of the screen to establish rotation direction, then type 5.
You rotated the rectangle 5 degrees. Try a few different rotation degrees.
Click: Camera> Standard View > Front.
Using the cmb, zoom in so that the white square fills the screen. If you don't have a cmb, type 'Z', hold the left mouse button, and move the mouse forward. You can also type 'H' and hold the lmb to pan.
On the toolbar, which is most likely on the left side of the screen, click the '3d text button' which is an isometric view of the letter A.
In a new dialog box will open prompting you to type. Type your text, hit the 'place' button and left click on the screen.
Your text has been placed. It will automatically snap to your white rectangle. The specific location is not important.
You may need to zoom or pan as described previously. Try creating text again, altering the 'height' and 'extruded' dimension.
Type 'O' to orbit and accentuate the 3d angles.
You should now have finished 3d text.
Once you have the text done. Click: File> Export> 2d Graphic.
You will be prompted to determine the saved file location.
Before you do that, click 'Options'. This will prompt you to key in the size of your image, larger is generally better. Make sure you dimensions are minimum 2000 pixels. Click 'OK' to confirm the 'Options' dialog. Name your file, then click 'Export'. Wait a few seconds, and the first part is done.
Do this for all of the 3d text images you desire to have.
 |
| Here is the 3d text, straight from SU. |
Finishing 3d Text
Now that we have our images, let's open paint.net.
You can open the file you just saved through: File> Open, or by clicking the Open button icon.
Click the 'Duplicate Layer' icon pictured below.
Click the 'Wand' icon. Make sure the correct layer is highlighted. Then set 'Tolerance' to 5%.
Click the face of your first letter, then while holding the Ctrl key on your keyboard, select the rest of the letters.
 |
| Make sure you are on the right layer before using the wand. |
The face of your text is now separate from the extrusion, allowing us to modify it independently.
From this point, it's a design decision.
Hit the 'Add New Layer' button.
Find an image to use as a texture. Open it in paint.net as we did earlier.
Next key in 'ctrl+a', then 'ctrl+c'. You just selected all and copied it.
Go back to your text file. Make sure your new layer is highlighted, and key in 'ctrl+v' to paste the texture. Drag the corners to resize your texture.
Select the wand tool, select the layer with the isolated text face, and click in the drawing space- you need to select the blank space around the letters. Now click on your texture layer. then hit 'delete' on your keyboard. You may have to clean up the space inside a few letters.
Next, duplicate your base layer by clicking on the layer and hitting the 'duplicate layer' icon. Then using the wand delete the white space around the letters. You want to isolate the text face and extrusion. Then hit 'delete.'
Click on the base layer again, click the 'add new layer' icon. Then click the black color on the color selector, and then click the 'paint' bucket tool. Click anywhere on your new layer.
The new layer is behind your texture, text face, and extrusion. You could modify any of the three layes independently now.
The 'Adjustment' menu has 'brightness/contrast' and 'hue/saturation controls' to adjust colors, etc. One note, you need to use the paint bucket to recolor the text to use 'hue/saturation' as the tools cannot recolor anything that is gray scale. Just use the paint bucket for each letter, one at a time.
My texture blends in with the extrusion and it needs to be faded. Go the the 'Layer's menu, and click 'Layer Properties'. Decrease the opacity to fade the texture.
The extrusion is too light in color, and the letters still aren't readable. Go to the 'Adjustment' menu and click 'brightness/contrast'.
Now, turn off all layers except for the face of the text. Uncheck the box next to the respective layer. Duplicate this layer, and select the layer below it, then use the wand, and invert your selection with 'ctrl-i'. Using wand, alt click to deselect areas. Now hit 'ctril+shift+i' to invert the colors.
We are going to create a border for the face of the text. I don't think paint.net has a native way of doing this. You could use a plug in, another program, or this trick.
On the menu, click: Effects>blurs>Gaussian blurs.
You can experiment with how much to blur the image.
Turn your layers back on, confirm they are in the right order.
You now have a nice shadow/outline effect.
Unfortunately, paint.net does not have any native tools to align your images. I would suggest merging just your text layer, keeping them separate from the background.
Click on your background layer. Click 'ctrl+a' and then 'ctrl+c'. Click: file>new.
A dialog box comes up with the dimensions of the layer you copied. Modify the dimensions by half.
On your new drawing click 'ctrl+a' and then 'ctrl+c again. In your text file, click 'ctrl+v' to paste the drawing.
Make sure you put it on a new layer. If you drag this object and let it snap to a corner, the right hand point is dead center. This will help you center your text layer.
You can use the arrow keys on your keyboard to move the image pixel by pixel.
If you have numerous text layers, edit them as you wish, merge them and put them all in one paint.net document by coping and pasting, each on a new layer.
You know have a finished 3d text image.


No comments:
Post a Comment