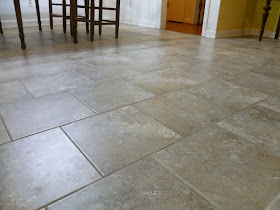
I finally came to the end of tiling, with just the doorways left. There are number of options at the threshold. Often, an aluminum or wood strip is used. I used glass tile, with an angled strip of wood to ease the transition due to the height difference. I bought the strip at my local home improvement store and cut it to fit.
 |
| The wood threshold was a perfect match to the existing floor. |
 |
| The door jamb is cut to fit the tile. |
 |
| The grout should be mayonnaise consistency. |
To apply the grout, you need a grout float. Put your knee pads on again, it's time to hit the floor. Use the float to pack the gaps between the tile with grout. Swipe excess grout at a forty-five degree angle to your gap. This way you don't pull the grout out of the joint. I started in one corner and worked my way in rows across the room.
After working for an hour, I put a couple of gallons of water in a bucket and wiped the excess grout away with a sponge. You should have gotten most of the excess up with your float. Water will saturate the grout on the tile surface and it will come right off. The joints will be fine as long as you don't dig into them. You will need to wipe the floor down a couple of times as you are using a bucket of dirty water to wash the floor. Finally wipe the floor rinsing the sponge in clean water after each wipe. I set a bucket in the sink so that no grout would run down the plumbing pipes. The grout should be dry enough to walk on after twenty-four hours.
One thing to note, grout works great between tile. Between aluminum door thresholds you need to get caulk. Most grout manufacturers make a caulk that will match the grout. Any time you have tile against a dissimilar material, you will need caulk instead of grout. I also had a few tile at the wall where the quarter round trim didn't quite cover the gap. Use caulk in this instance too.
The last step before calling the job done is to seal the grout. I used an aerosol can. Be sure to ventilate the room. I also wore a respirator. Some sealers evaporate from the tile so there is no additional clean up. The one I used required you to wipe the floor fifteen minutes after spraying. Use a fan to pull the fumes outside if at all possible.
Wait for another twenty-four hours before walking on the floor and call the job done. Move your furniture and accessories back into the room and enjoy your new floor.
 |
| Enjoy your finished floor. |
For those of you that followed along, my two month project turned into a six month project. With the room being large, and the requirement to stage the work so that the room was still accessible throughout, it made for a long project duration.
Thanks for following along. If you have any questions, let me know. I would be happy to help.


No comments:
Post a Comment