IMPORTANT SAFETY TIP:
If you house was built before 1980, and you have a vinyl tile or sheet flooring, chances are it contains asbestos. Don't panic. The best thing to do, is leave it.
I suspected the bottom layer of sheet flooring in my home contained asbestos, because it was put down in the mid 70s.
Since the second layer of flooring is glued to it, I'm leaving both layers. I will install the concrete backer board for the tile on top of the old sheet flooring.
If you house is newer, and you take the old floor out down to the sub-floor, I would staple down a layer of plastic first, before your concrete backer board. It doesn't cost much and it ensures water will not reach the sub-floor. With water lines running to the refrigerator, dishwasher, and sink; it's a good idea. Use 4 mil plastic. It can be found at any home supply store.
This is where we left the floor in part 1.
So, I removed the rest of the top layer of floor/backer board, and then I screwed down the new concrete backer board. I used 1/4" concrete backer board. It's the thinnest size available. The tile and mortar will bond to this layer, which will allow me to pull up the tile if i ever need to without damaging the sub-floor, and in my case the asbestos containing sheet flooring.
If you installed plastic and then the backer board, the mortar bonds to the concrete backer board, because it will not bond to plastic.
I used corrosion resistant screws. The concrete board I used had X's printed on one face to indicate nail positions. You don't want the backer board to move.
One thing I did was close a floor vent. It was in an awkward position and just a few feet from the closest vent. We kept it closed, so it really served no function.
 |
| The vent in question. It's even inserted at an odd angle with respect to the floor. |
Removing the vent is simple. First remove the floor grate. It should pull right out. You may need a screw driver to pry it away from the floor. You will have a few nails holding the galvanized vent to the floor. Remove the nails.
 |
| There will be a few nails at the perimeter along the top. |
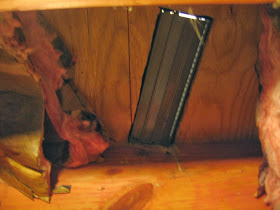
Remove any insulation just below the floor opening. Wear gloves and goggles. The duct should be loose from the floor.
The duct connects to the main line, most likely with a snap in adapter. This should pull out with a bit of force. I used a piece of polystyrene to fill the void in the main line. Copious amounts of duct tape will hold it in place.
 |
| Leak proof and stylish too. |
I screwed in a 3/4" piece of plywood from the bottom, cut to fit between joists. I made sure my screws were short enough to NOT poke through the floor above. I then braced it with 2x4's nailed into the floor joists.
From the top, you will need to fill the void from the subfloor. In my case, I had to fill the void of the original flooring as well.
In the next step, I will lay out the tile pattern before mortar. Since I'm going to have a pattern of a different color in the tile, I want to lay it out before hand so that I get it adjusted and positioned correctly.
It also helps to lay the tile out to see where joints will intersect doors, cabinets, and any corners. You want to avoid small slivers of tile at walls or doors.


No comments:
Post a Comment